In this article you can read how to use PREVIEW tab in PLAY software to set your camera and start image acquisition. Please note: PLAY is designed to support cameras provided with ASCOM drivers designed for ASCOM Platform at least 6.6. If you have a camera released prior to ASCOM 6.6 or if your camera comes with an older ASCOM driver, it may not connect to PLAY or it may not show the picture after connection. Please check you’re using the latest ASCOM driver available for your camera. In the PREVIEW tab you can find all your camera settings, see the picture recorded from the connected camera, move your mount, move your focuser and start a sequence acquisition. On the left column you can see all your camera settings.
- Expo (s): this is the exposition time of your image, in seconds. I suggest increasing the exposition time in order to improve visibility of your target but here you will have to test different exposition times since you will have to set the longest time as allowed by your telescope and mount (the trick here is to set a long time but also that still allow you to see pinpoint shaped stars).
- Gain: this is the gain setting as accepter by the ASCOM driver of your camera. You can check your camera manufacturer user manual in order to check the suggested values.
- Shots: this is the number of pictures you want to record. Usually recording a set of images allow you to stack them by using dedicated astrophotography processing software and improved target visibility. Usually a good sequence is composed of at least 30-40 pictures of the same object.
- Delay (s): this is the delay time between consecutive pictures.
- Temp (°C): this is the cooling temperature your camera sensor will be set during sequence acquisition. Usually the lower this value, the lower electronic noise you will have in your pictures but this is limited by the cooling capability of your camera. For example, if your camera cooling system provides you a cooling capability of -30°C in respect to the ambient temperature, and you’re making astrophotography at an ambient temperature at around 10°C, you can’t expect to be able to set a “Temp (°C)” value lower than -20°C (10°C minus -30°C = -20°C) since your camera cooling system is not able to reduce sensor temperature even more. Please also note that by reducing cooling temperature value you increase also power consumption.
- Binning: this is the binning settings. Usually Binning 2×2 is used to have a preview on object position in the image, to you can better frame it and (if you have) rotate ARCO in order to obtain a perfect framing for your telescope. Binning 4×4 will also improve the speed of pictures showed on the screen since images have 16-times lower resolution. Binning 1×1 can be used instead for focusing and to record the final picture.
- AutoFocus: click here to start AutoFocus of your image; it requires a SESTO SENSO or ESATTO focusing solutions and a camera to be connected to PLAY; your telescope’s mount has to correctly track stars too.
- Auto Alignment: click here to start Auto alignment of your telescope; it requires a camera and a mount to be connected to PLAY.
- Live view: this option sets PLAY to repeat preview image capture until it is stopped. This is useful when you are framing the target object (at binning 4×4) or when you’re focusing (at binning 1×1).
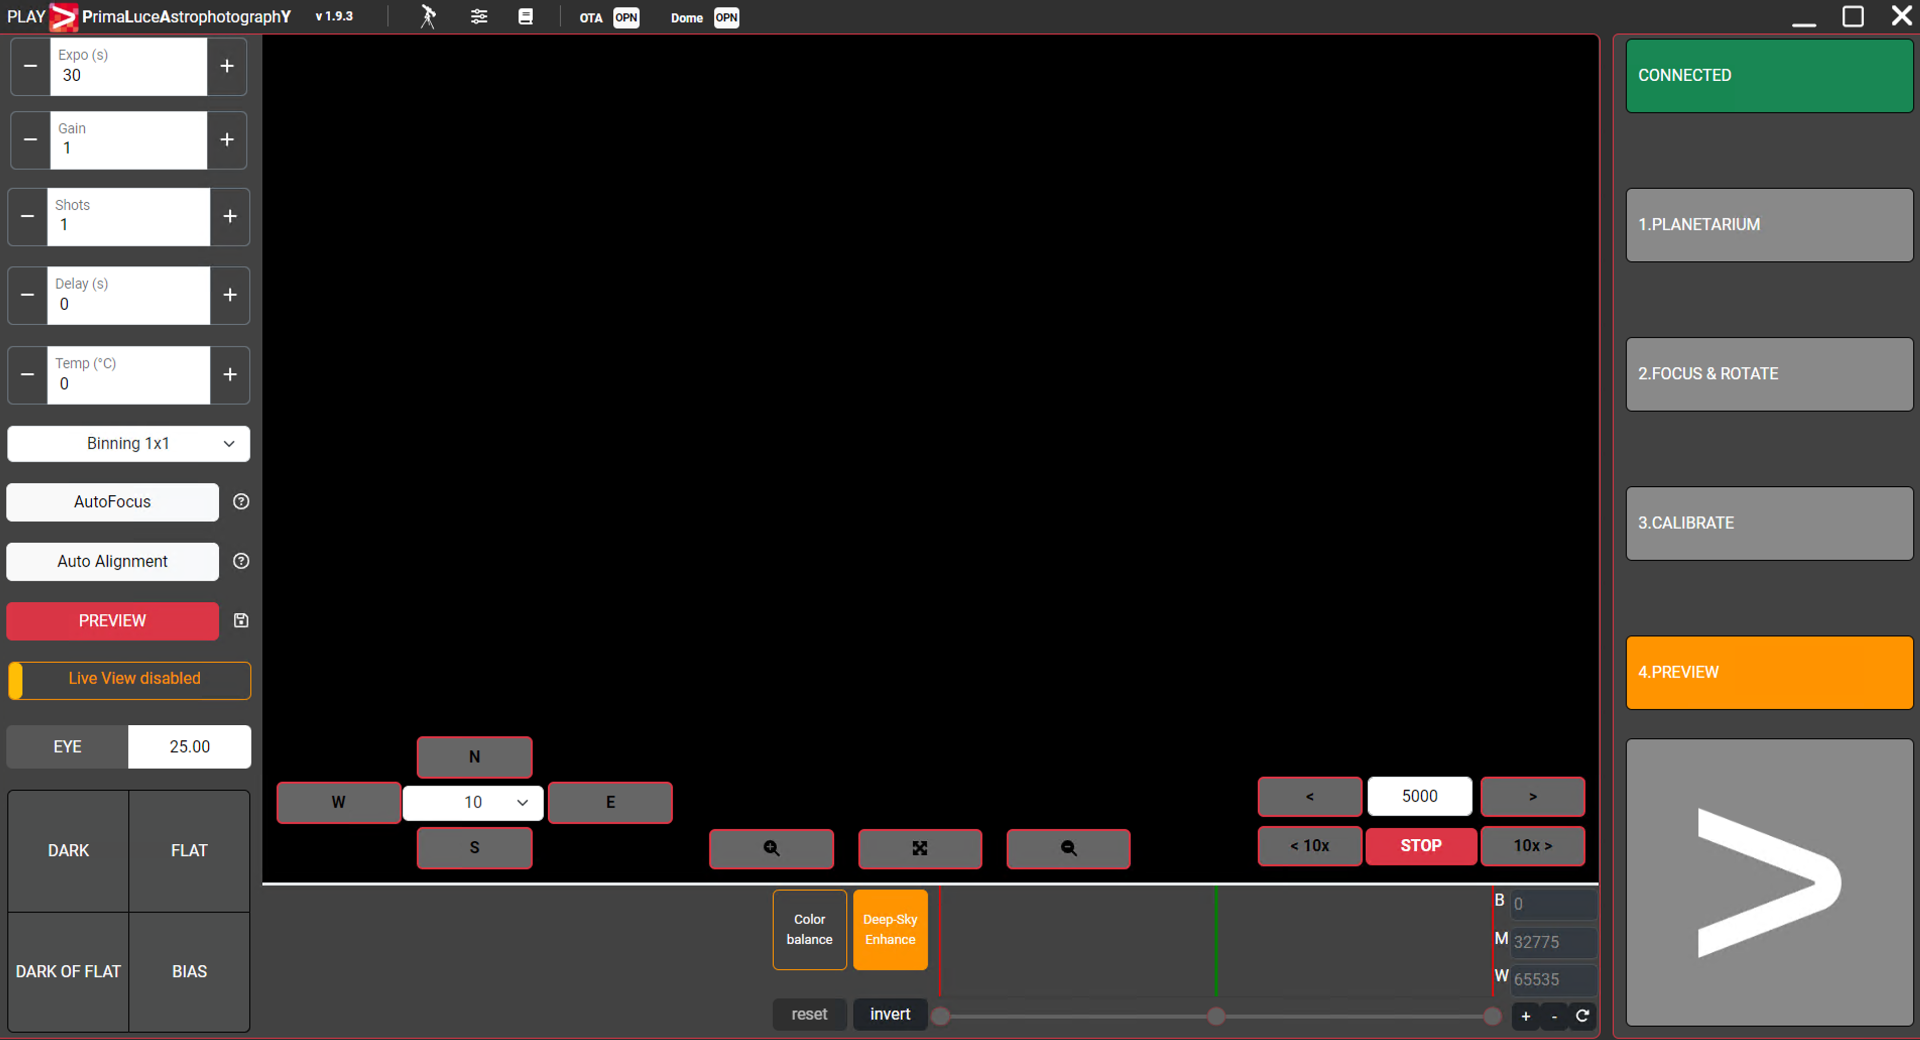
If you press the “PREVIEW” button, camera will collect image (or images) based on the settings you previously selected and the picture will be shown on the screen.
Thanks to the on-screen controls, you can make a final control on your framed object and on the focus:
- move your mount by using the NSWE buttons and select one of the moving speeds by using the controls in the lower-left part of the image.
- zoom-in or zoom-out the preview picture by using the controls in the lower-centre part of the image. You can also reset the preview view by using the central button.
- move your focuser by inserting a step number you want to use and press the < or > buttons to move the focuser by the number you entered. Press the << or >> buttons to move the focuser by 10 times the number you entered.
PLEASE NOTE: “Deep-Sky Enhance” is not automatically activated when:
- you point the telescope to a planet/Moon/Sun
- you collect a DARK, FLAT or BIAS
- GIOTTO flat field generator is turned on
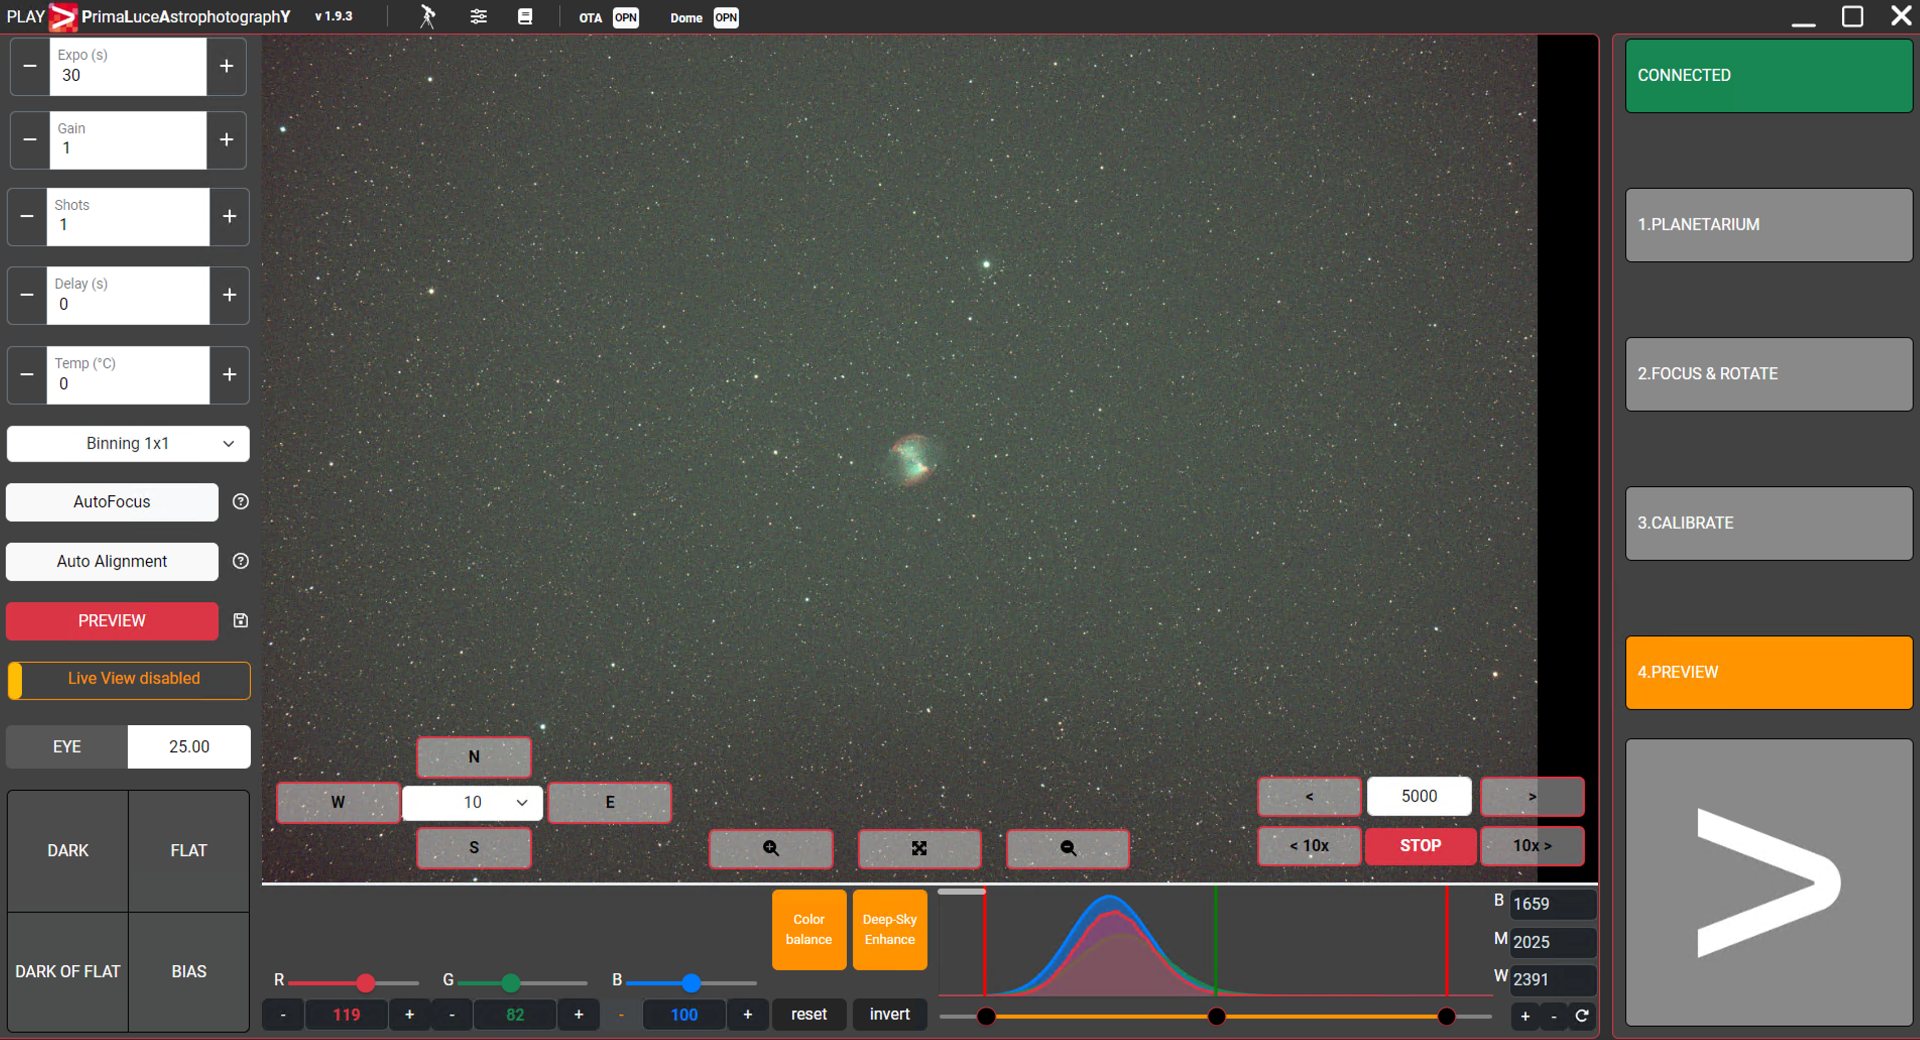
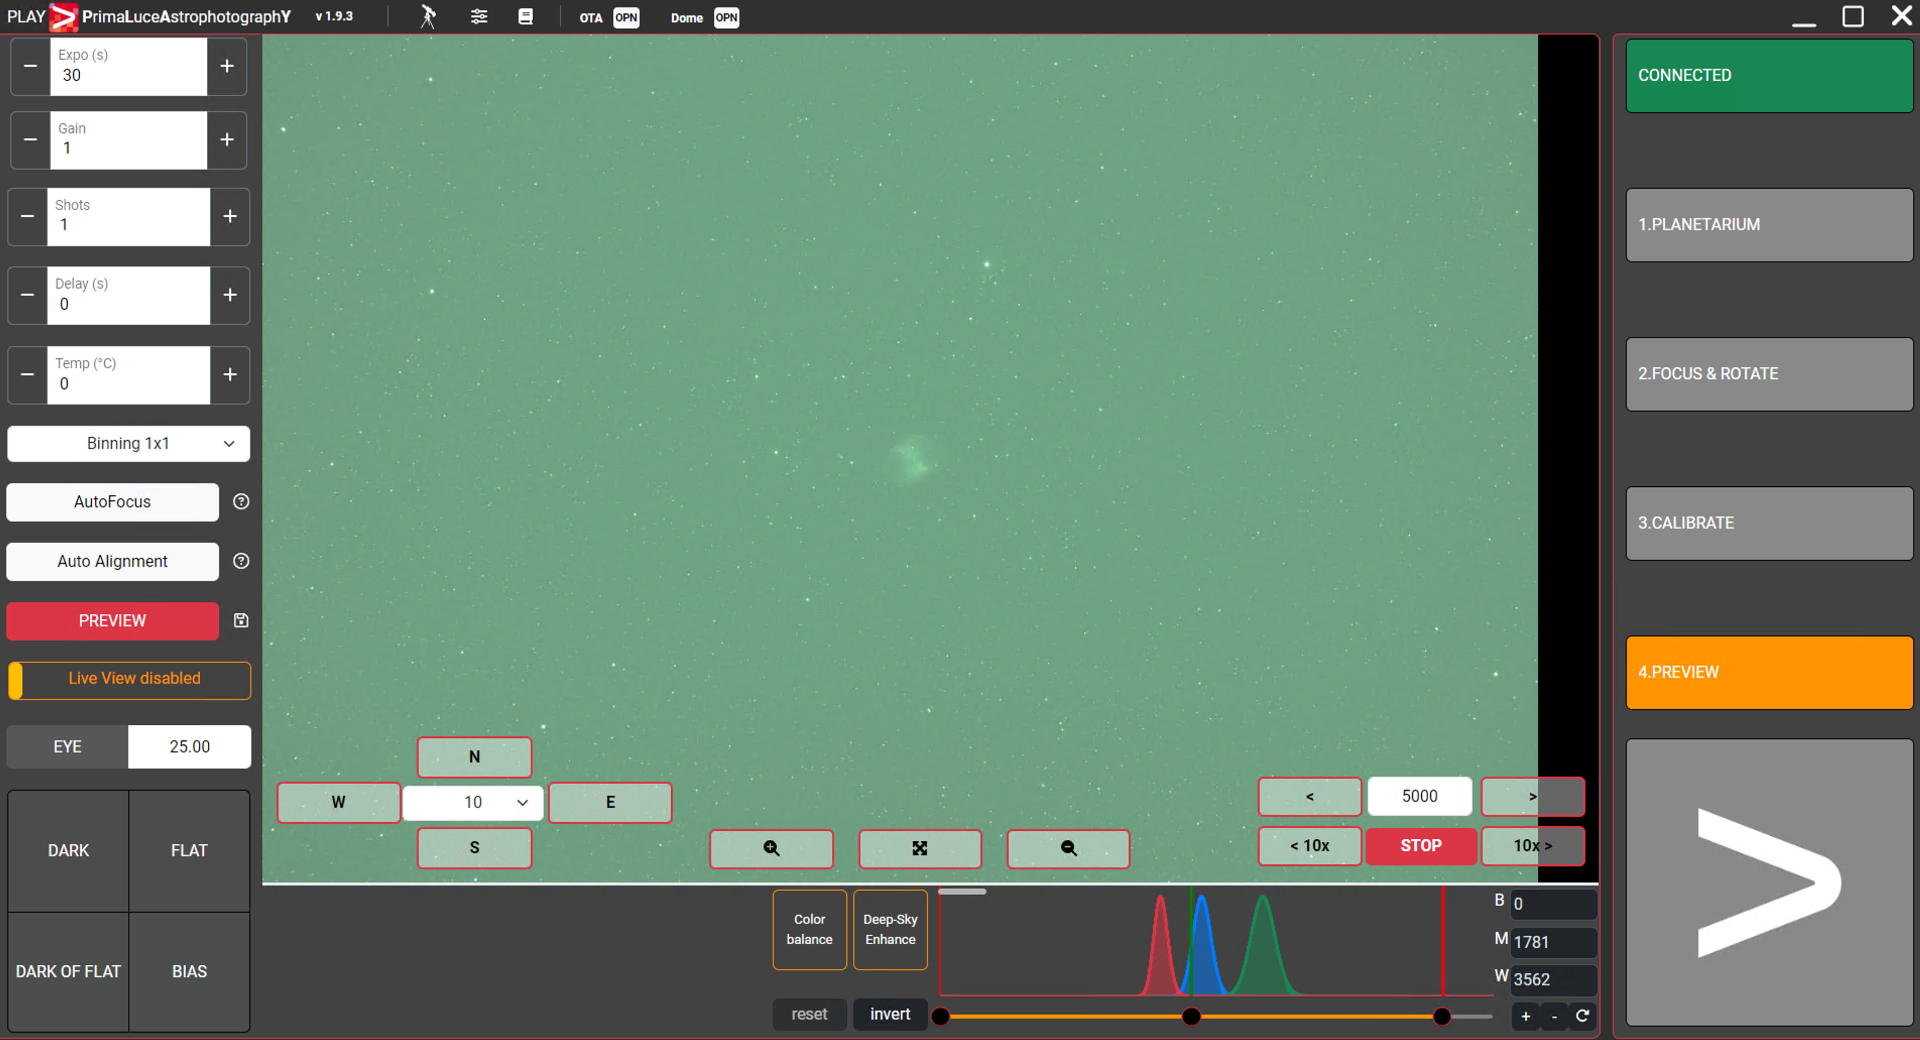
When you capture a picture of a deep-sky object (like a nebula, galaxy or star cluster), in order to let you better view the object the “Deep-Sky Enhance” feature automatically applies an histogram stretch and, if you have a color camera, it also automatically balances colours. The histogram, that you can see in the lower part of the screen, is a crucial tool to better highlight the object: so a detailed understanding of the histogram is very important now. An histogram is a bar chart that shows how the tones in an image are distributed. The tonal differences are shown on the horizontal axis (X-axis), ranging from pure black on the left end to pure white on the right. The Y-axis, or vertical axis, displays the number of pixels for every tonal level. The darkest regions of your images, or shadows, are represented on the left side of the histogram. If the graph is sharply skewed to the left, your image may be underexposed, losing detail in the darker regions. The brightest portions, or highlights, are located on the right side of the histogram. An histogram leaning towards the right suggests an overexposed image. In astrophotography, this is especially crucial to take into account when attempting to maintain brightest part of images like the core of bright galaxies or planetary surfaces. The midtones are located in the center of the histogram; an image that has been properly exposed will typically have a balanced distribution in the middle, suggesting a good range of midtones. Please note that, if you use a color camera, instead of looking at a single graph in your histogram which maps the light intensity across an image, you will find individual color channels: Red, Green, and Blue (RGB).
Astrophotographers use the histogram as a tool to increase visibility of faint nebulae or galaxies after capturing a picture, particularly when working with deep-sky objects. In fact, the A/D (Analog-to-Digital) converters found in many modern digital cameras, including those used in astrophotography, usually have a depth of 14 or 16 bits. This allows the camera to capture a broad range of brightness levels, from the complete black to the complete white, in a single image: a 16-bit A/D converter can discriminate between 65.536 brightness levels, compared to 16.384 levels for a 14-bit converter. Even though the camera can record a wide range of brightness levels, most computer monitors and digital displays are limited to 8 bits per color channel. This implies that they can only show 256 brightness levels for each color (red, green, and blue), which is a substantial reduction from what the camera is able to record. Many deep-sky objects contain very faint features, such as the delicate arms of spiral galaxies or the intricate structures within nebulae and, in order to correctly show these details on computer screens, you have to apply a histogram stretching: this technique enhances visibility of recorded object, making faint details of deep-sky objects more visible on standard displays.
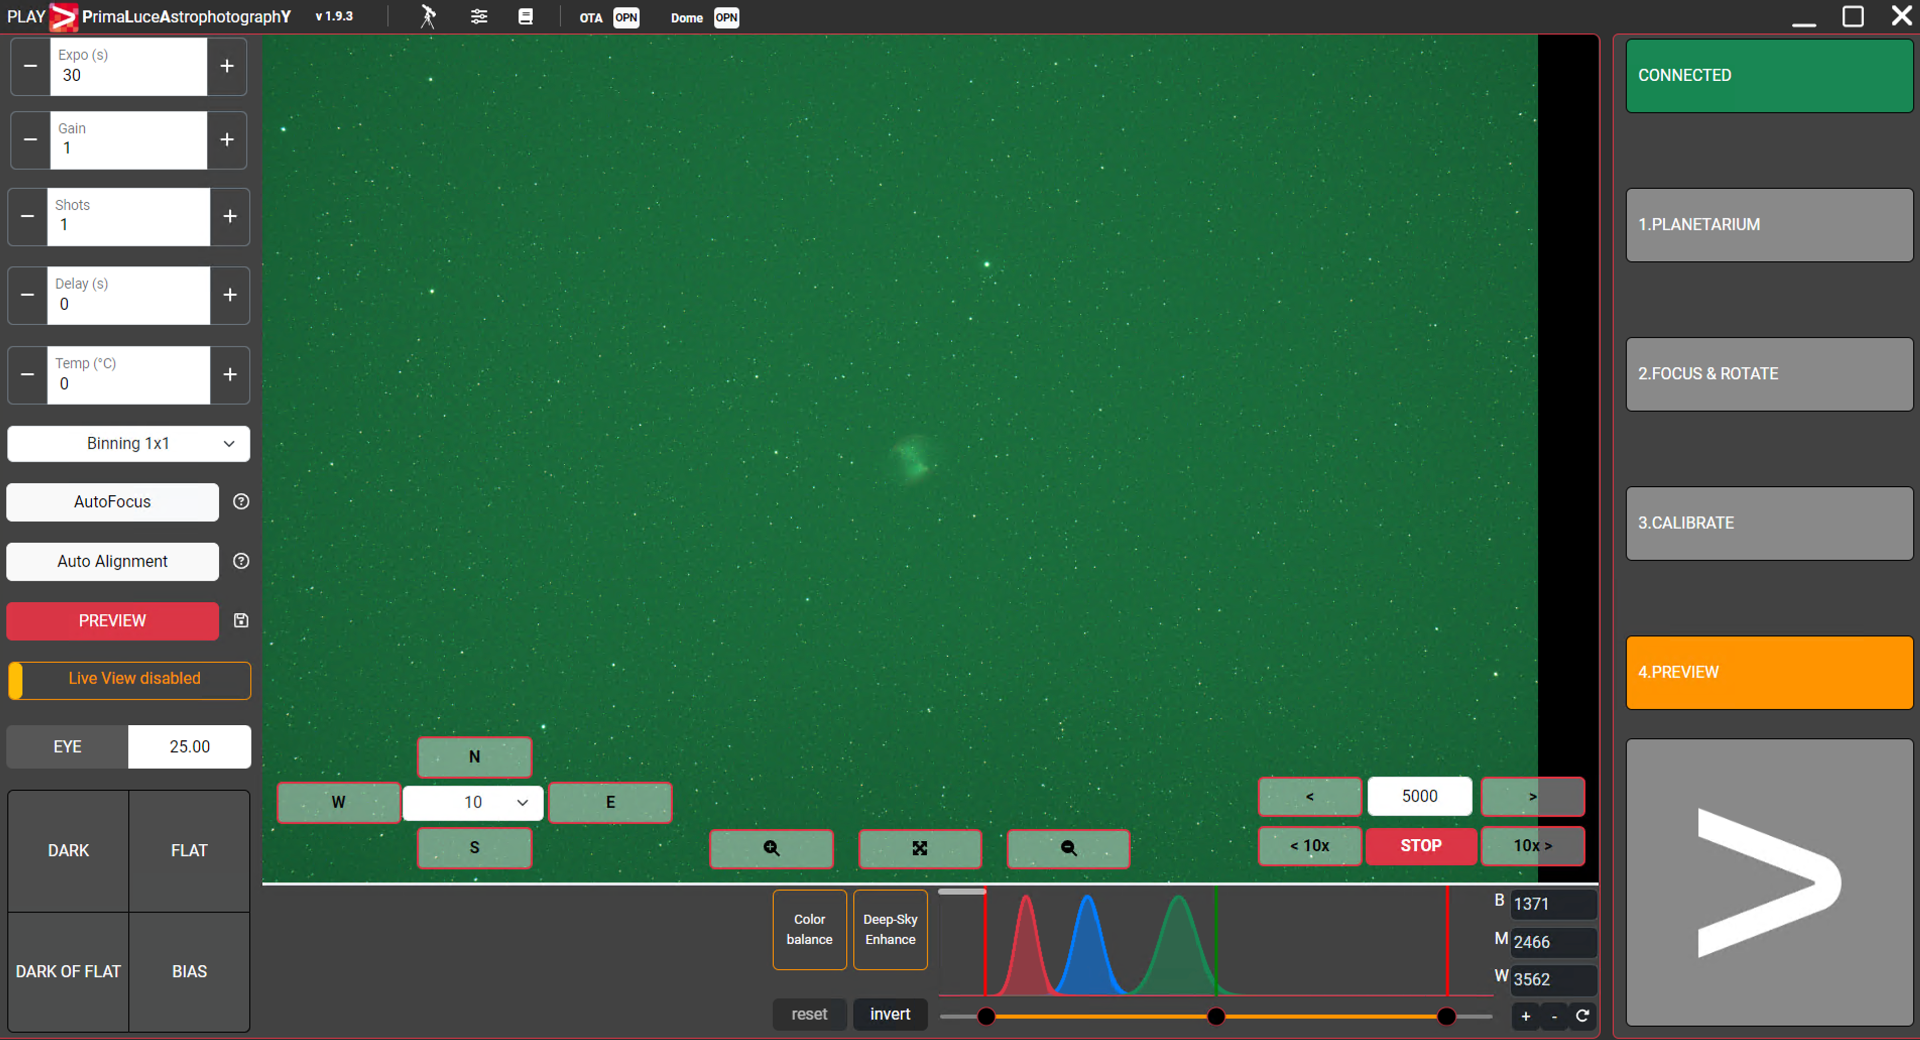
If you don’t apply the automatic stretch with the “Deep-Sky Enhance” feature and instead you want to manually set the image view, the initial step of histogram stretching involves moving the right slider, which corresponds to the whites in the image, towards the left. This action effectively increases the brightness of the image, making the deep-sky objects more apparent against the sky background. In order to do this, make a mouse left-click on the right slider and move to the left, by releasing the slider just to the right of the histogram values.
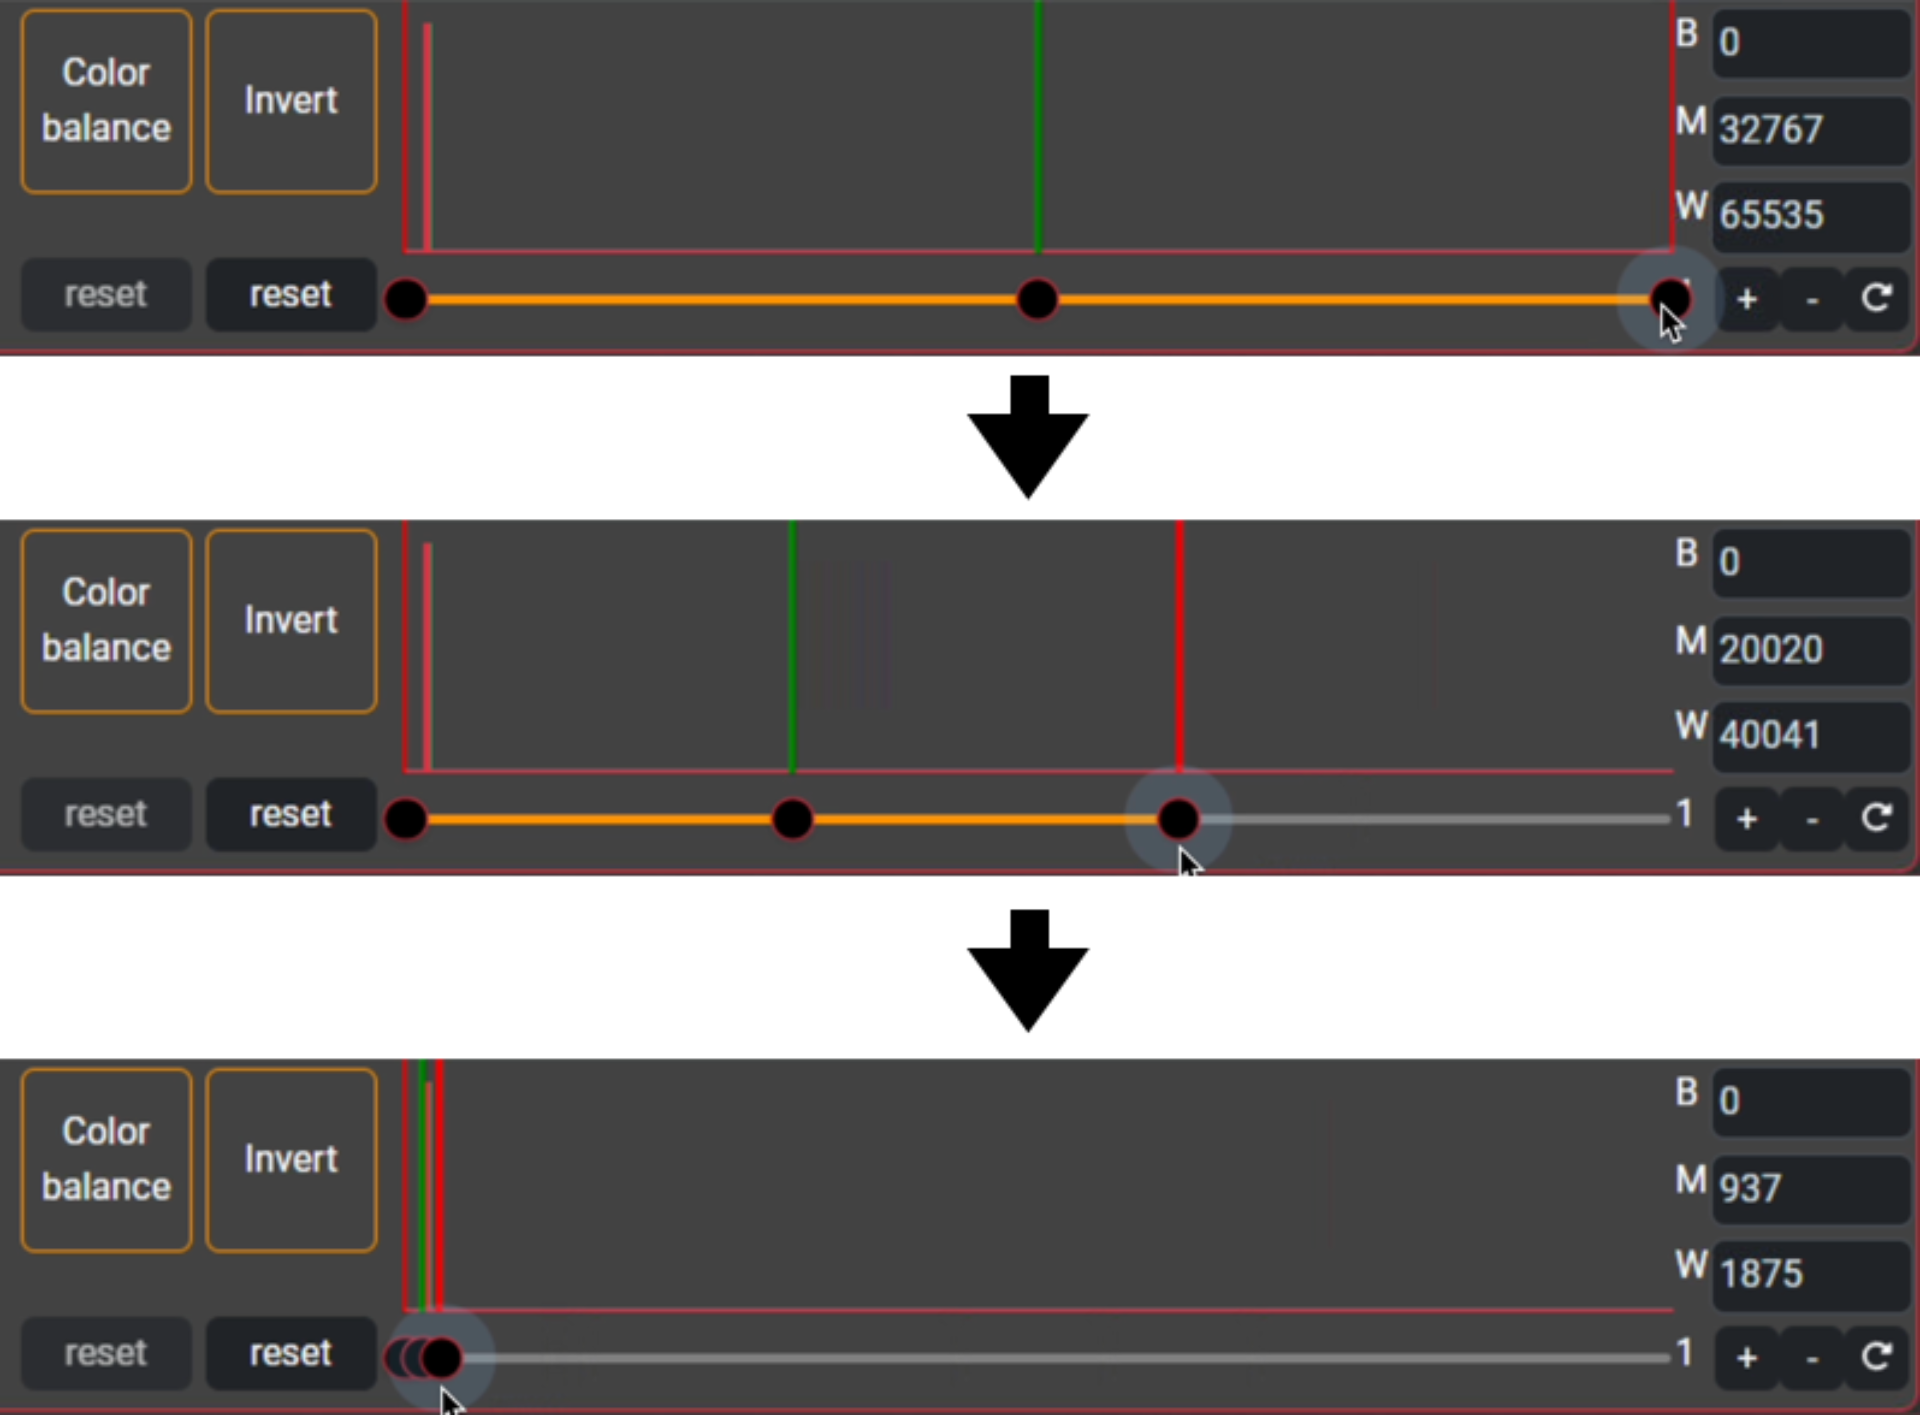
Then release mouse and the image will be updated on the screen. Please remember that the histogram stretching doesn’t really modify the captured image, it just modify the way the image is shown on the screen. This means that, when you stretch the histogram with PLAY, your FITS images are not modified and you will be able to process them with astrophotography processing softwares later. When you release the mouse, PLAY’s histogram chart automatically zooms into the part of the histogram between highlights (W) and shadows (B) in order to let you better regulate their values. By using the + and – buttons, you can manually regulate the zoom factor. The reset button (close to + and -) allows you to reset zoom to full histogram view. If you apply a zoom to a specific part of the histogram, you can use the slider on top of the histogram to slide to different parts of the histogram.
Then, in order to make the sky background darker, move the left slider—representing the blacks— to the right. I suggest you to move it and release the mouse just to the left of the histogram values. This will darken the sky background without darkening the weak details of the object you pictured. The final touch in this process is a slight adjustment of the center slider, associated with the midtones, that you can move a little bit to the left. This fine-tuning further enhances the visibility of the deep-sky object by lightening the midtone areas, bringing forward the object’s details without compromising the overall balance of the image.
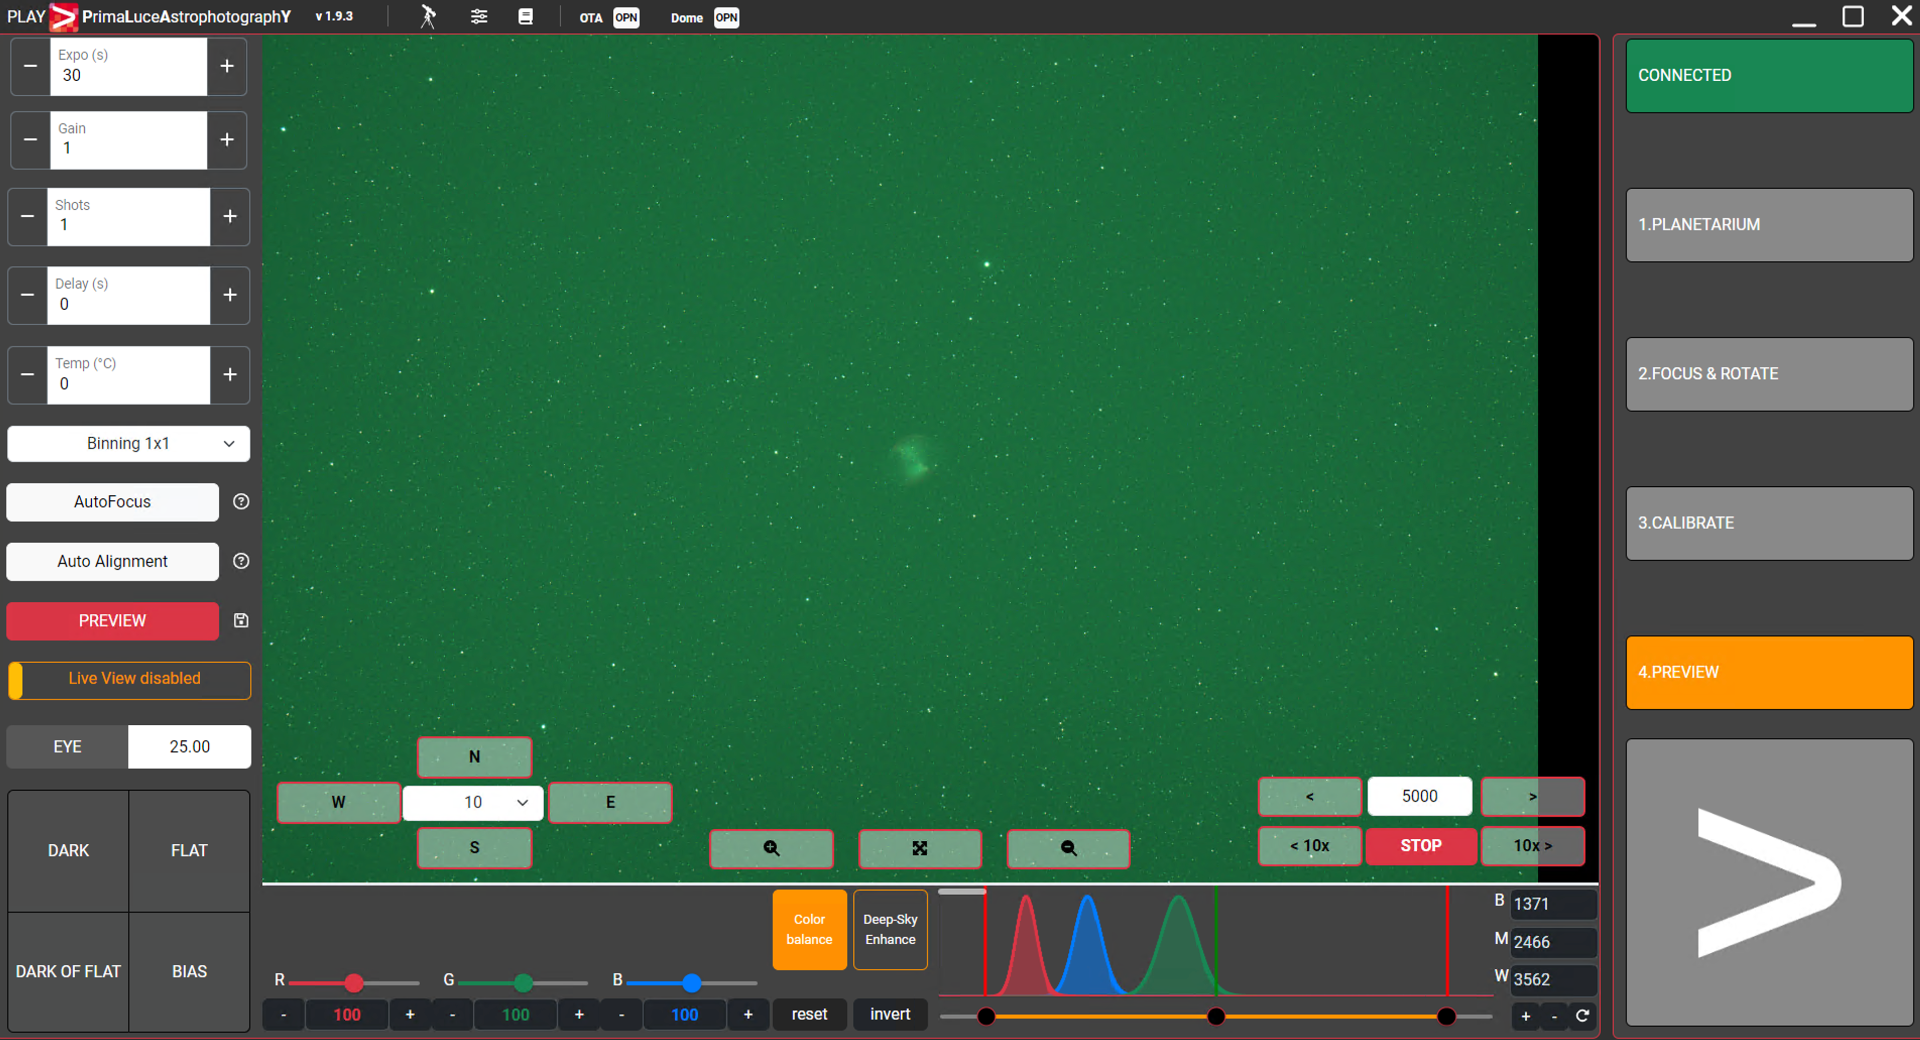
If you use a color camera, now you can also click on Color Balance button to open controls related to color in your image. The reason behind the importance of color histograms lies in their ability to guide you in making precise adjustments to color balance. In fact your image may show color shifts caused by various factors, including the use of light pollution removal filters or cooled color cameras that have no IR-Cut filters built in (in order to provide you with a better sensitivity in the very important H-Alpha line – that is part of red – that is emitted by many nebulas). A color histogram allows photographers to identify and correct these shifts, this way neutralizing unwanted color casts and bringing the image closer to what the human eye would perceive. For example, in this image you can see that the red spike is more to the left, while the green one is the one to the right, that means that green pixels have a higher luminosity than the red ones.
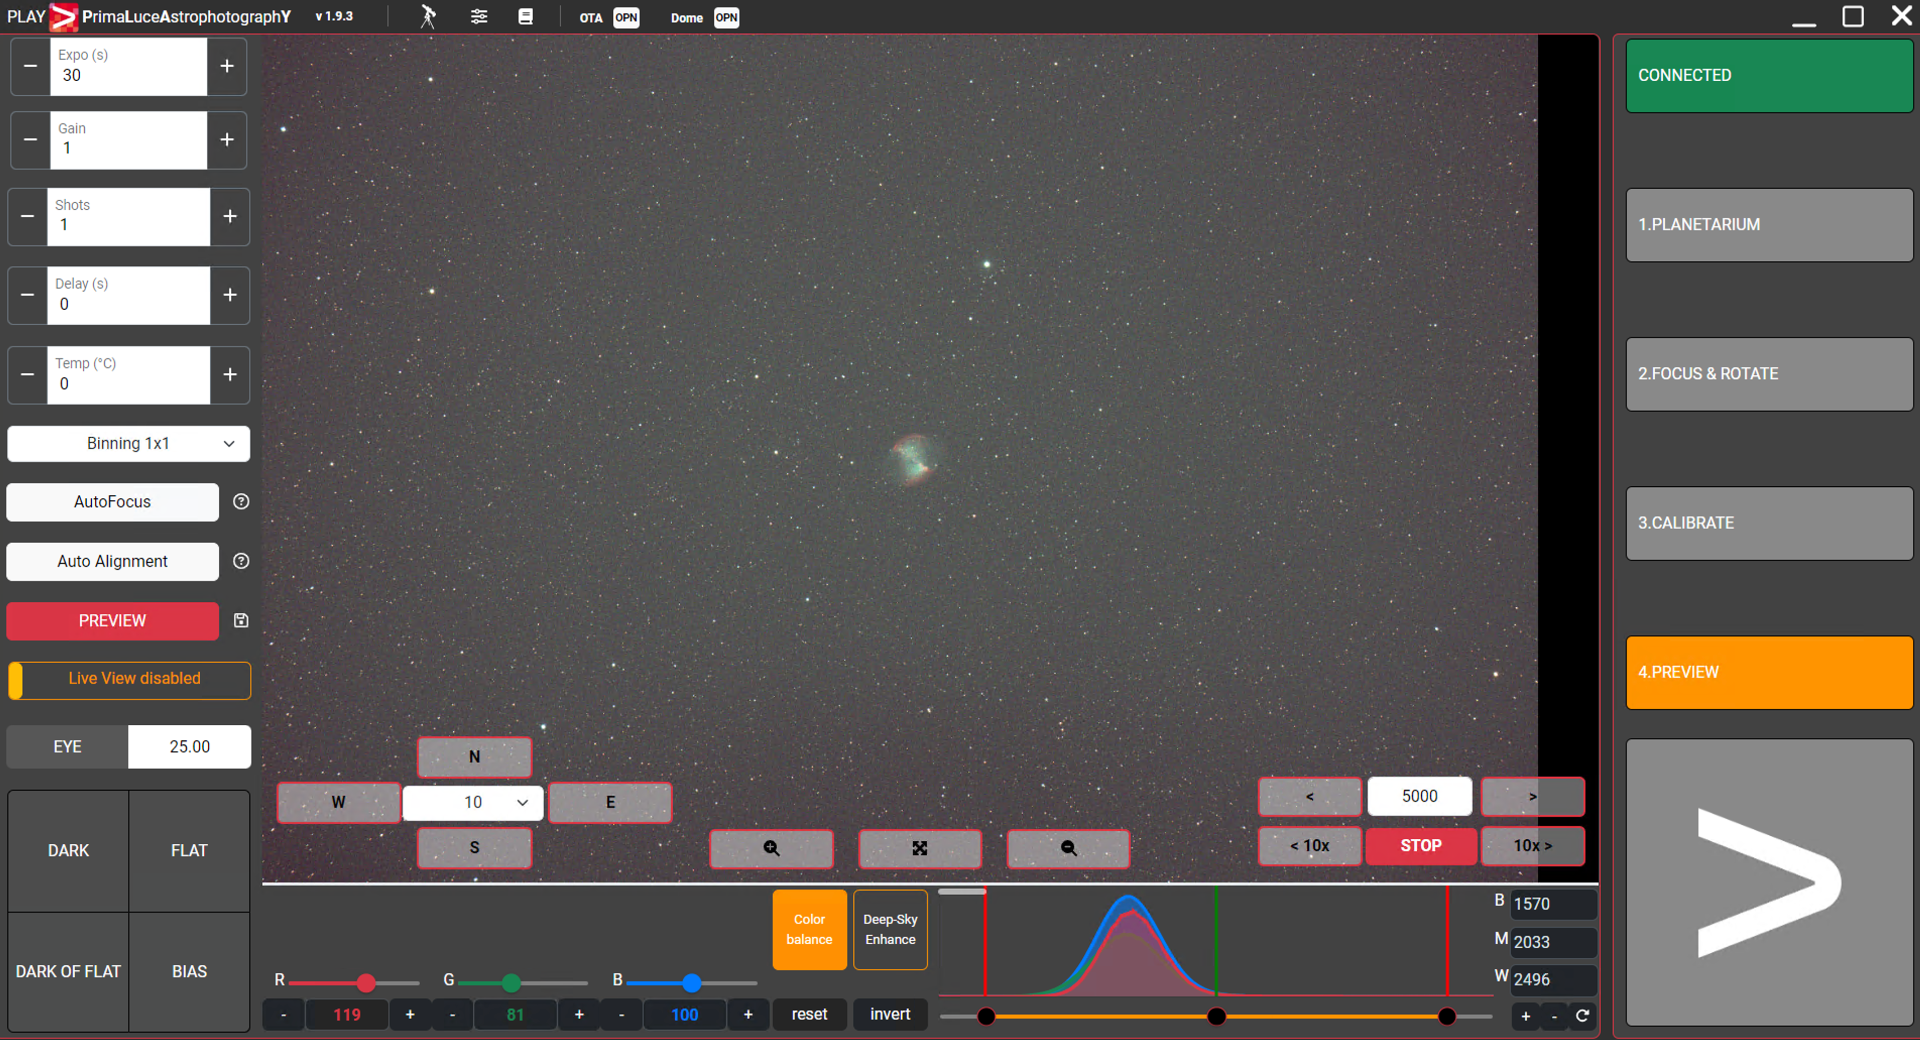
You can balance colours by using the sliders or + – buttons corresponding to each channel (R, G and B). In this example we increase saturation of the red, increase a little (less than the red one) the blue and decrease the one of the green. If you’re taking a picture of a deep-sky object, where you may expect a large part of your image to be dark (since it’s the sky background) a good method for color balance is to ensure that the peaks of the RGB channels are closely aligned.
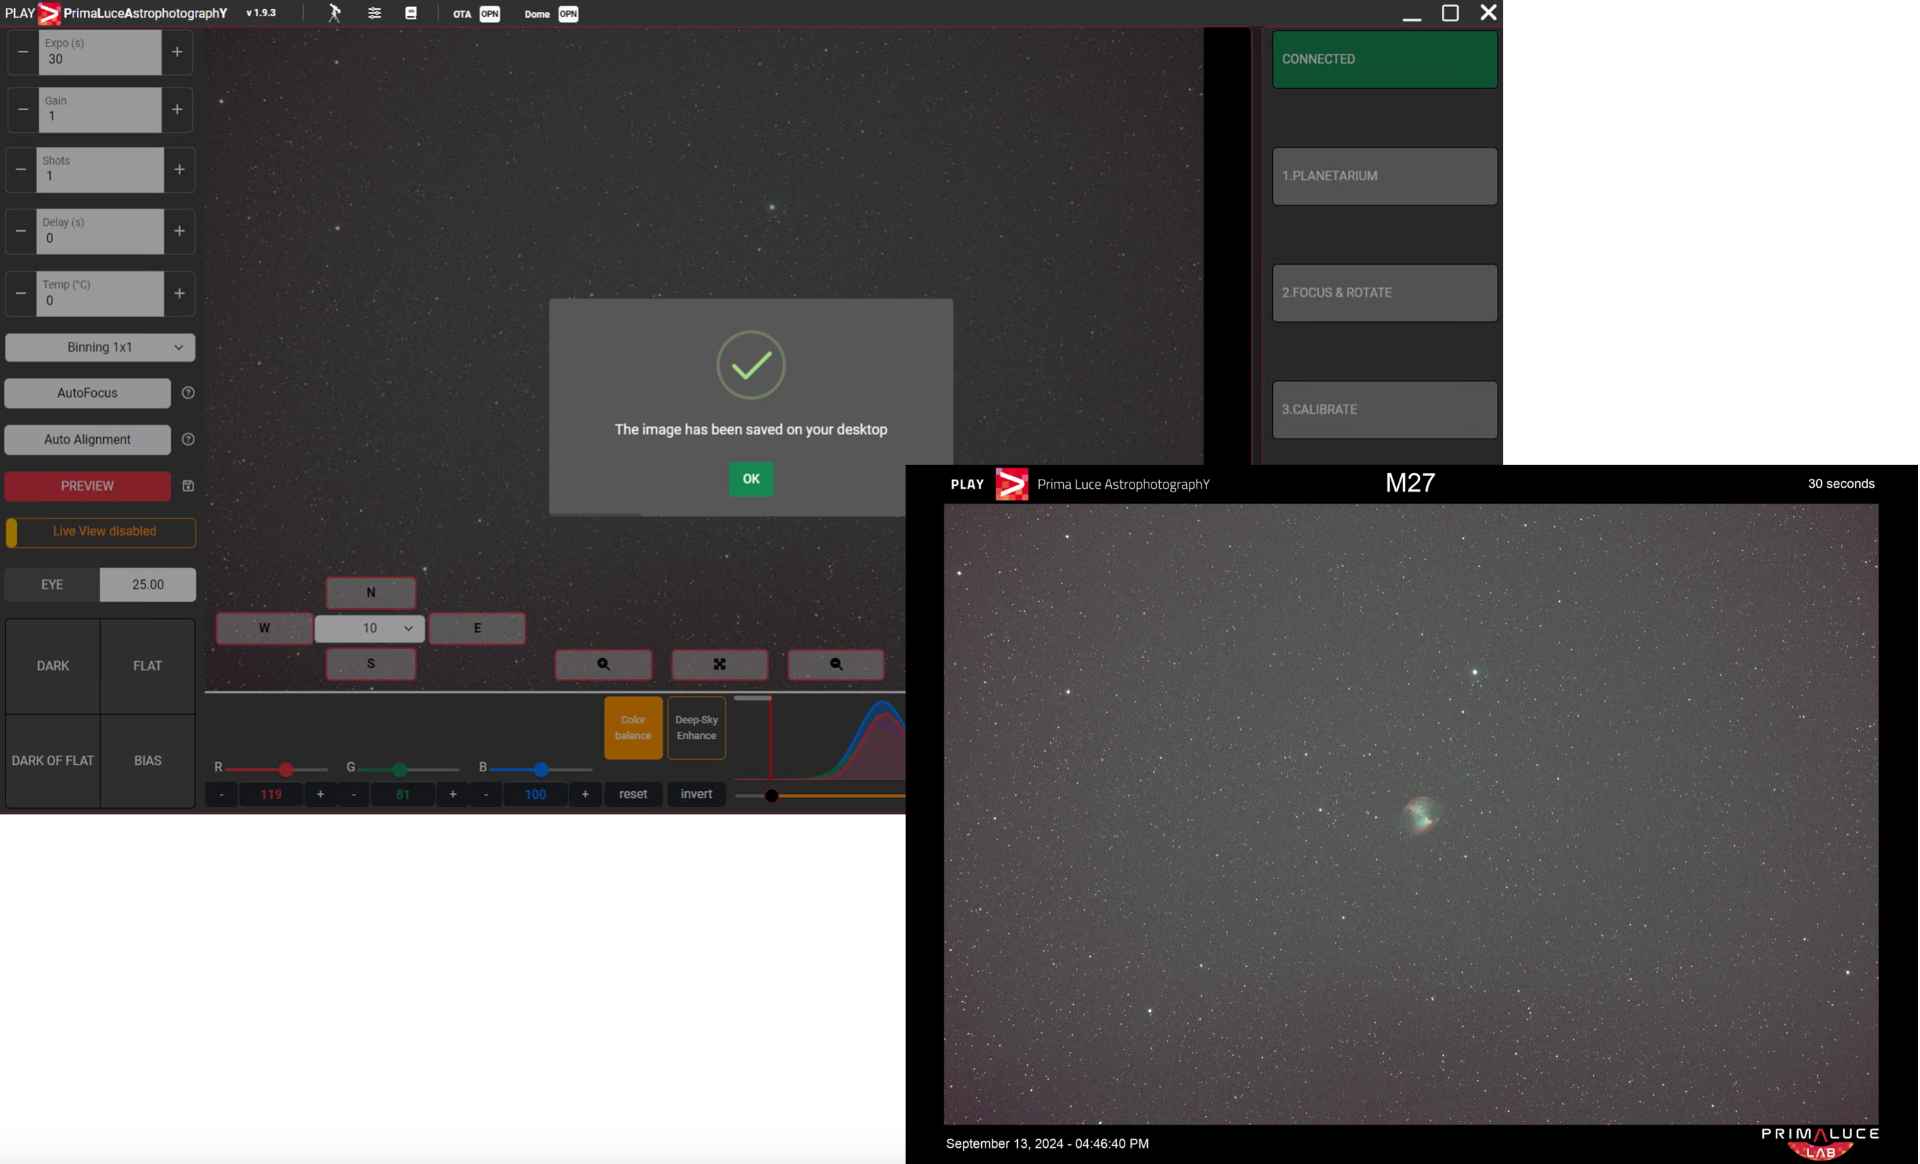
When you will be happy with the result, if you want to save your preview you can press the SAVE icon to the right of the PREVIEW button: this will record your image in PNG format in your computer Desktop, together with the name of the recorded object, the exposure time, the date and time of your acquisition, and the name of your telescope/observatory (if you set it in PLAY settings).