

In this article we show how to use Weighted Batch Preprocessing script of PixInsight to calibrate Light images of Deep-Sky objects with Dark, Flat and Bias images recorded with PLAY astrophotography software and stack them in order to get a single image you can process. PixInsight (you can buy and download from https://pixinsight.com, this tutorial has been written with PixInsight 1.8.9) is a very powerful astronomy processing software that may seems complex at the beginning, since it comes with many features for astrophotography. So we decided to write an introduction guide about pre-processing and we recorded a set of 6 images of the IC5070 Pelican Nebula from a city site (EYE value around 18.5), by using a 90mm apochromatic refractor telescope on AZ-EQ5 mount with SESTO SENSO 2 focusing motor, ARCO rotator, GIOTTO flat field generator, ALTO telescope covering motor and QHY294C cooled camera. The entire telescope was remotely controlled and powered with the EAGLE and we captured all the images by using PLAY.
PLEASE NOTE: this is a basic workflow that you can follow to start into images calibration, alignment and stacking of deep-sky images. PixInsight provides a high level of personalisation so please refer to its user manual for more details. For a professional level astrophotography tutoring about image processing with PixInsight, we suggest you to visit Masters of PixInsight.
In order to use PixInsight Weighted Batch Preprocessing to calibrate images recorded with PLAY, you can follow these steps.
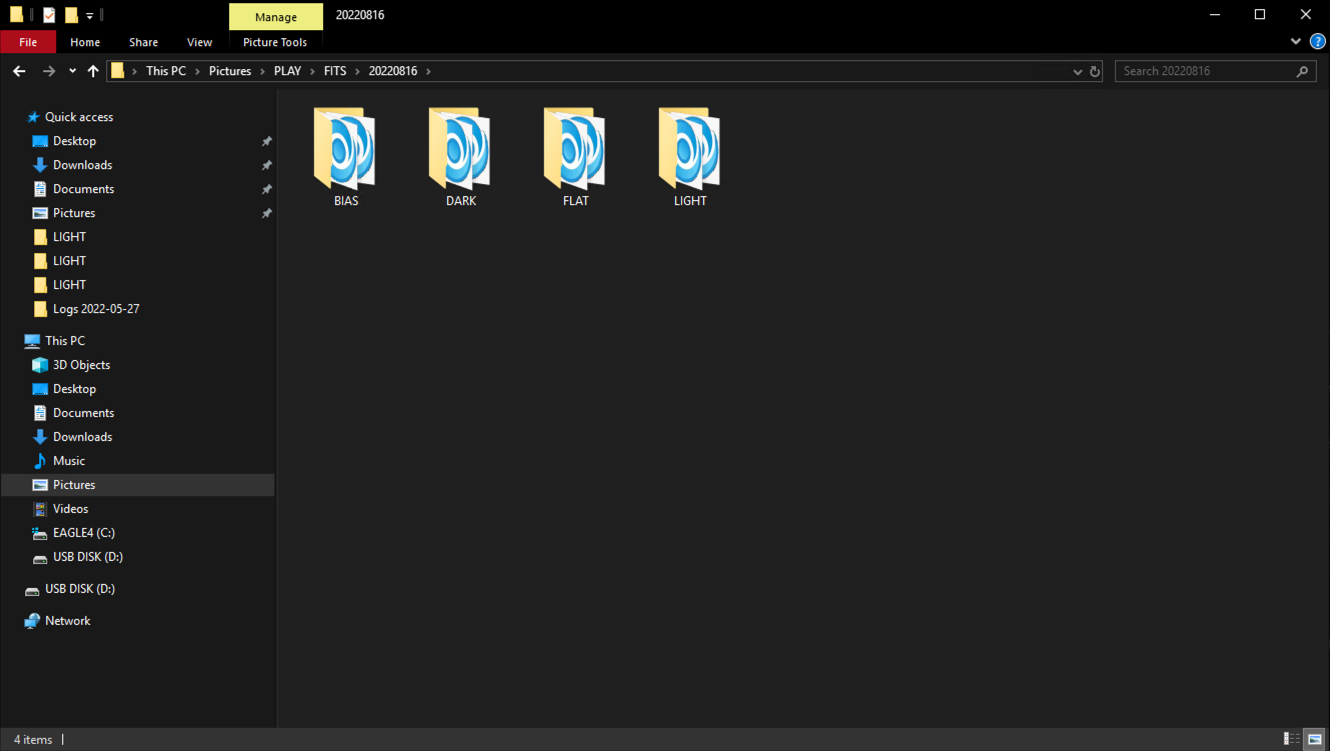
When you capture images with PLAY, they’re all saved in the directory you specified in the Camera selector window. In this example, we saved in C:/pictures/PLAY. Since the images have been saved on August 16th 2022, PLAY created the folder 20220816 and, inside this folder, it created subfolders for each image type: LIGHT (with the images of IC5070 nebula we recorded), DARK, FLAT and BIAS.
We moved (with a simple USB drive) the images from our EAGLE (that is installed on the telescope) to the MacBookPro computer where we have the licence of PixInsight (if you like, you can install PixInsight in your EAGLE too). Start PixInsight and select Script, then Batch Processing and finally WeightedBatchPreprocessing, this will open a new window.
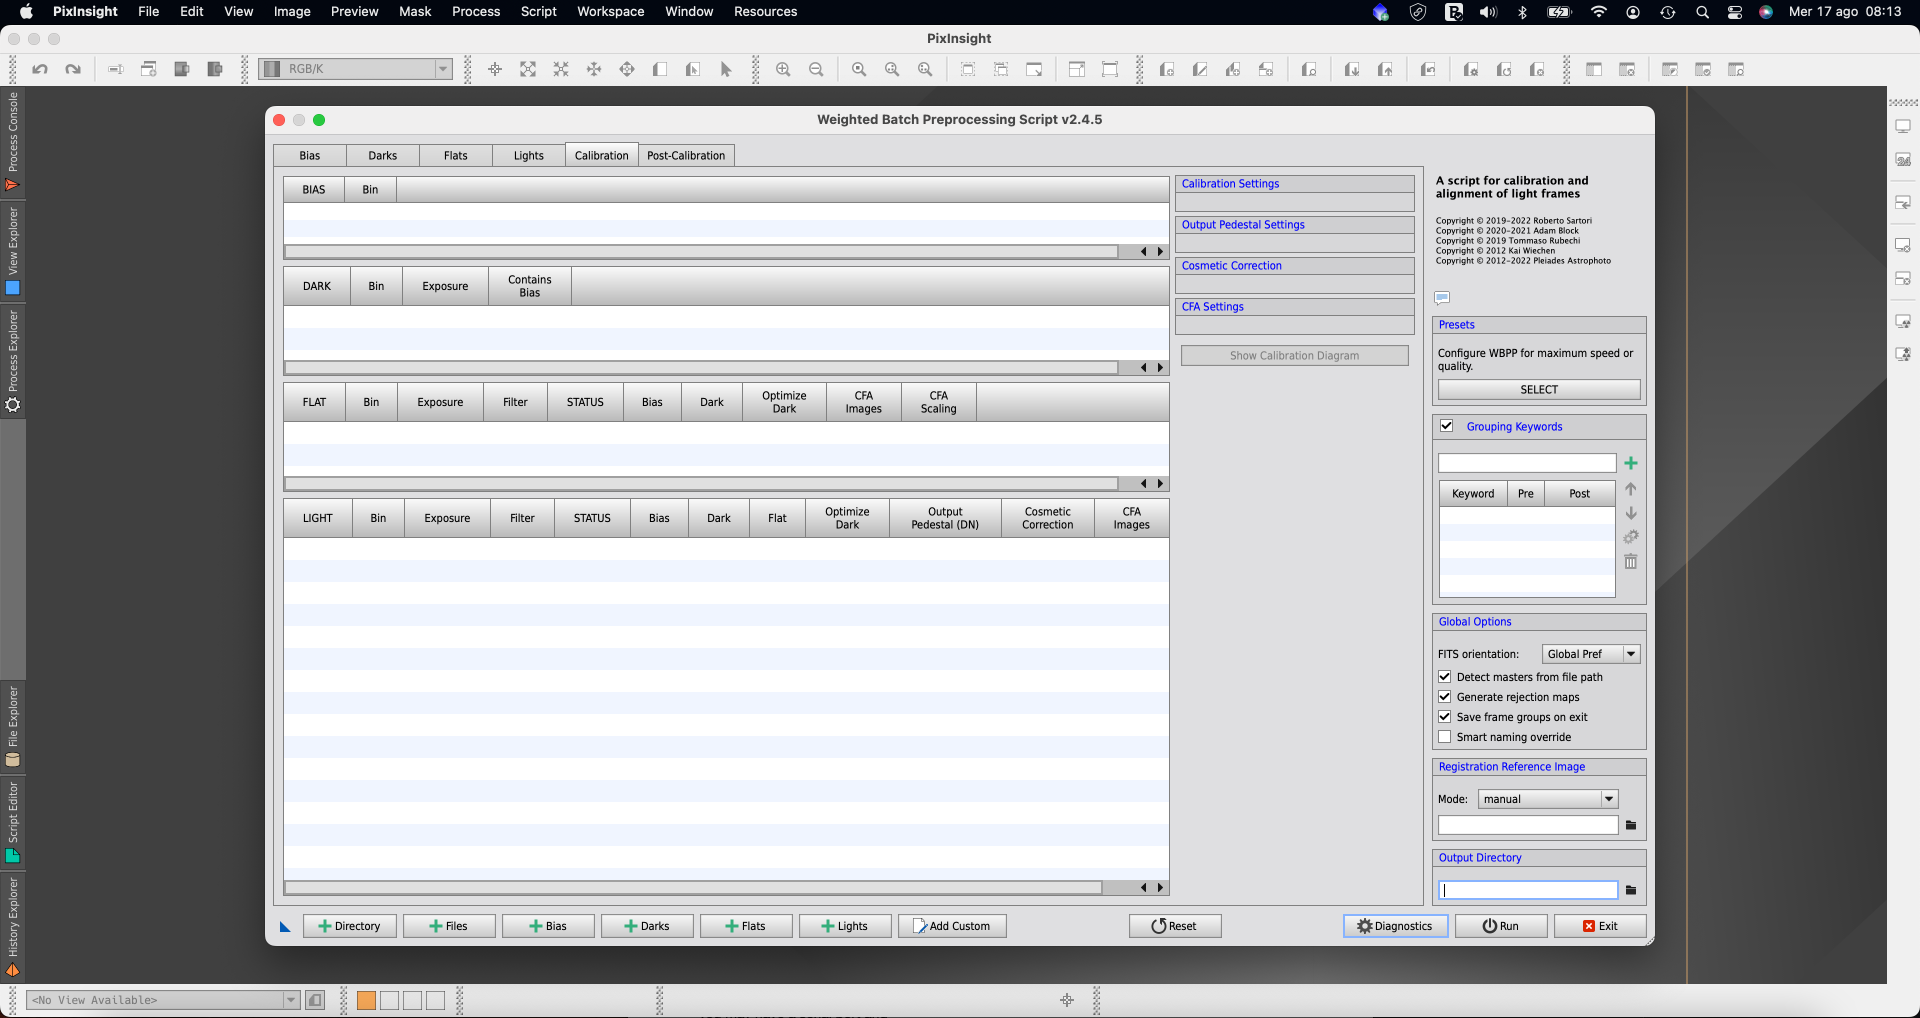
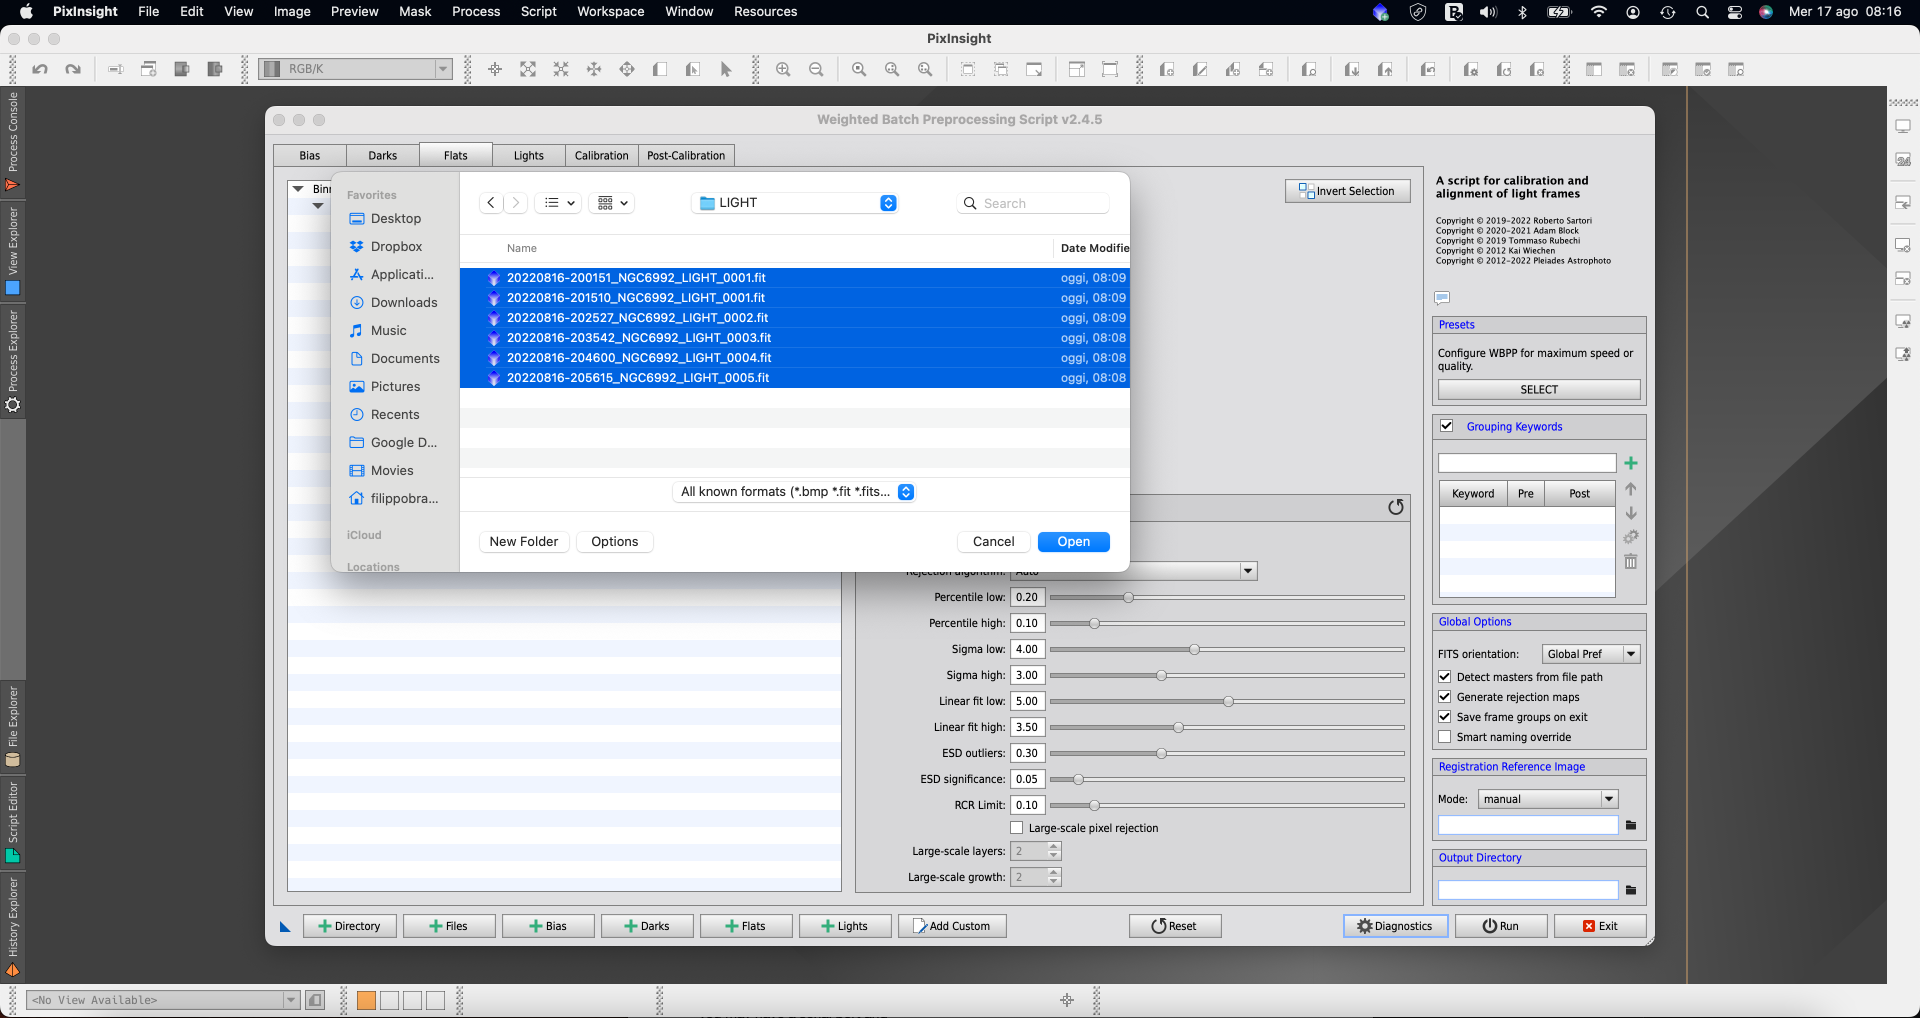
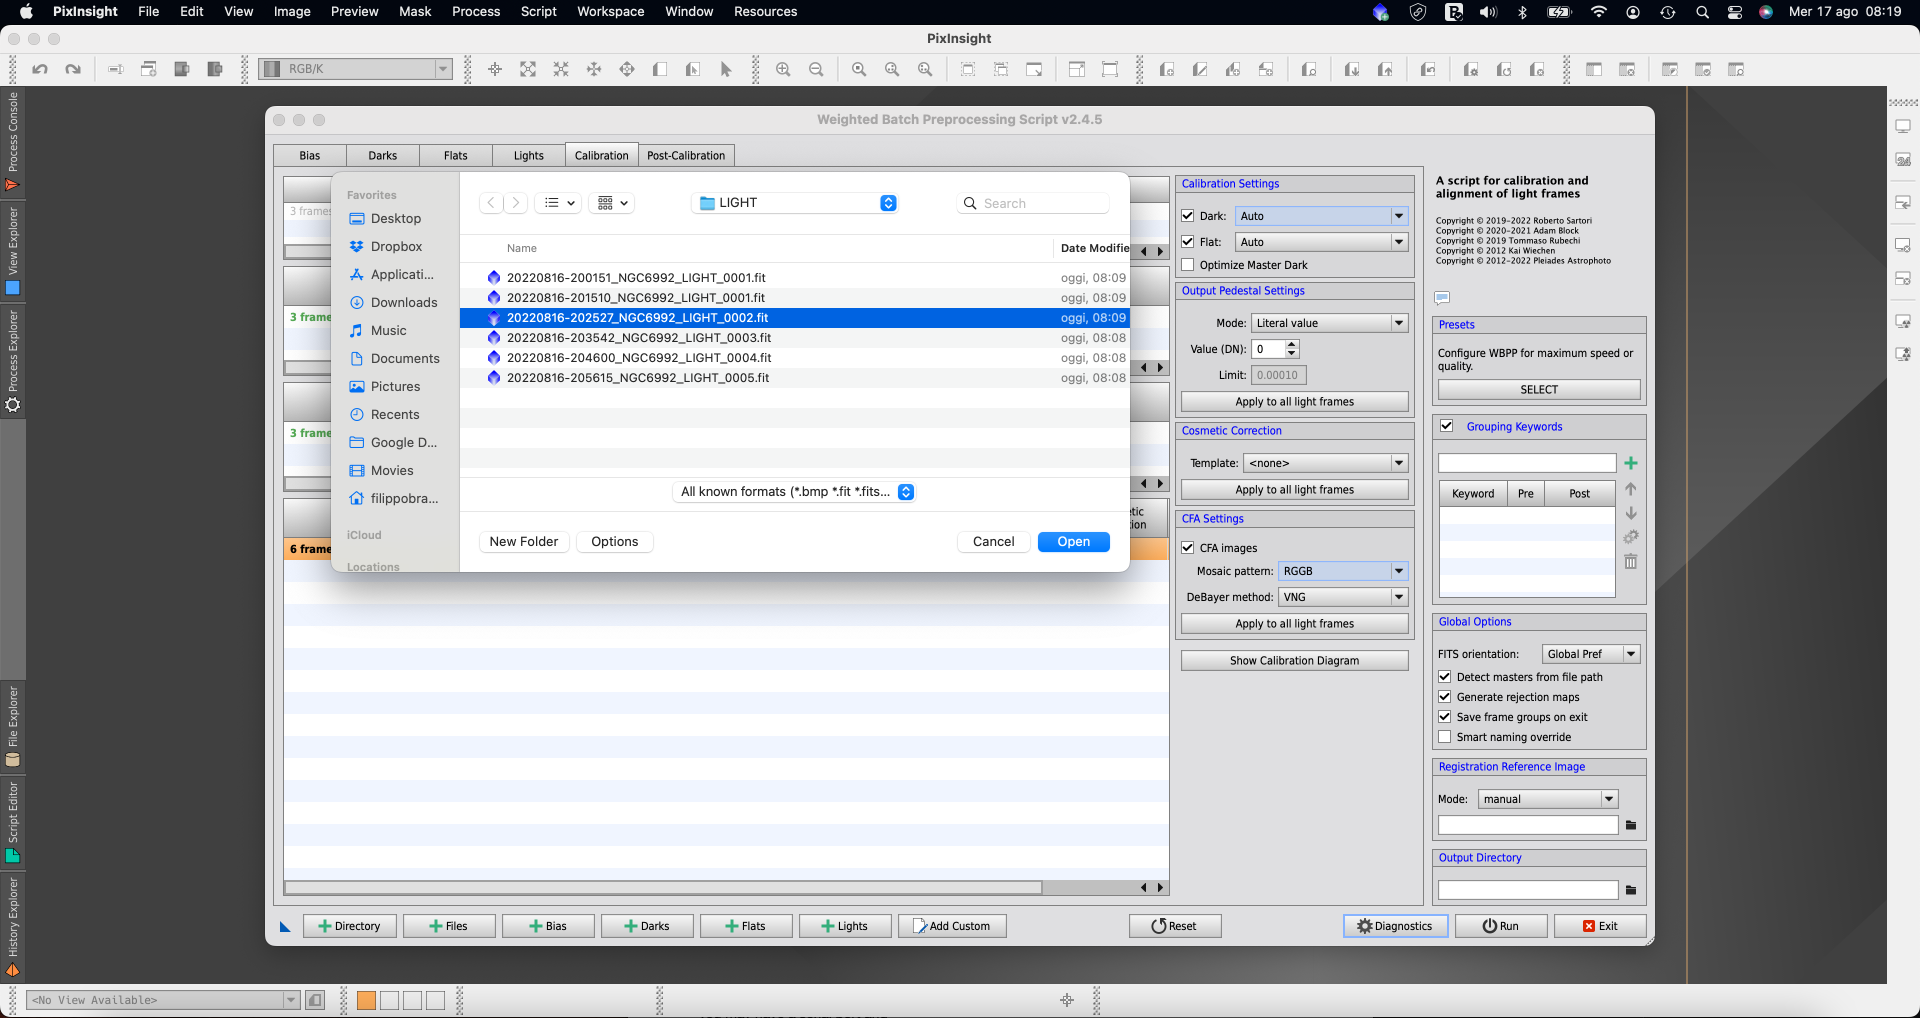
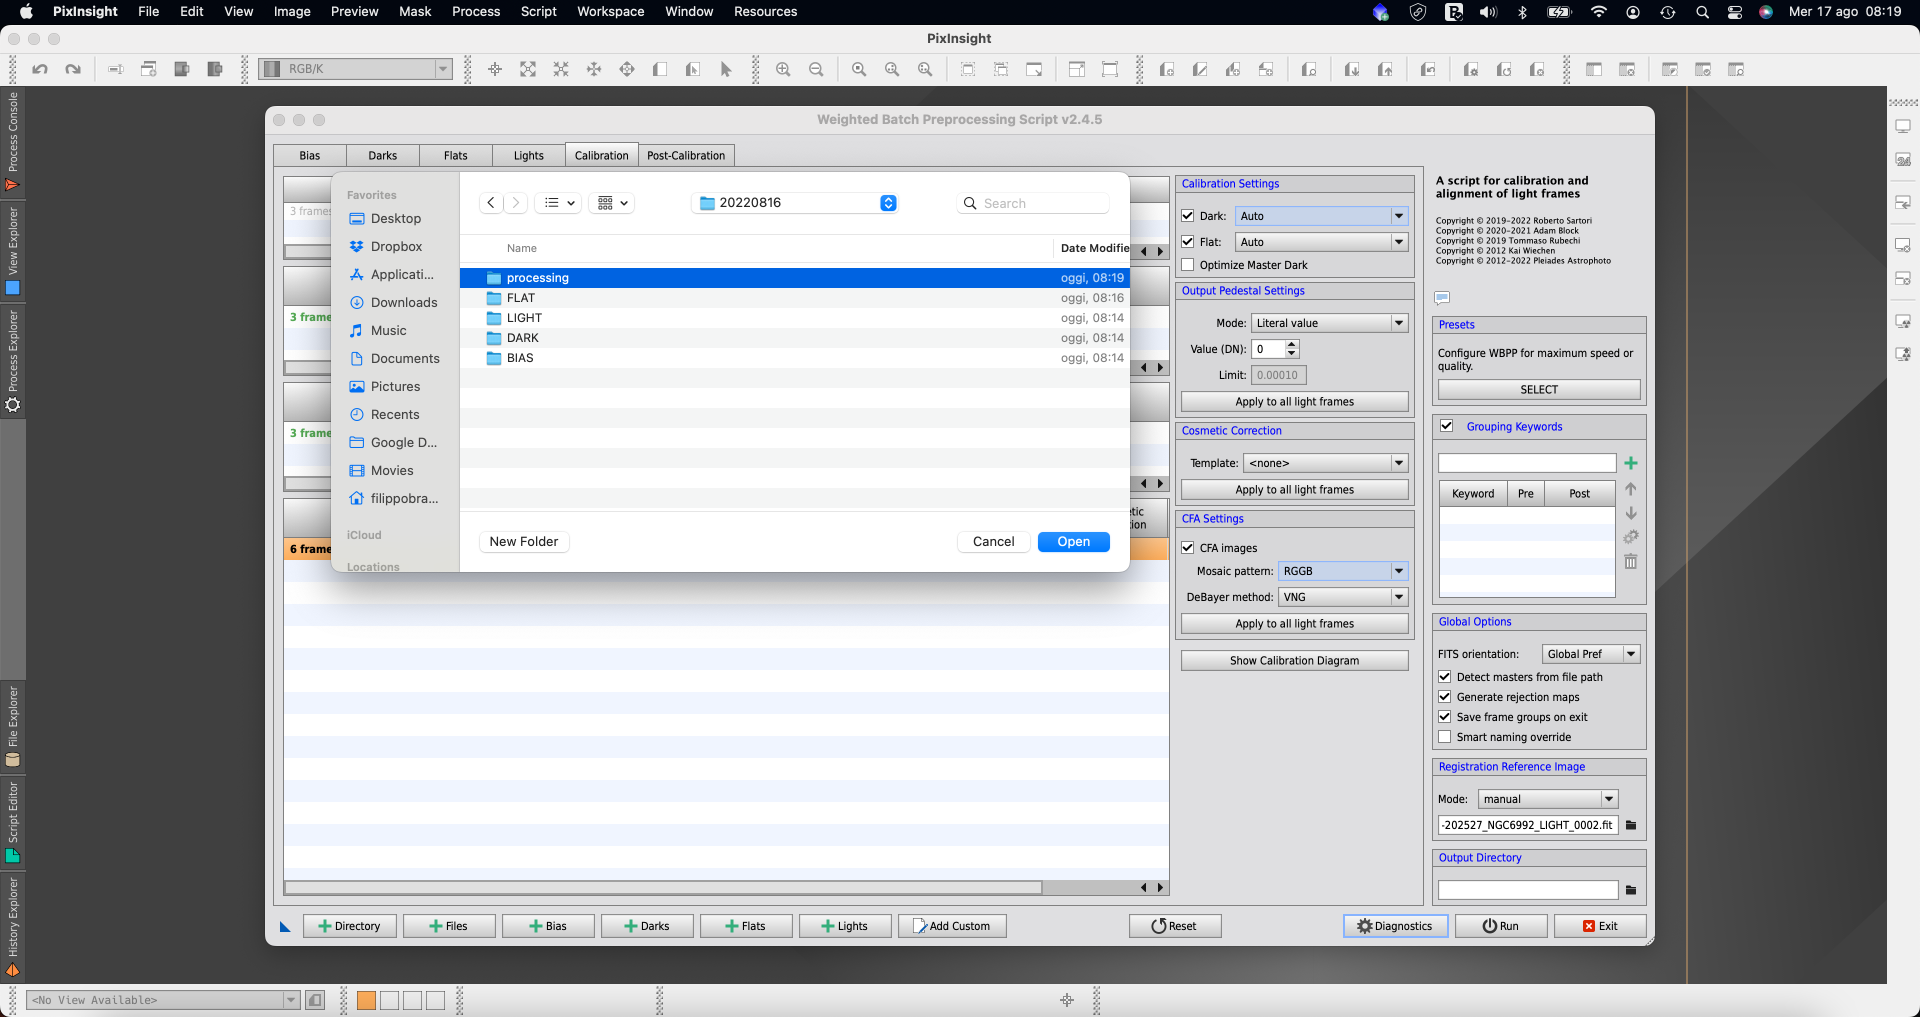
Click on the Directory button in the lower part of the WeightedBatchPreprocessing window and select the directory (that includes LIGHT, BIAS, DARK, FLAT folders) where you saved all the images. In our example, we selected the the folder 20220816.
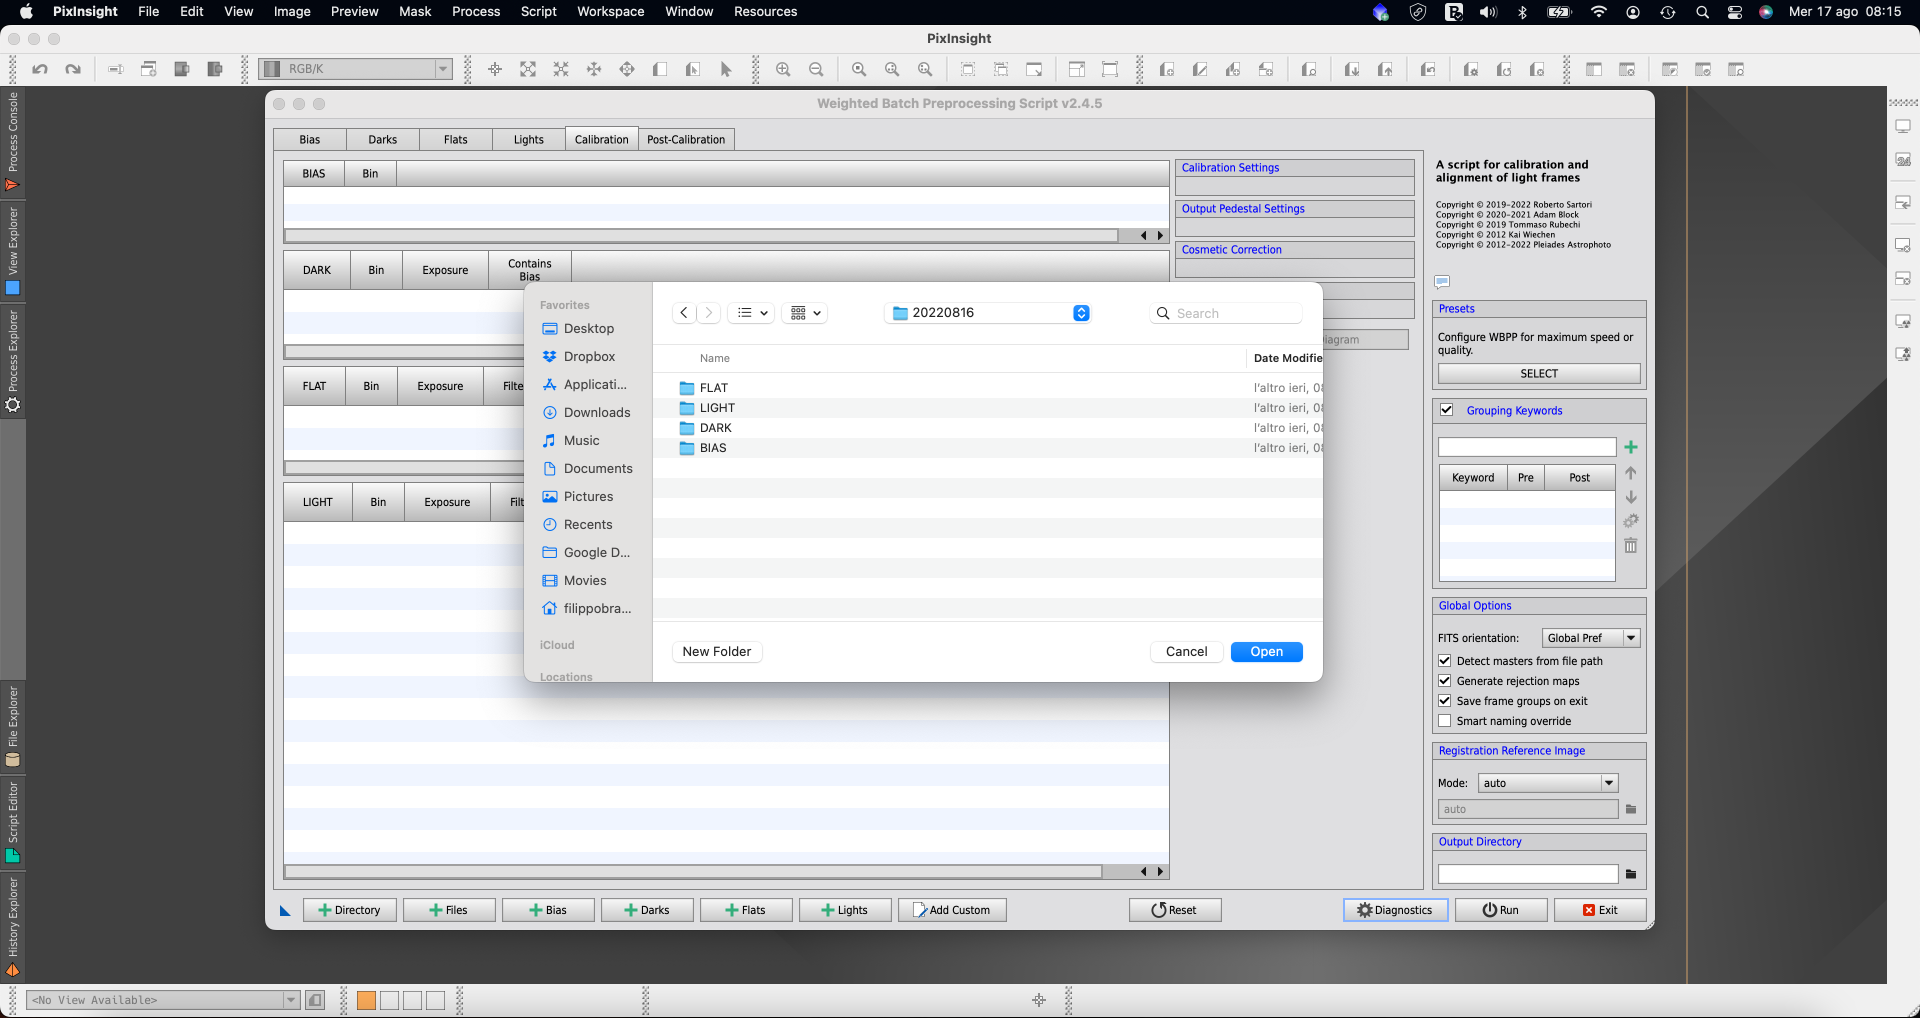
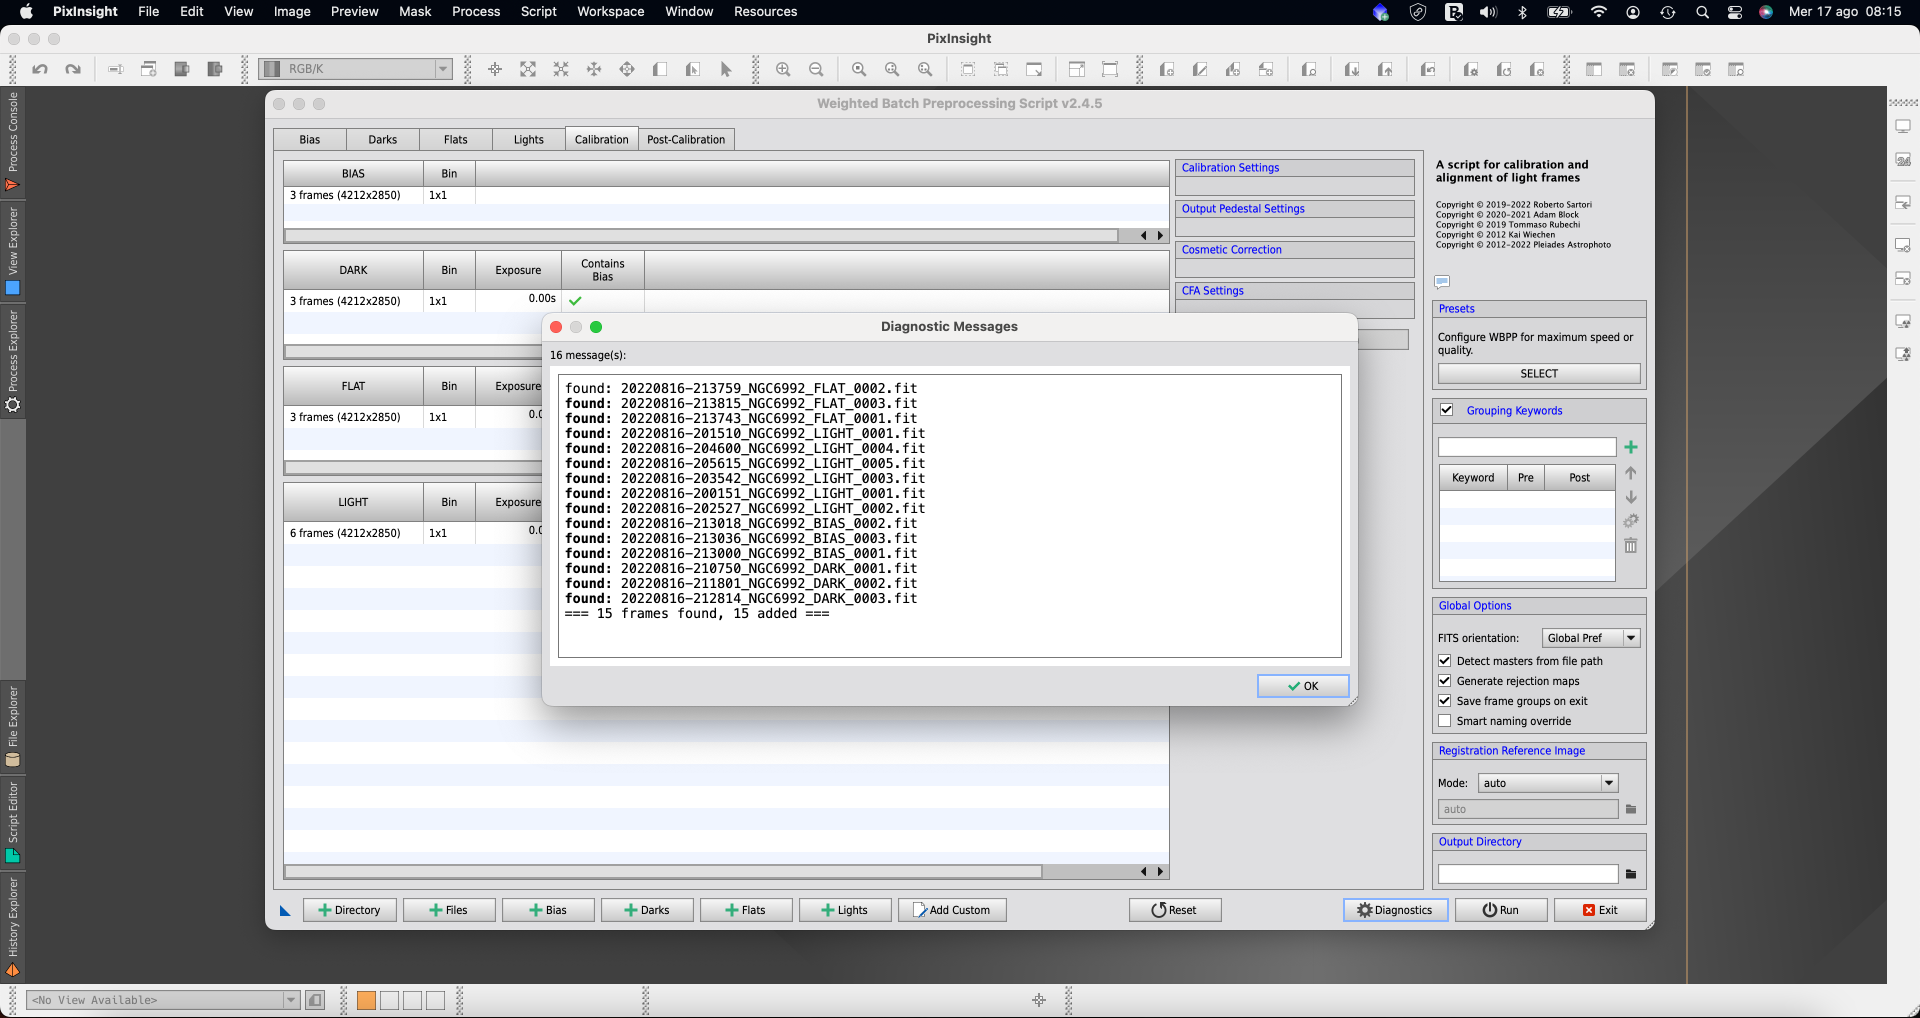
Click on the Open button to add them to the WeightedBatchPreprocessing and a popup window will confirm the images PixInsight found and divided in different sets. Click OK button to confirm.
As an alternative to previous point: if the automatic file assignment doesn’t work, you can manually specify every folder that includes every image type (Light, Bias, Flat, Dark) by clicking on the Bias, Darks, Flat and Lights buttons in the bottom part of the window and specifying the folders.
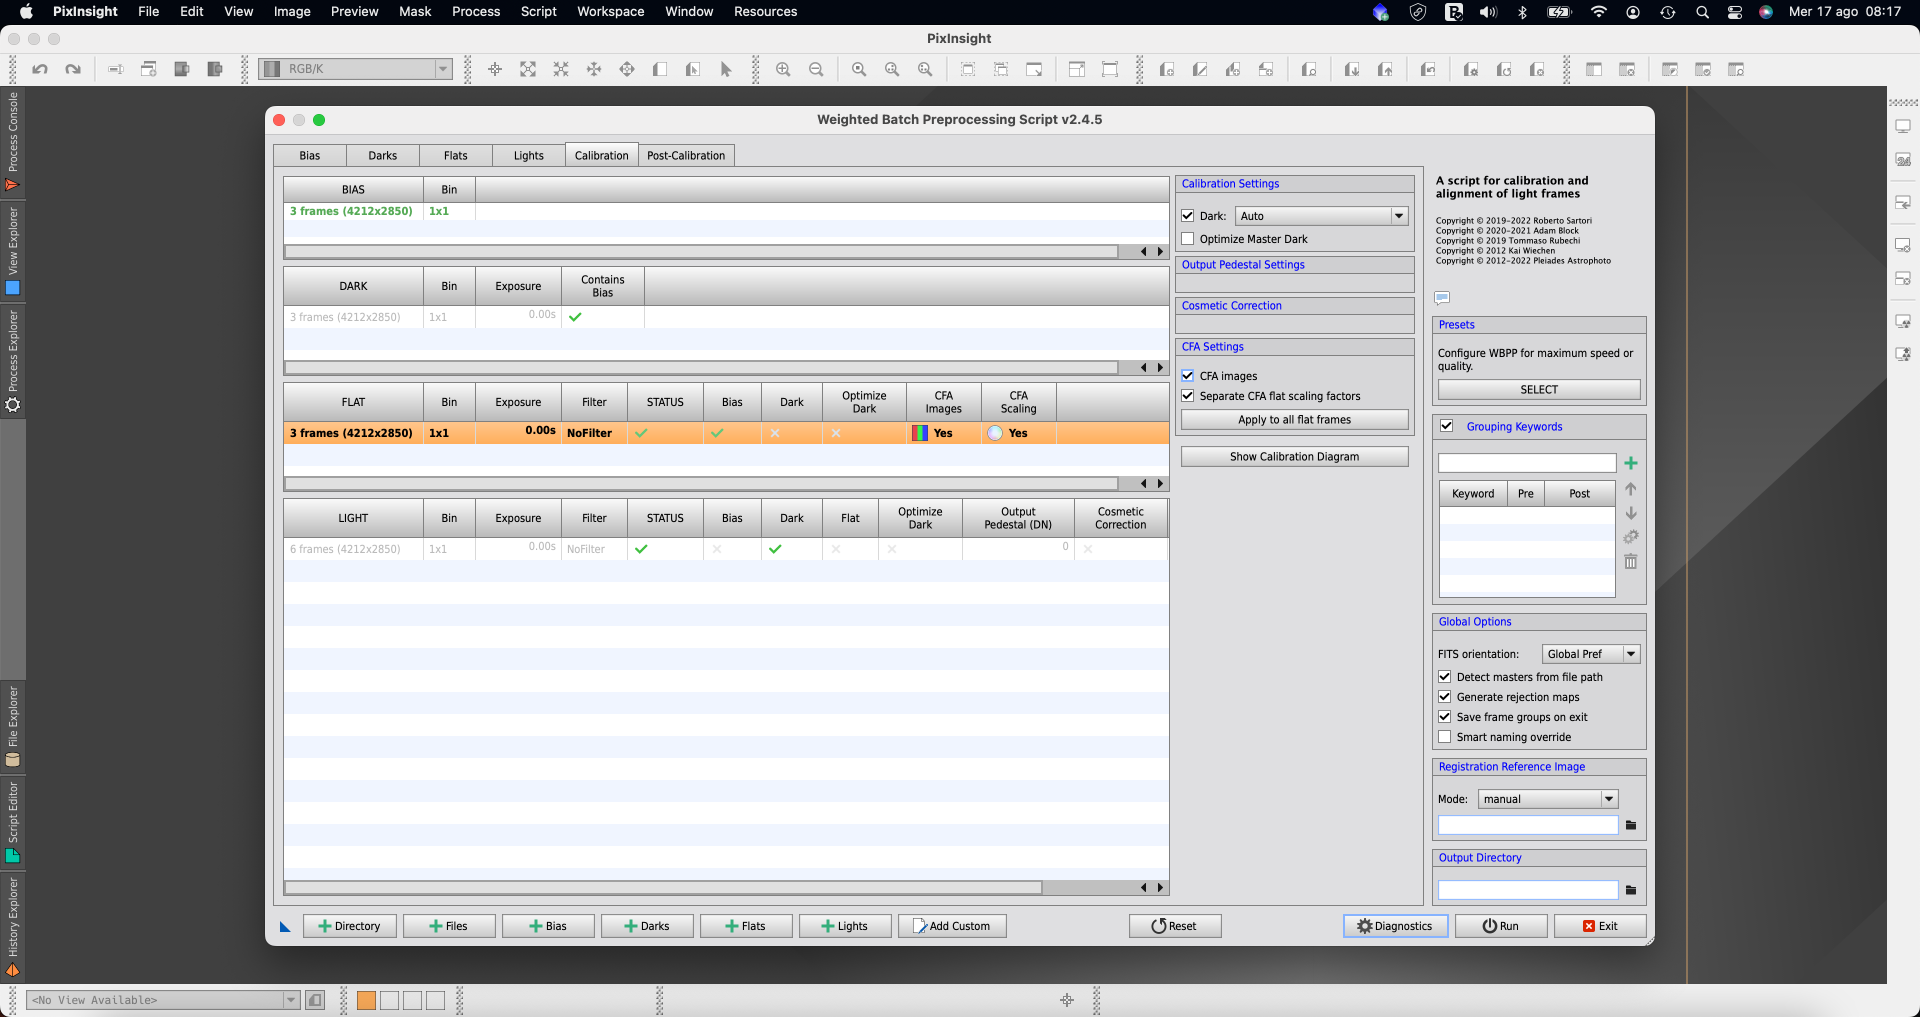
If you’re using a color camera, in the Calibration tab select the line corresponding to FLAT frames (as you can see in the picture below) and activate the 2 options “CFA images” and “Separate CFA flat scaling factors”.
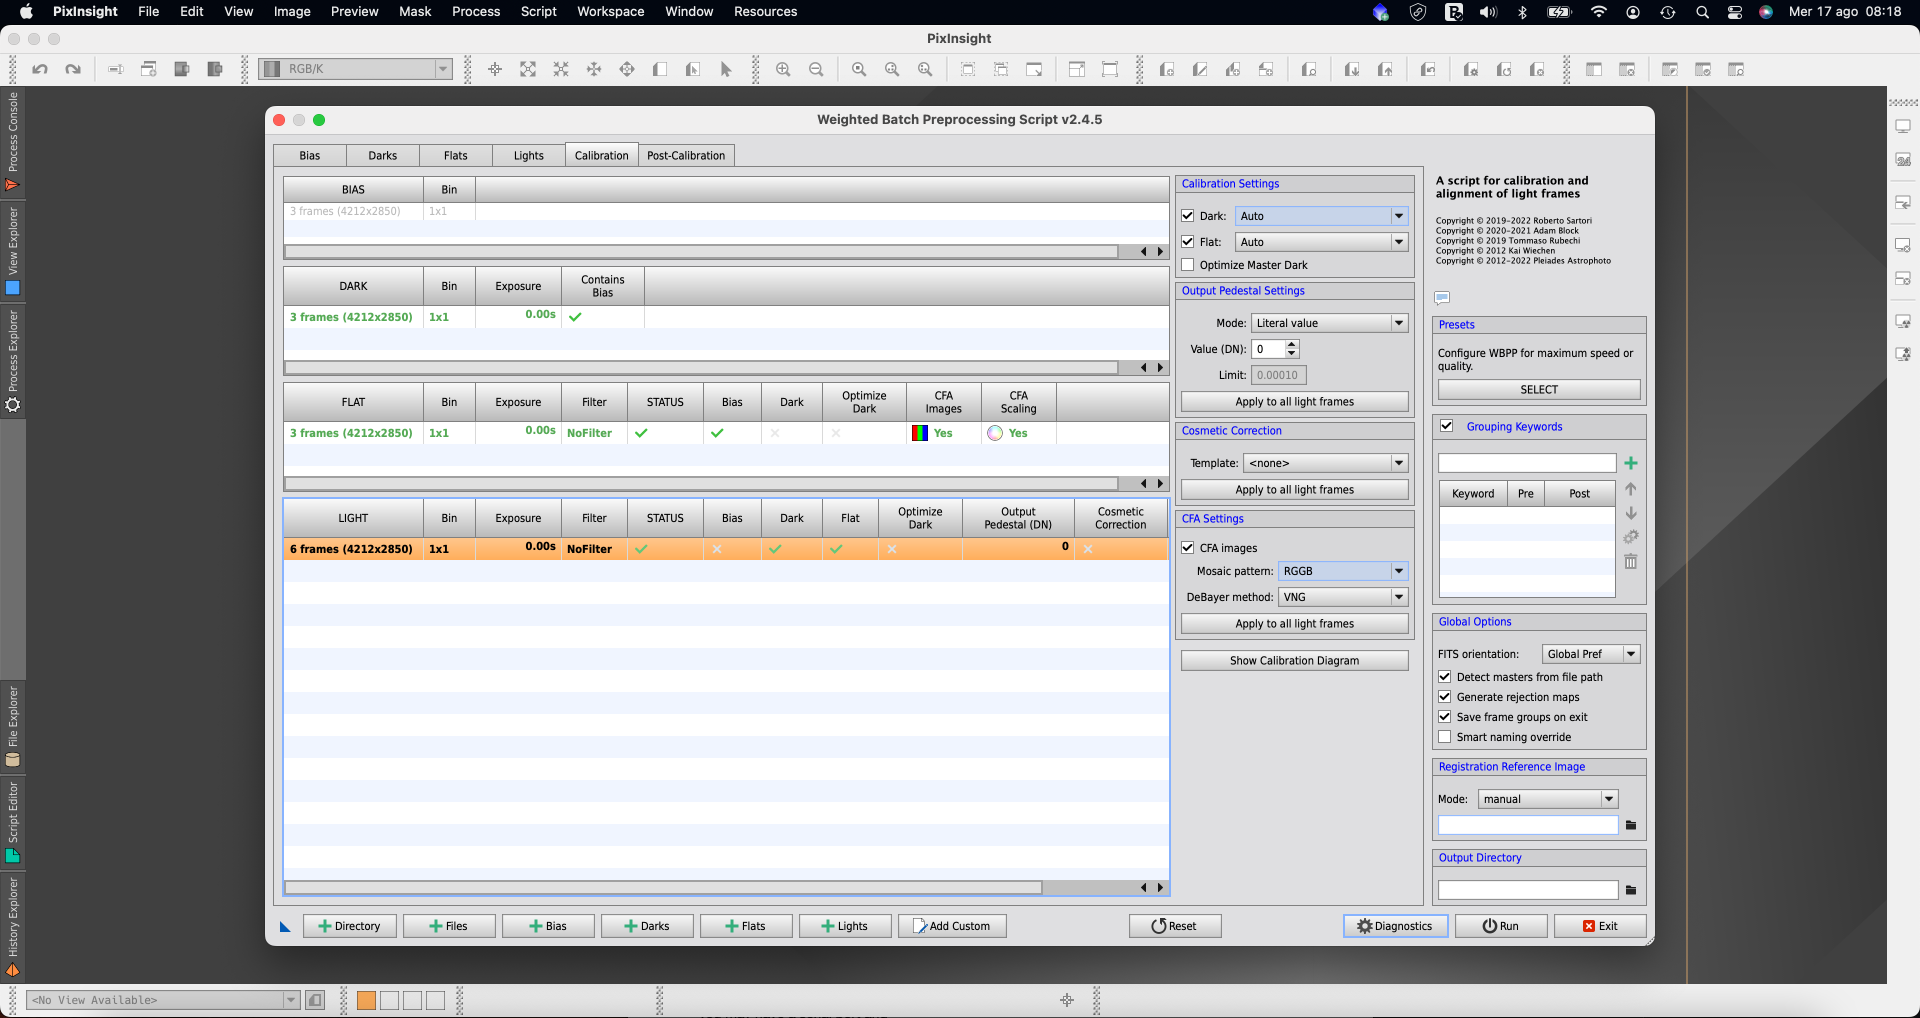
If you’re using a color camera, in the Calibration tab please select the line corresponding to LIGHT frames (as you can see in the picture below) and activate the option “CFA images”. Under mosaic pattern, please select the one that corresponds to your camera model. Since we were using a QHY294C cooled camera that has a RGGB pattern (please refer to your camera user manual to check the correct debayer pattern), we selected RGGB.
In the Post-Calibration tab, please make sure that “Subframe Weighting”, “Image Registration”, “Local Normalisation” and “Image Integration” options are selected.
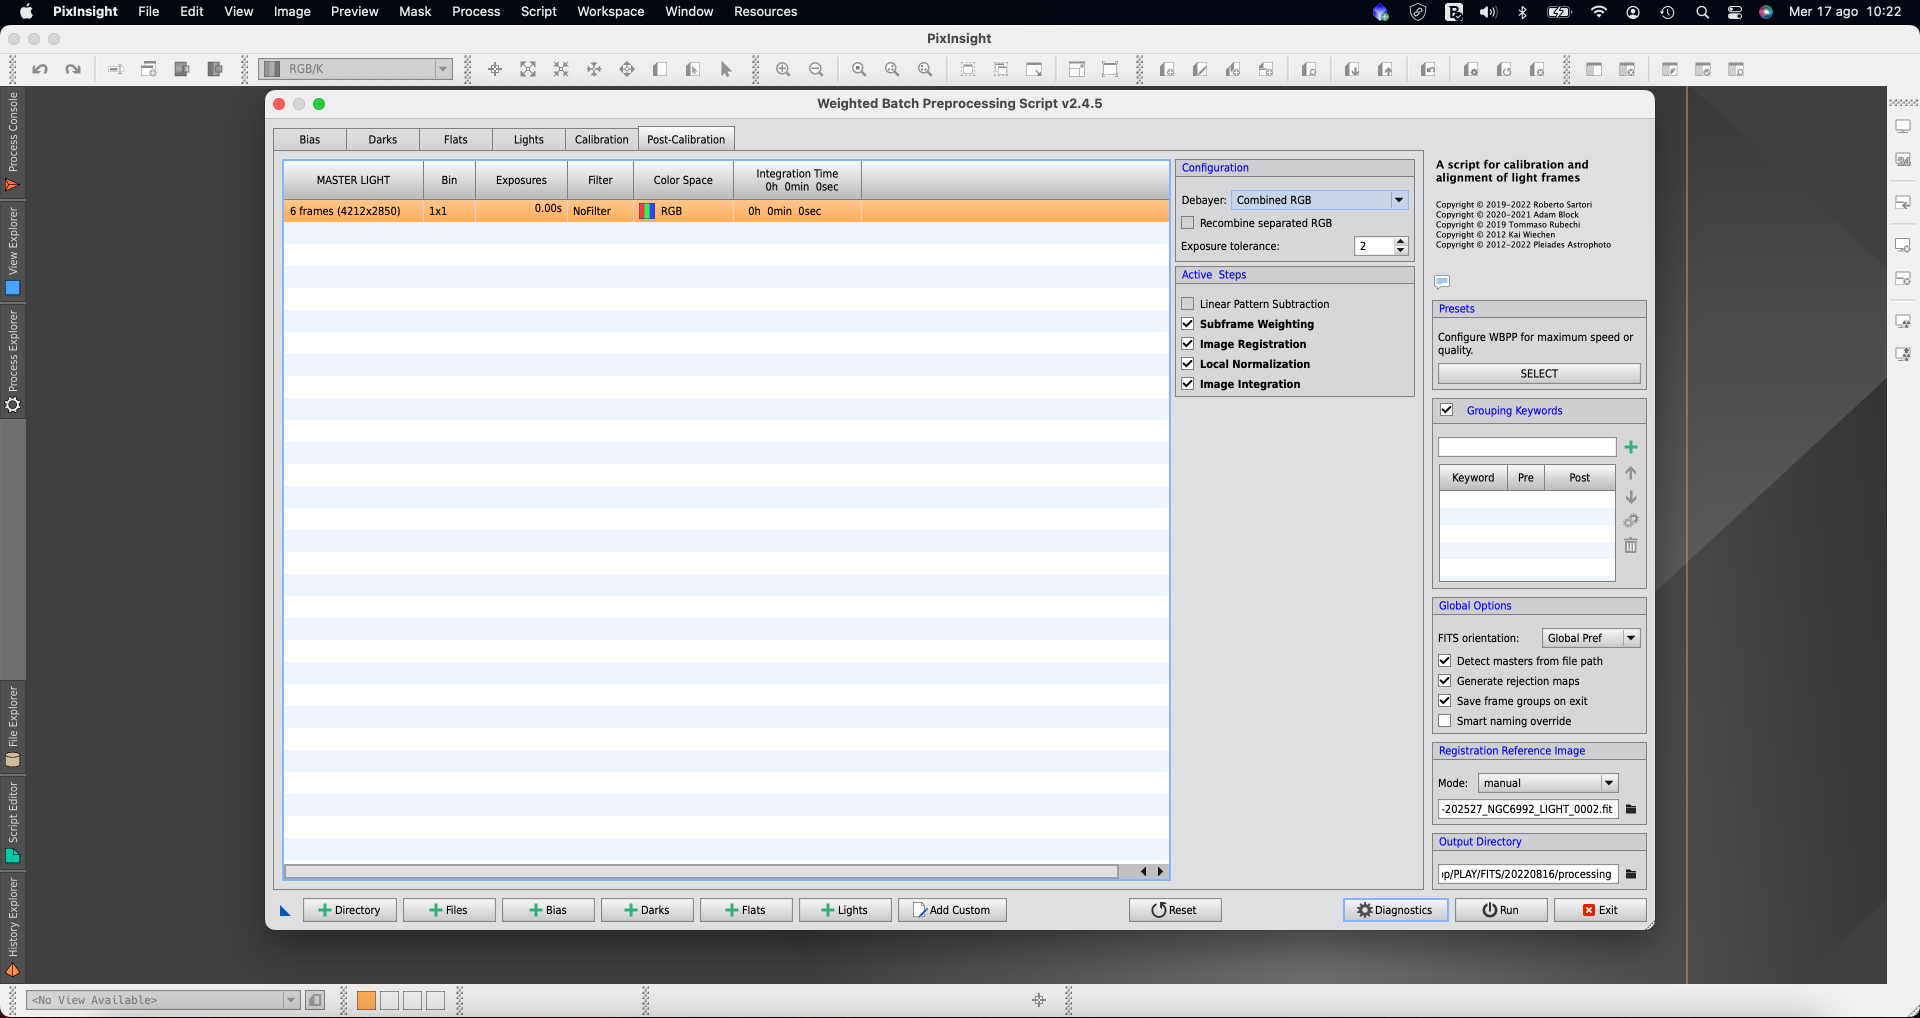
In the bottom-right part of the WeightedBatchPreprocessing window, please select the folder icon in the “Registration Reference Image” field in order to provide PixInsight a reference image for the stack. You can select one of the LIGHT images (usually we select the one in the middle) and click the Open button to confirm.
In the bottom-right part of the WeightedBatchPreprocessing window, please select the folder icon in the “Output Directory” field in order to indicate PixInsight the directory where to save all the processing files. We created a “processing” folder inside our PLAY/FITS/20220816 folder. Then click the Open button to confirm.
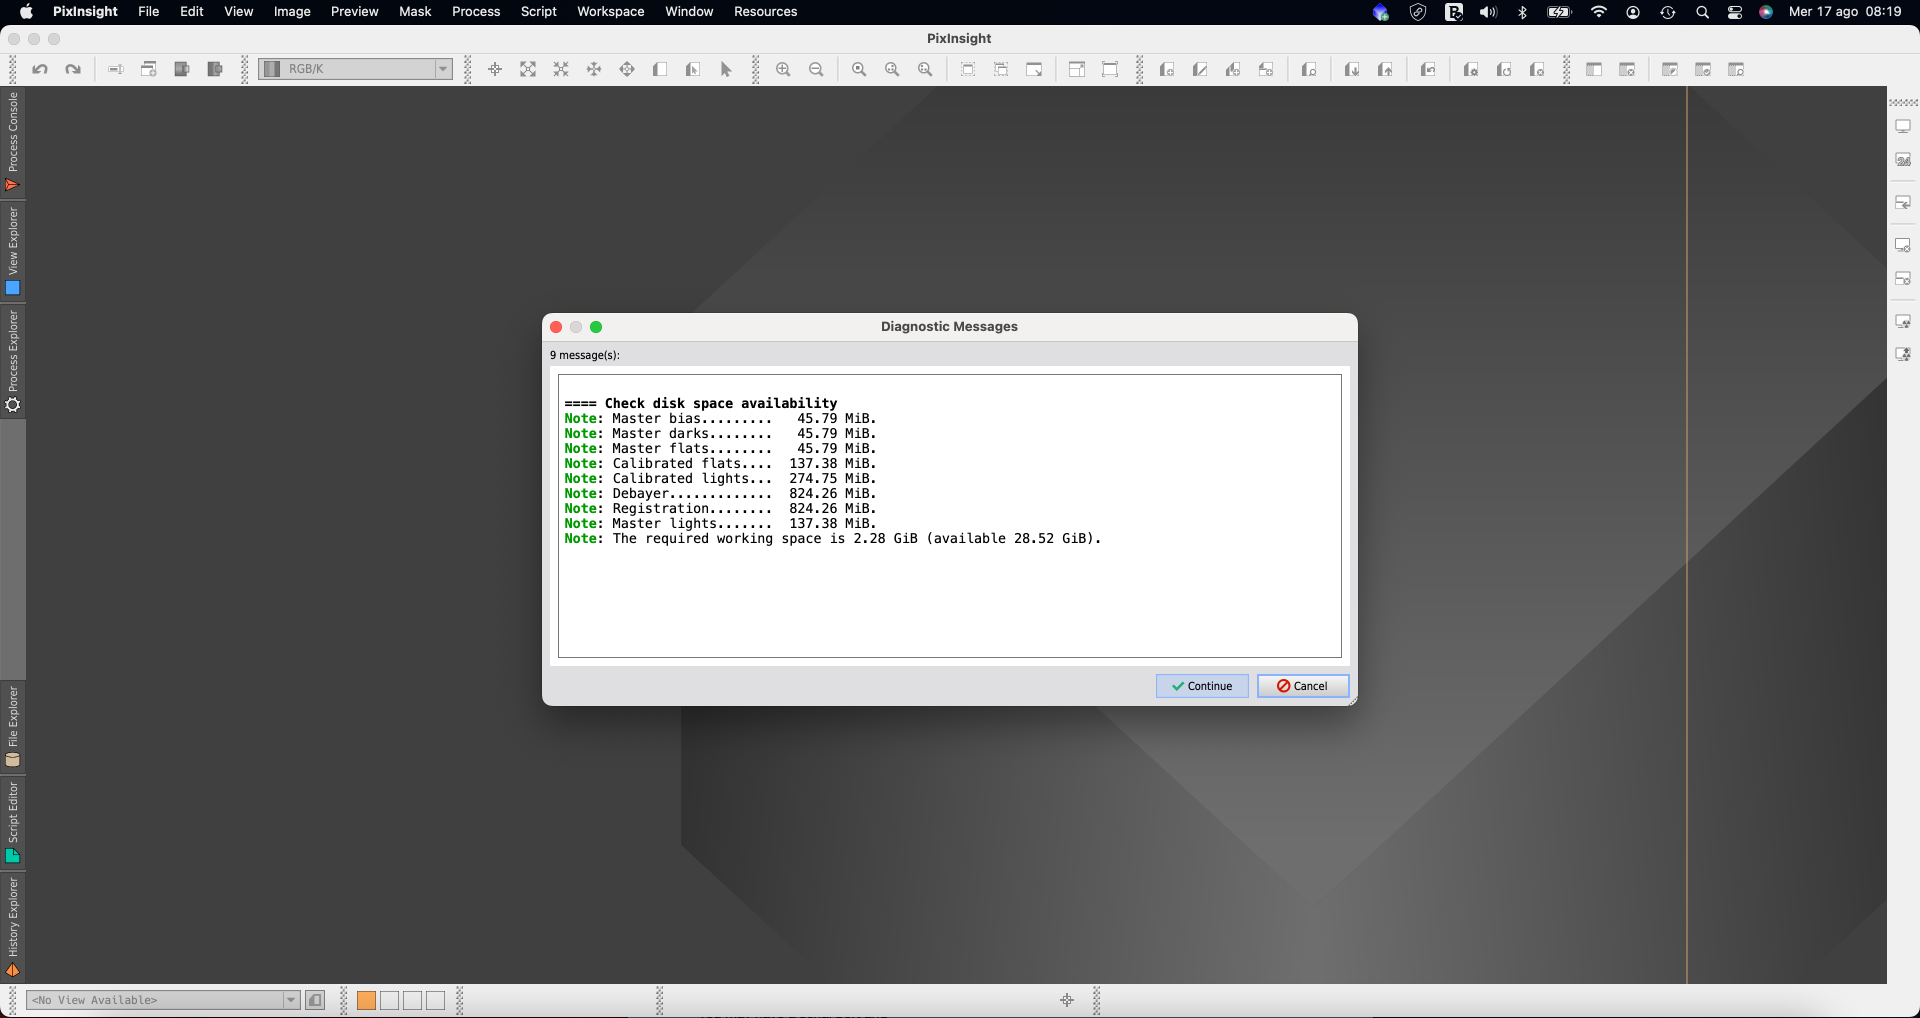
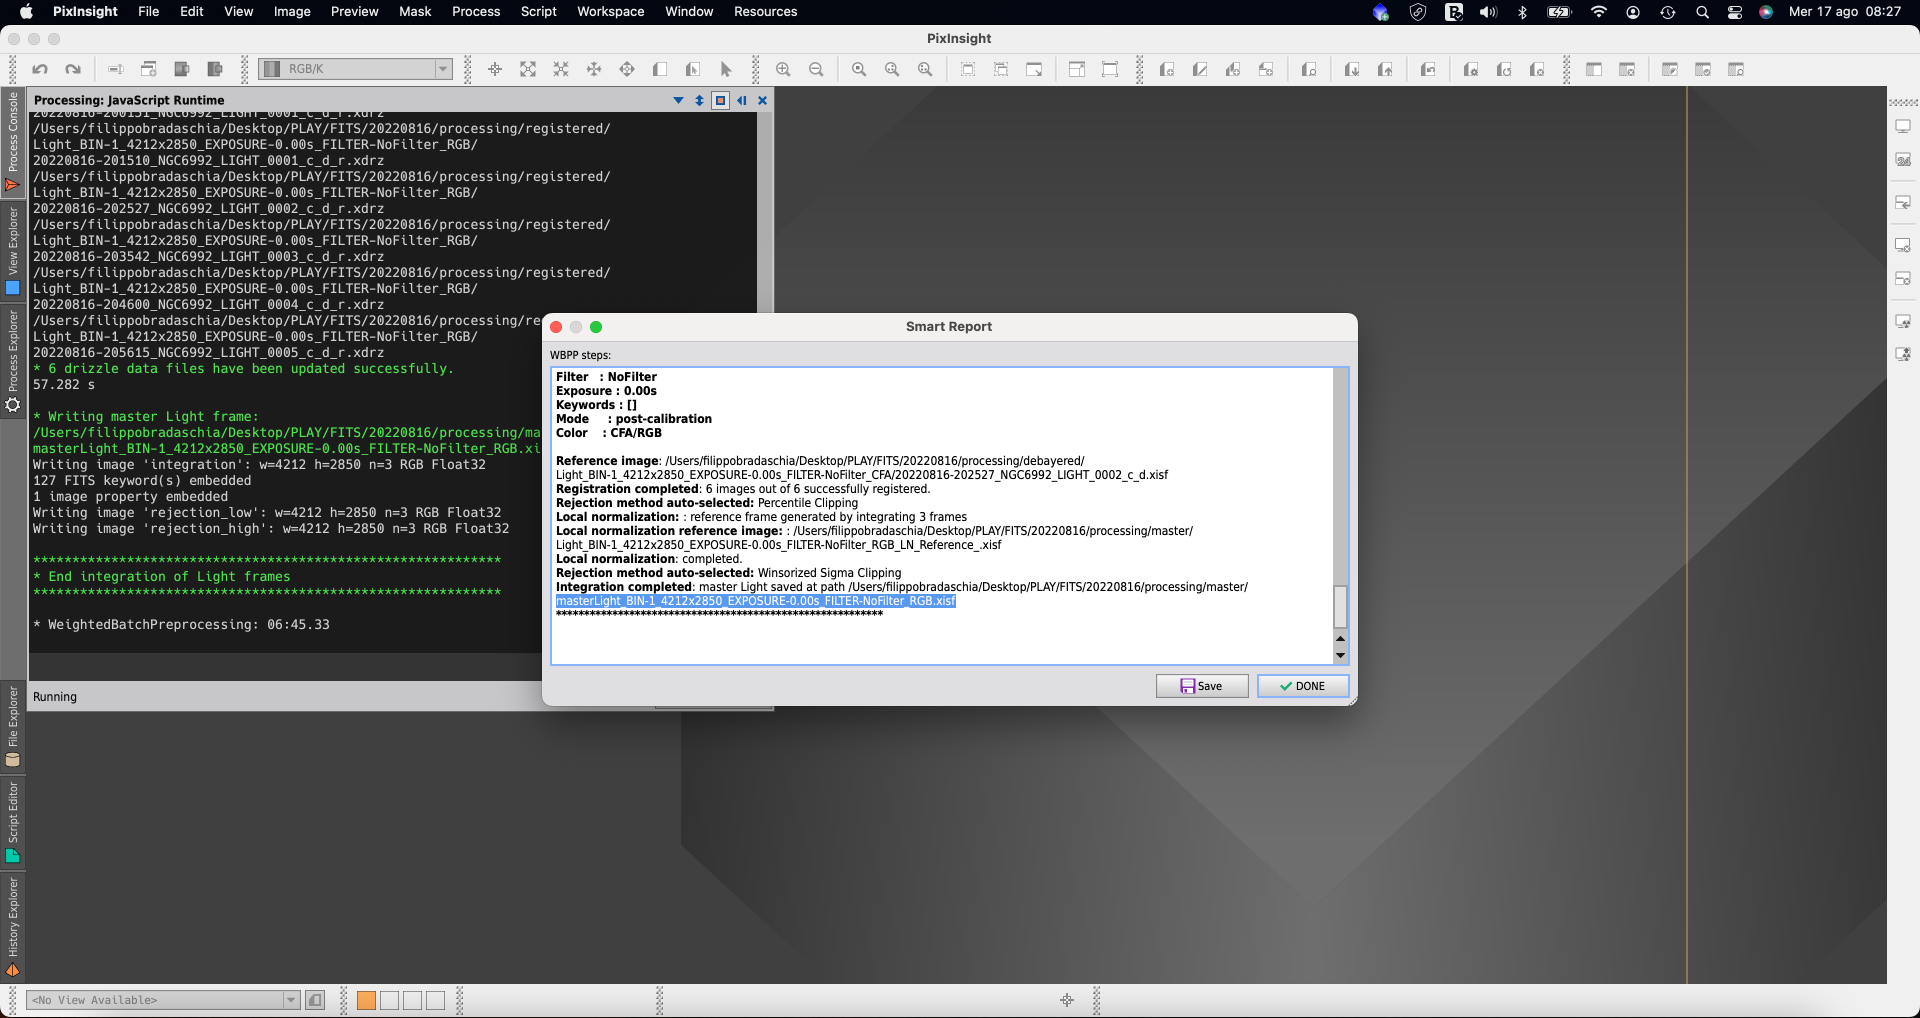
Finally, click the Run button in order to start pre-processing of all the images. First, PixInsight will show you a Diagnostic Message reporting errors (if any) and disk space availability. If there are no errors and you’re fine with the diagnostic, please click Continue button.
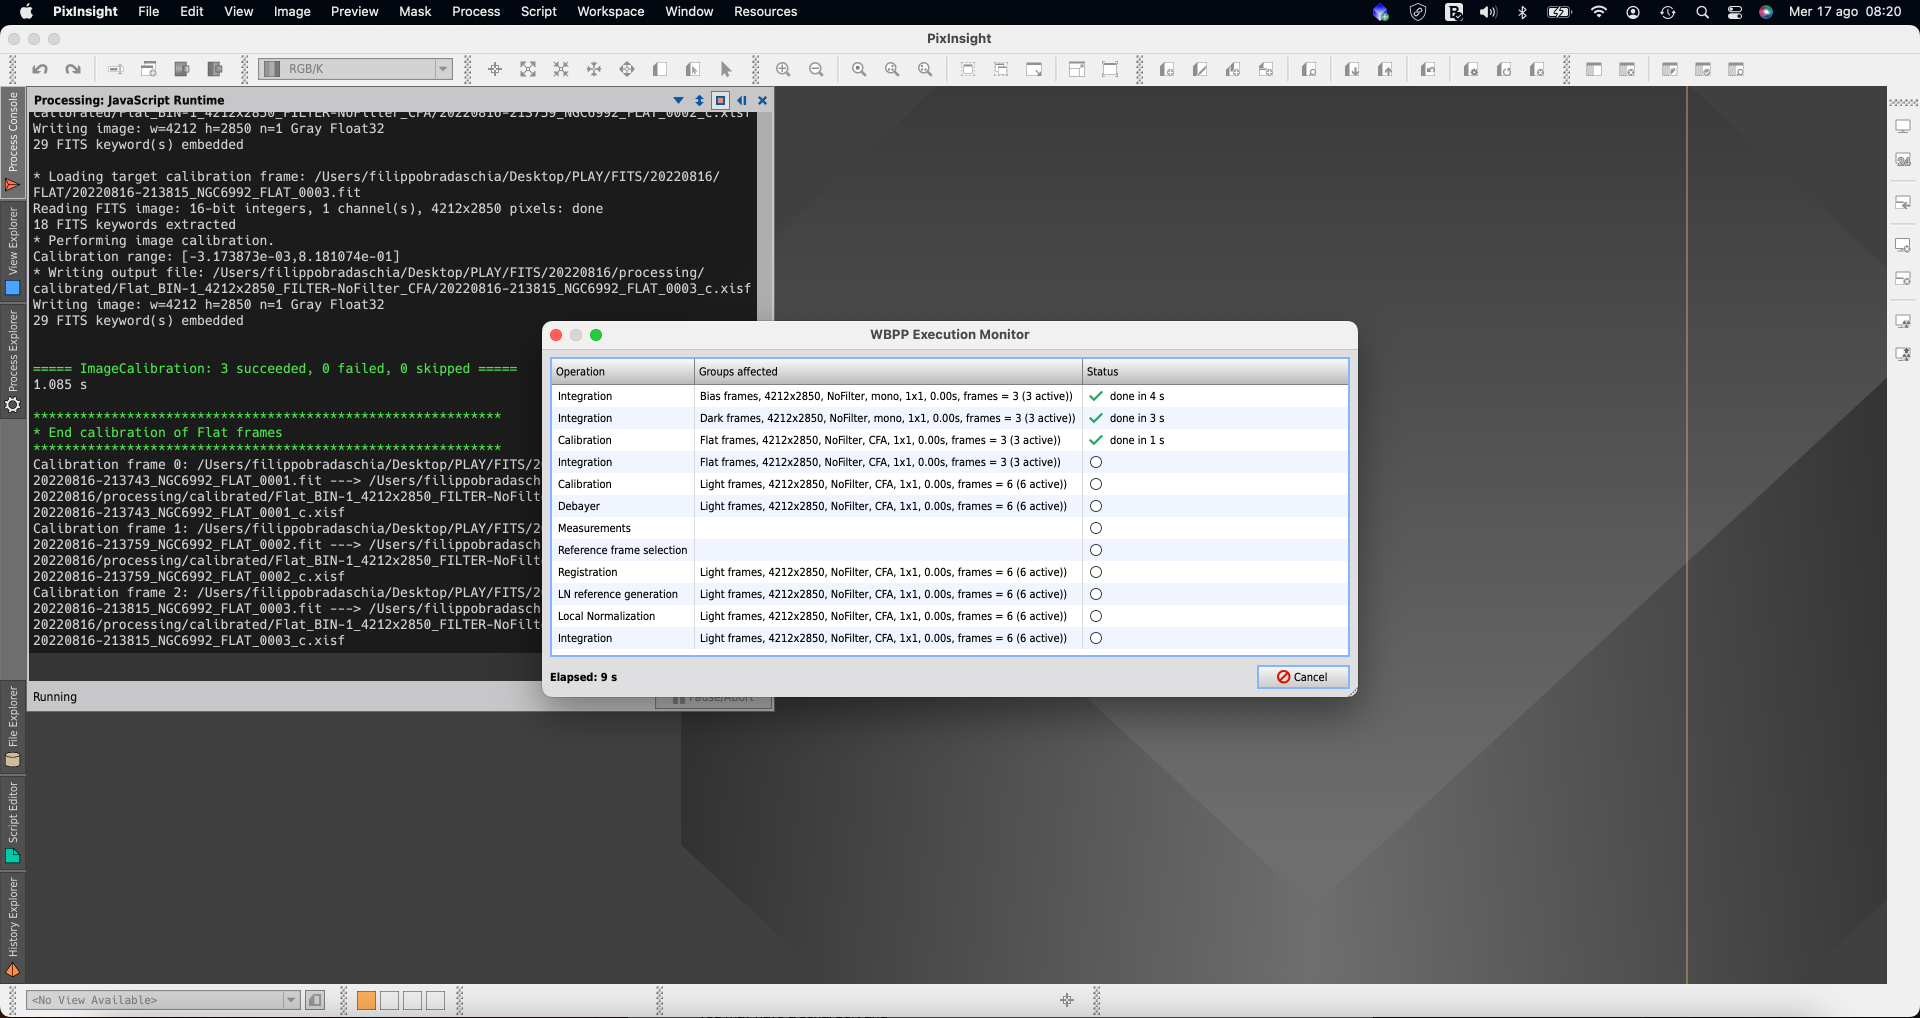
During the WeightedBatchPreprocessing process, PixInsight shows you all the steps that it’s executing to complete the task. Depending on the computer performance, resolution of your camera sensor and quantity of the images you saved, this process may take a long time (even more than 1 hour).
At the end of the process, a notification window will show you the confirmation message. The calibrated and stacked image is reported in the last line corresponding to “Integration completed” line.
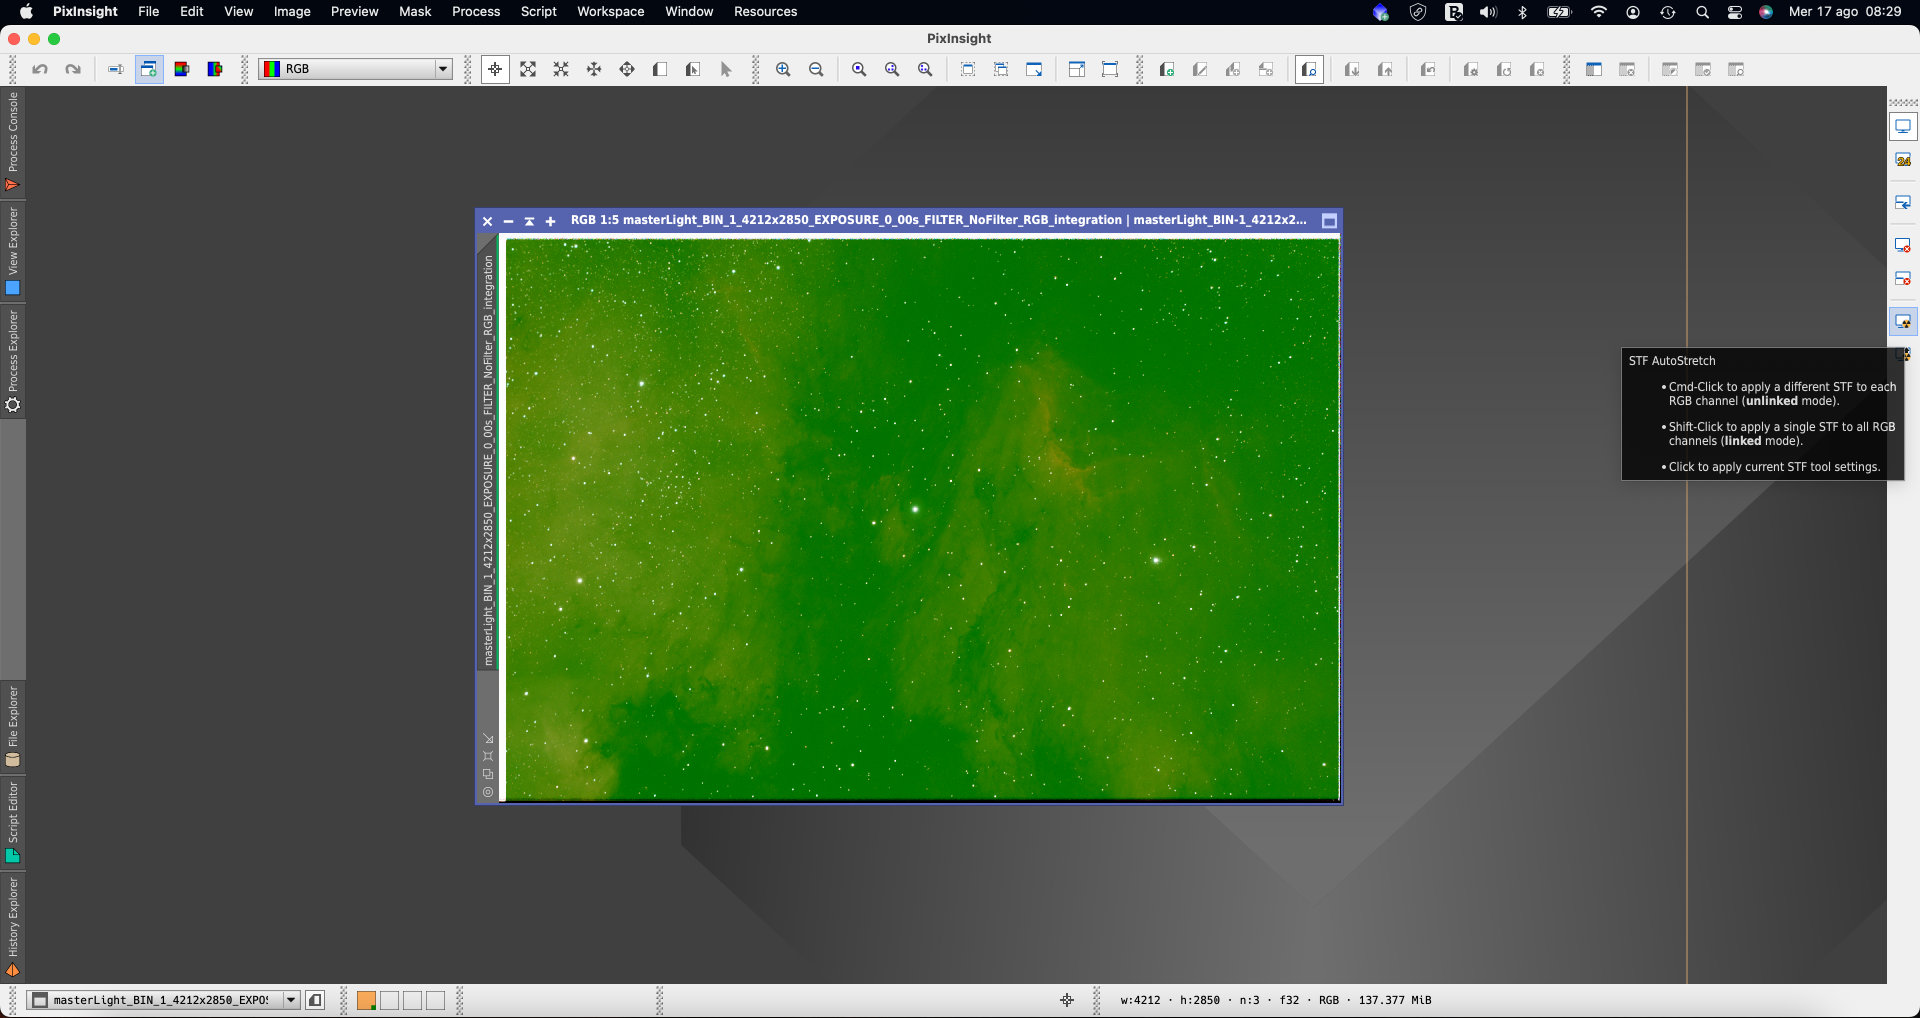
You can open this file with PixInsight and you can click on the “STF AutoStretch” button in order to have a quick view of the final result.
You can now process your image by using the many tools available in PixInsight (this is not described in this article).