

SESTO SENSO 3 SC is our robotic focusing motor specifically designed for Schmidt-Cassegrain type telescopes that use an internal primary mirror focusing system. This means it can be connected to different telescopes like Celestron’s SC, EdgeHD, RASA or SkyWatcher MAK180. SESTO SENSO 3 SC features a specially designed Direct Pulley Clamp (DPC) that attaches directly to the focus knob of your SC-type telescope, enabling precise motorized control of the internal focusing mechanism that moves the primary mirror. Thanks to the integrated encoder, SESTO SENSO 3 SC also allows manual focusing without losing motor position, giving you flexibility and accuracy in every observing or imaging session.
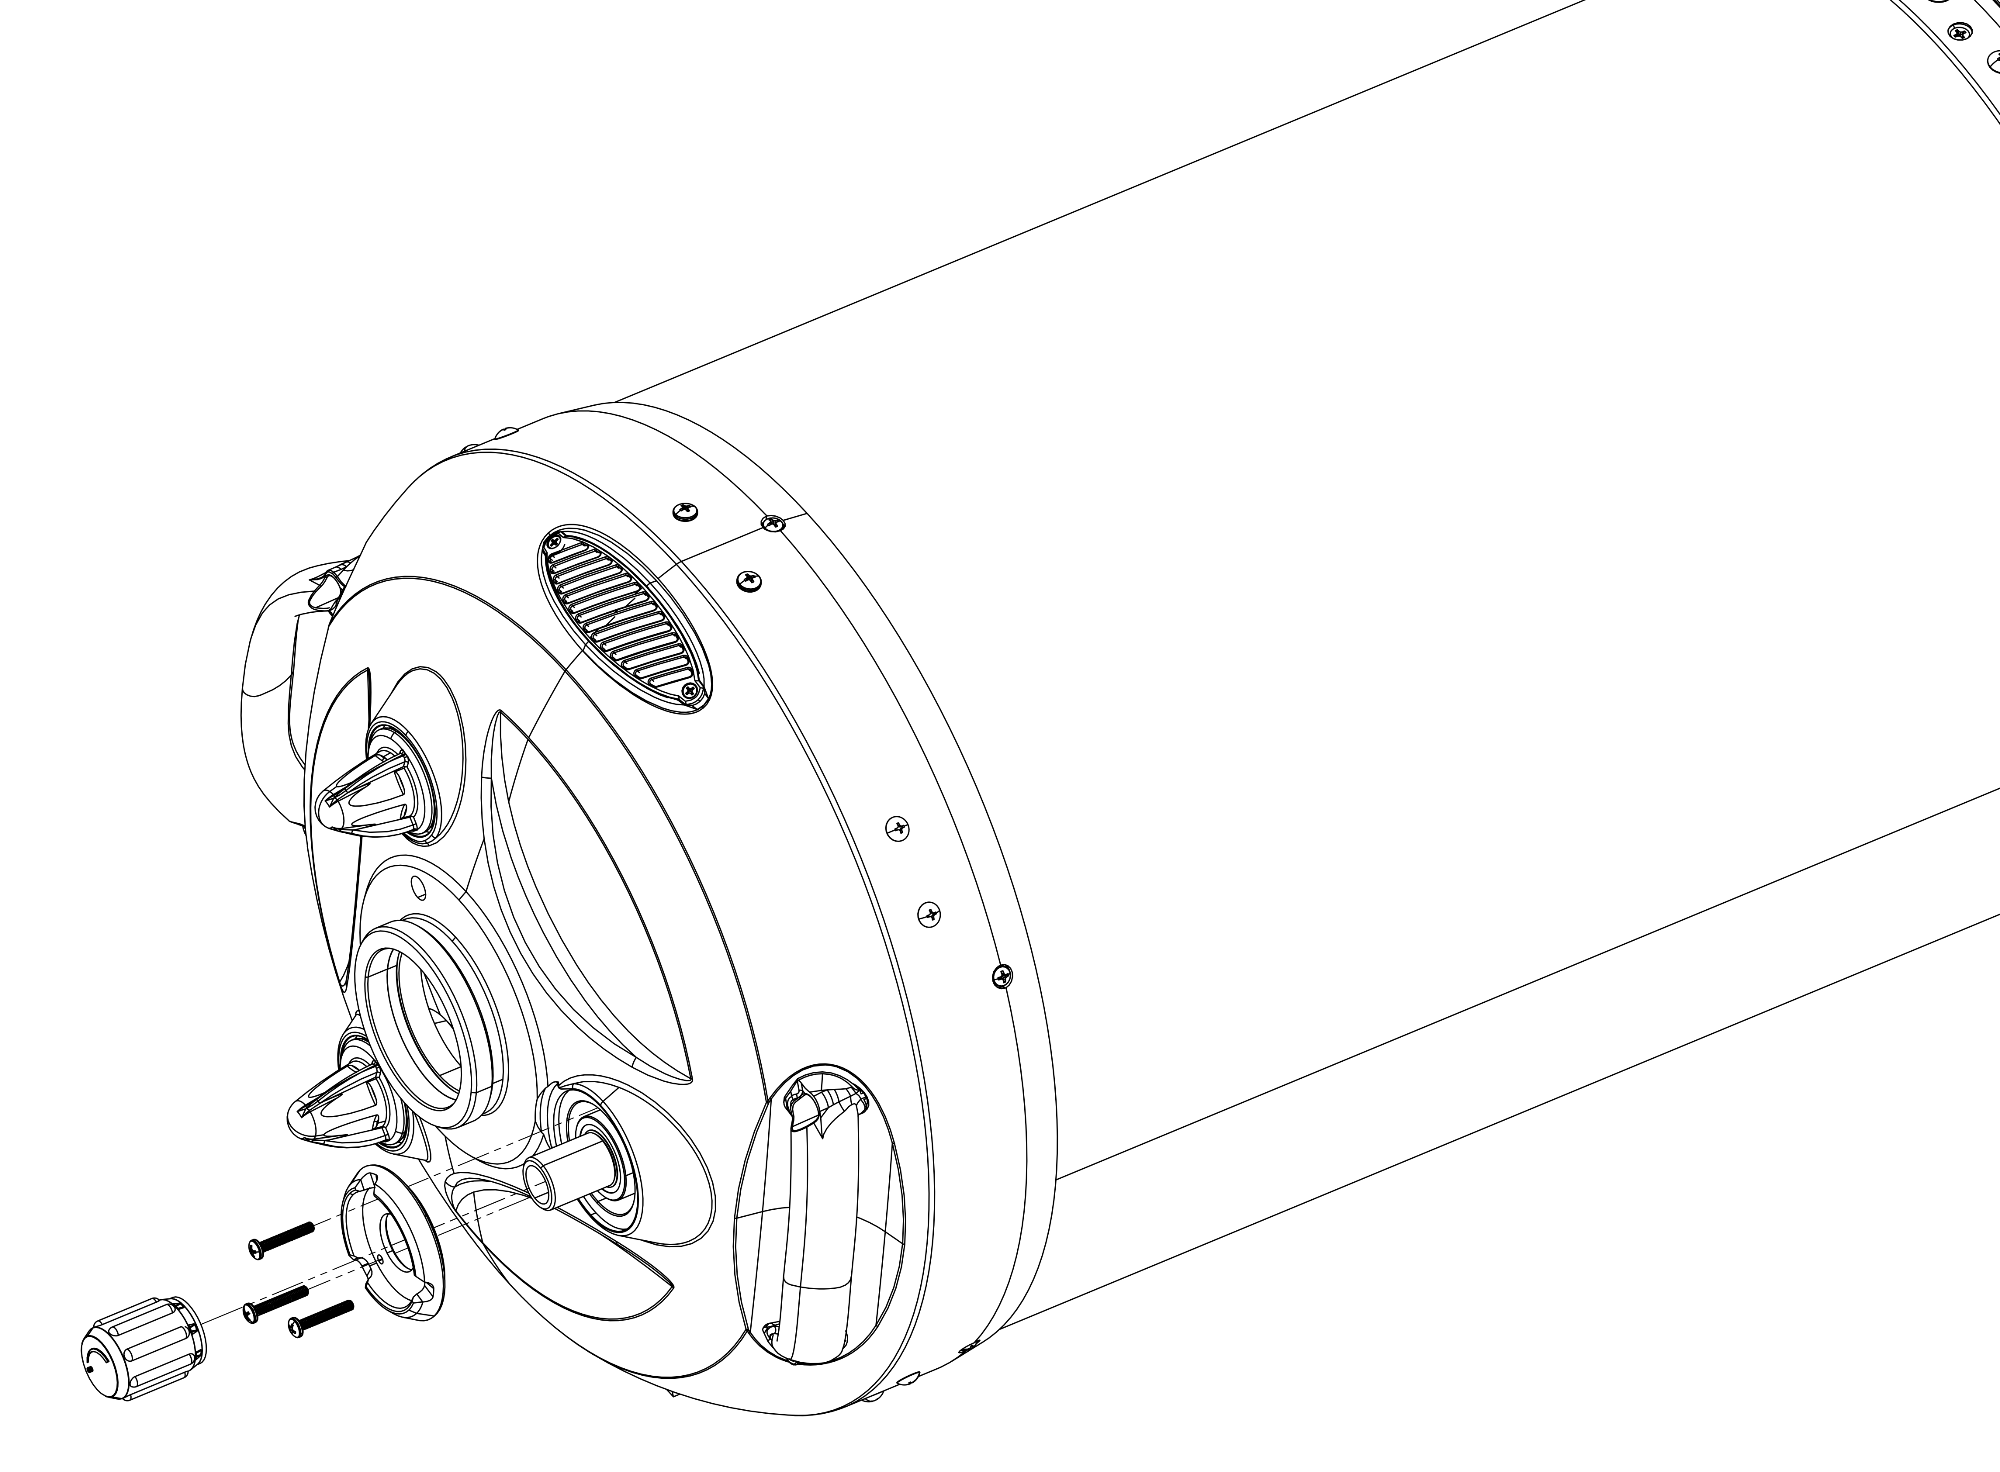
Before starting the installation, position your SC-type telescope horizontally. This helps prevent the primary mirror from shifting during the installation process. Start by firmly pulling off the rubber focus knob from the telescope’s focuser. A moderate amount of force may be required, as the knob is typically pressed onto the shaft. Once the knob is removed, loosen the locking screws that secure the retaining ring around the focuser shaft using a suitable hex key or screwdriver. After loosening the screws, remove the retaining ring completely, exposing the internal shaft of the focusing mechanism.
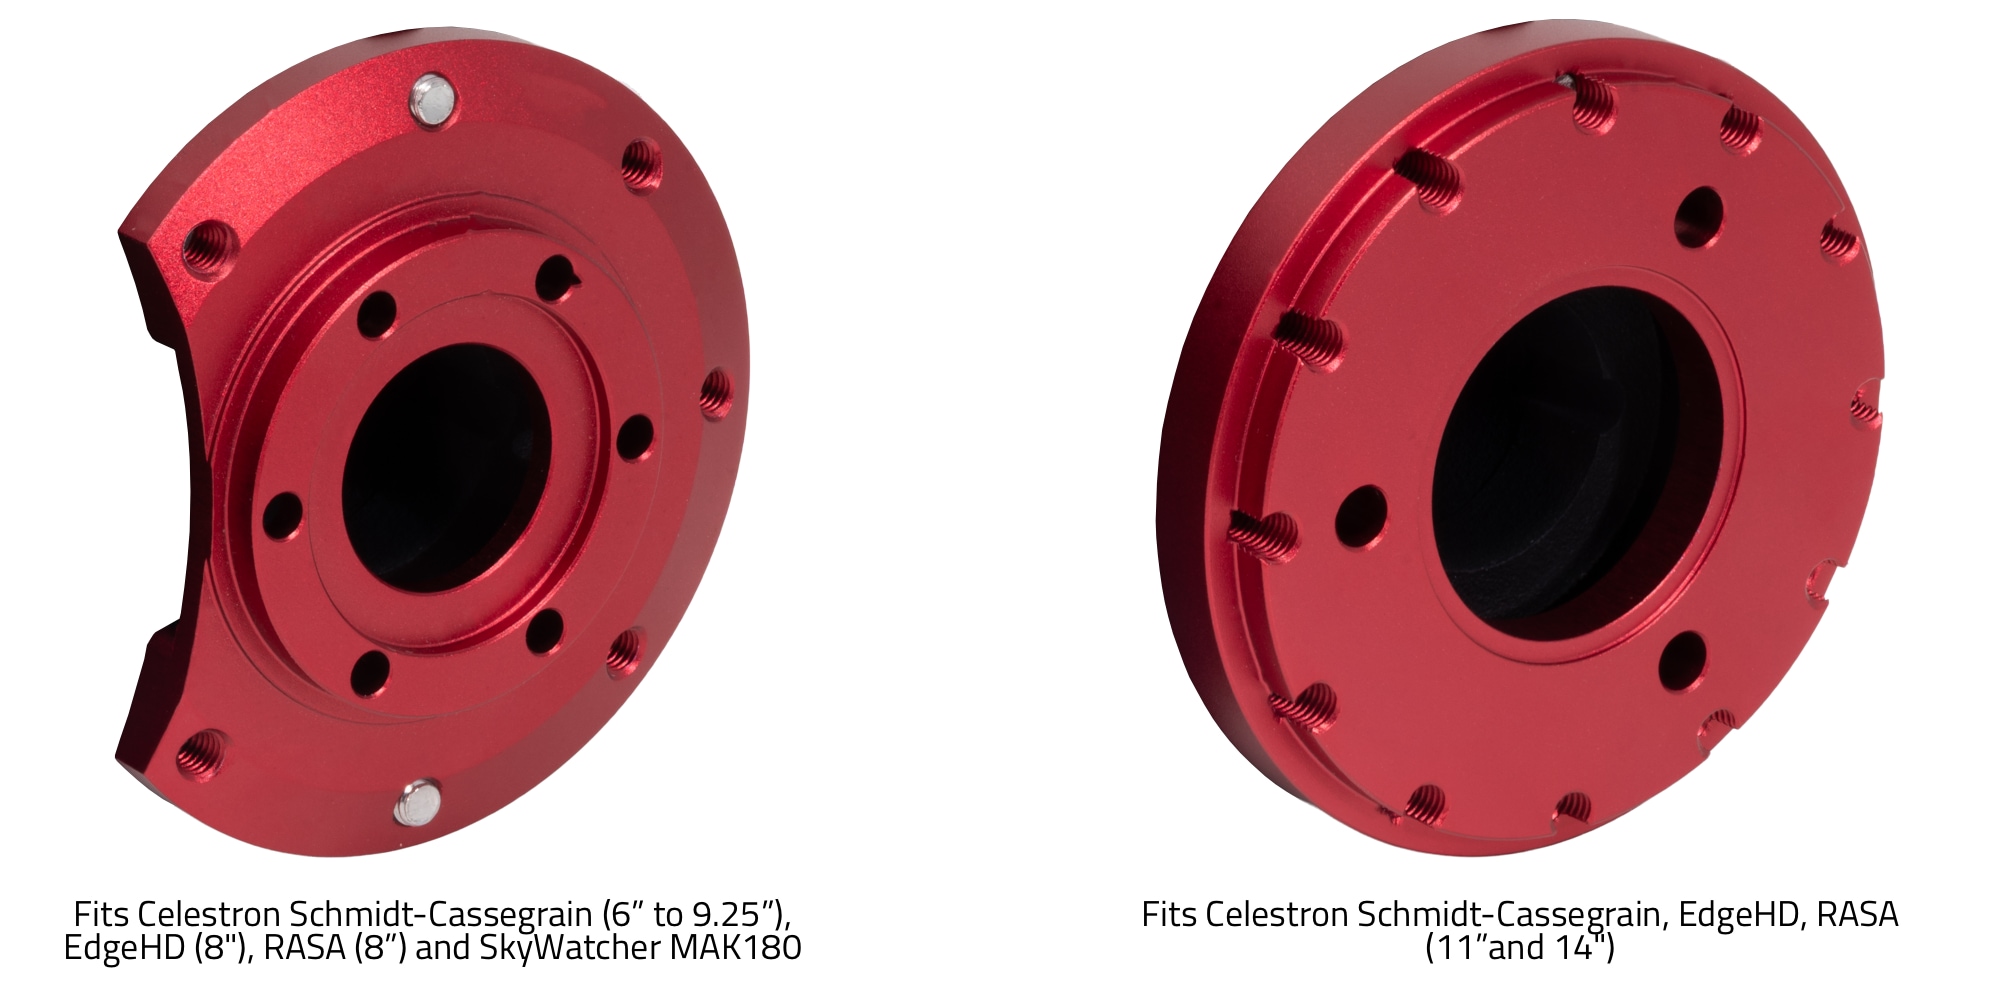
SESTO SENSO 3 SC includes different mechanical adapters to ensure compatibility with a wide range of SC type telescopes. At this stage, you need to identify which adapter matches your specific telescope model. Use the smaller adapter (left in the image) if you have a Celestron SC (6” to 9.25”), EdgeHD (8″), RASA (8”) and SkyWatcher MAK180. Use the larger adapter (right in the image) if you have a Celestron SC, EdgeHD, or RASA in the 11” or 14” size. Select the correct adapter and have it ready for the next step of the installation.
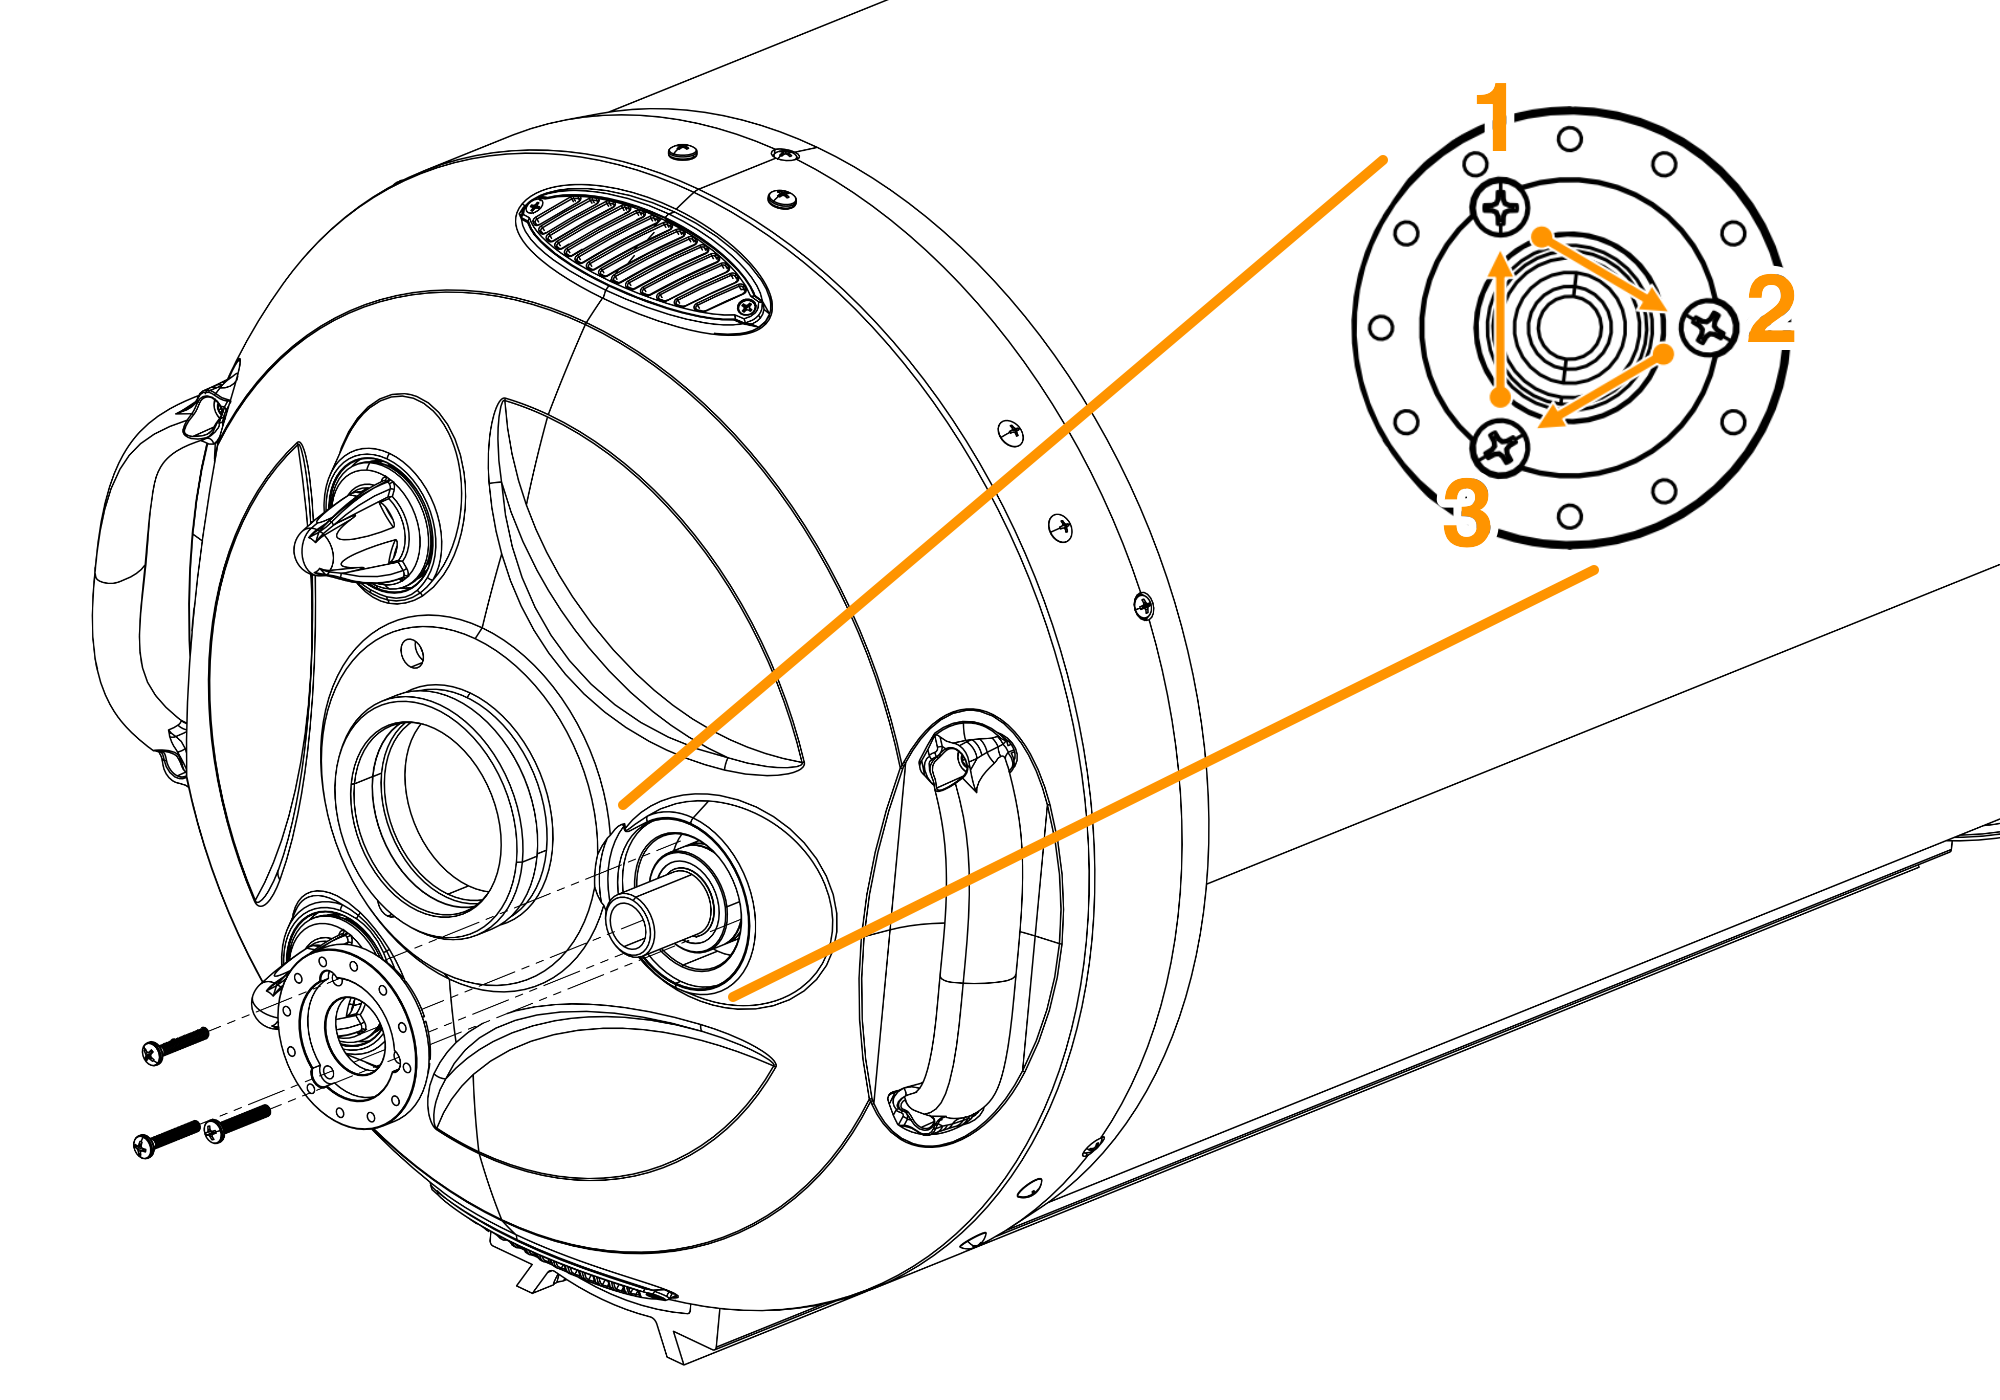
Using the same screws you removed in Step 1, attach the SESTO SENSO 3 SC adapter to your telescope. This adapter replaces the original retaining ring that came with your SC telescope and provides the mounting base for the motor. Before fully tightening the screws, make sure the cylinder of the telescope’s focuser shaft is properly centered within the inner diameter of the SESTO SENSO 3 SC adapter. This is important to ensure smooth and precise movement. To avoid stressing the internal focuser bearing, tighten the three screws gradually and in sequence start with the first screw (1) and tighten it lightly; then move to the second screw (2) in a clockwise direction, and tighten it lightly as well; then proceed to the third screw (3), again tightening it just a little. Repeat this pattern in multiple passes, gradually tightening each screw while keeping the cylinder concentric with the adapter. The screws should be tight enough to eliminate any lateral movement, but not so tight that they bind the focuser mechanism.
Depending on the design of your telescope’s focuser shaft, you may need to insert the provided shaft adapter into the SESTO SENSO 3 SC motor. This adapter ensures a secure and precise connection between the motor and your telescope’s focusing shaft. If needed for your telescope (usually 6” through 9.25” models), insert the adapter into the rear of the SESTO SENSO 3 SC motor (the side that faces the telescope).
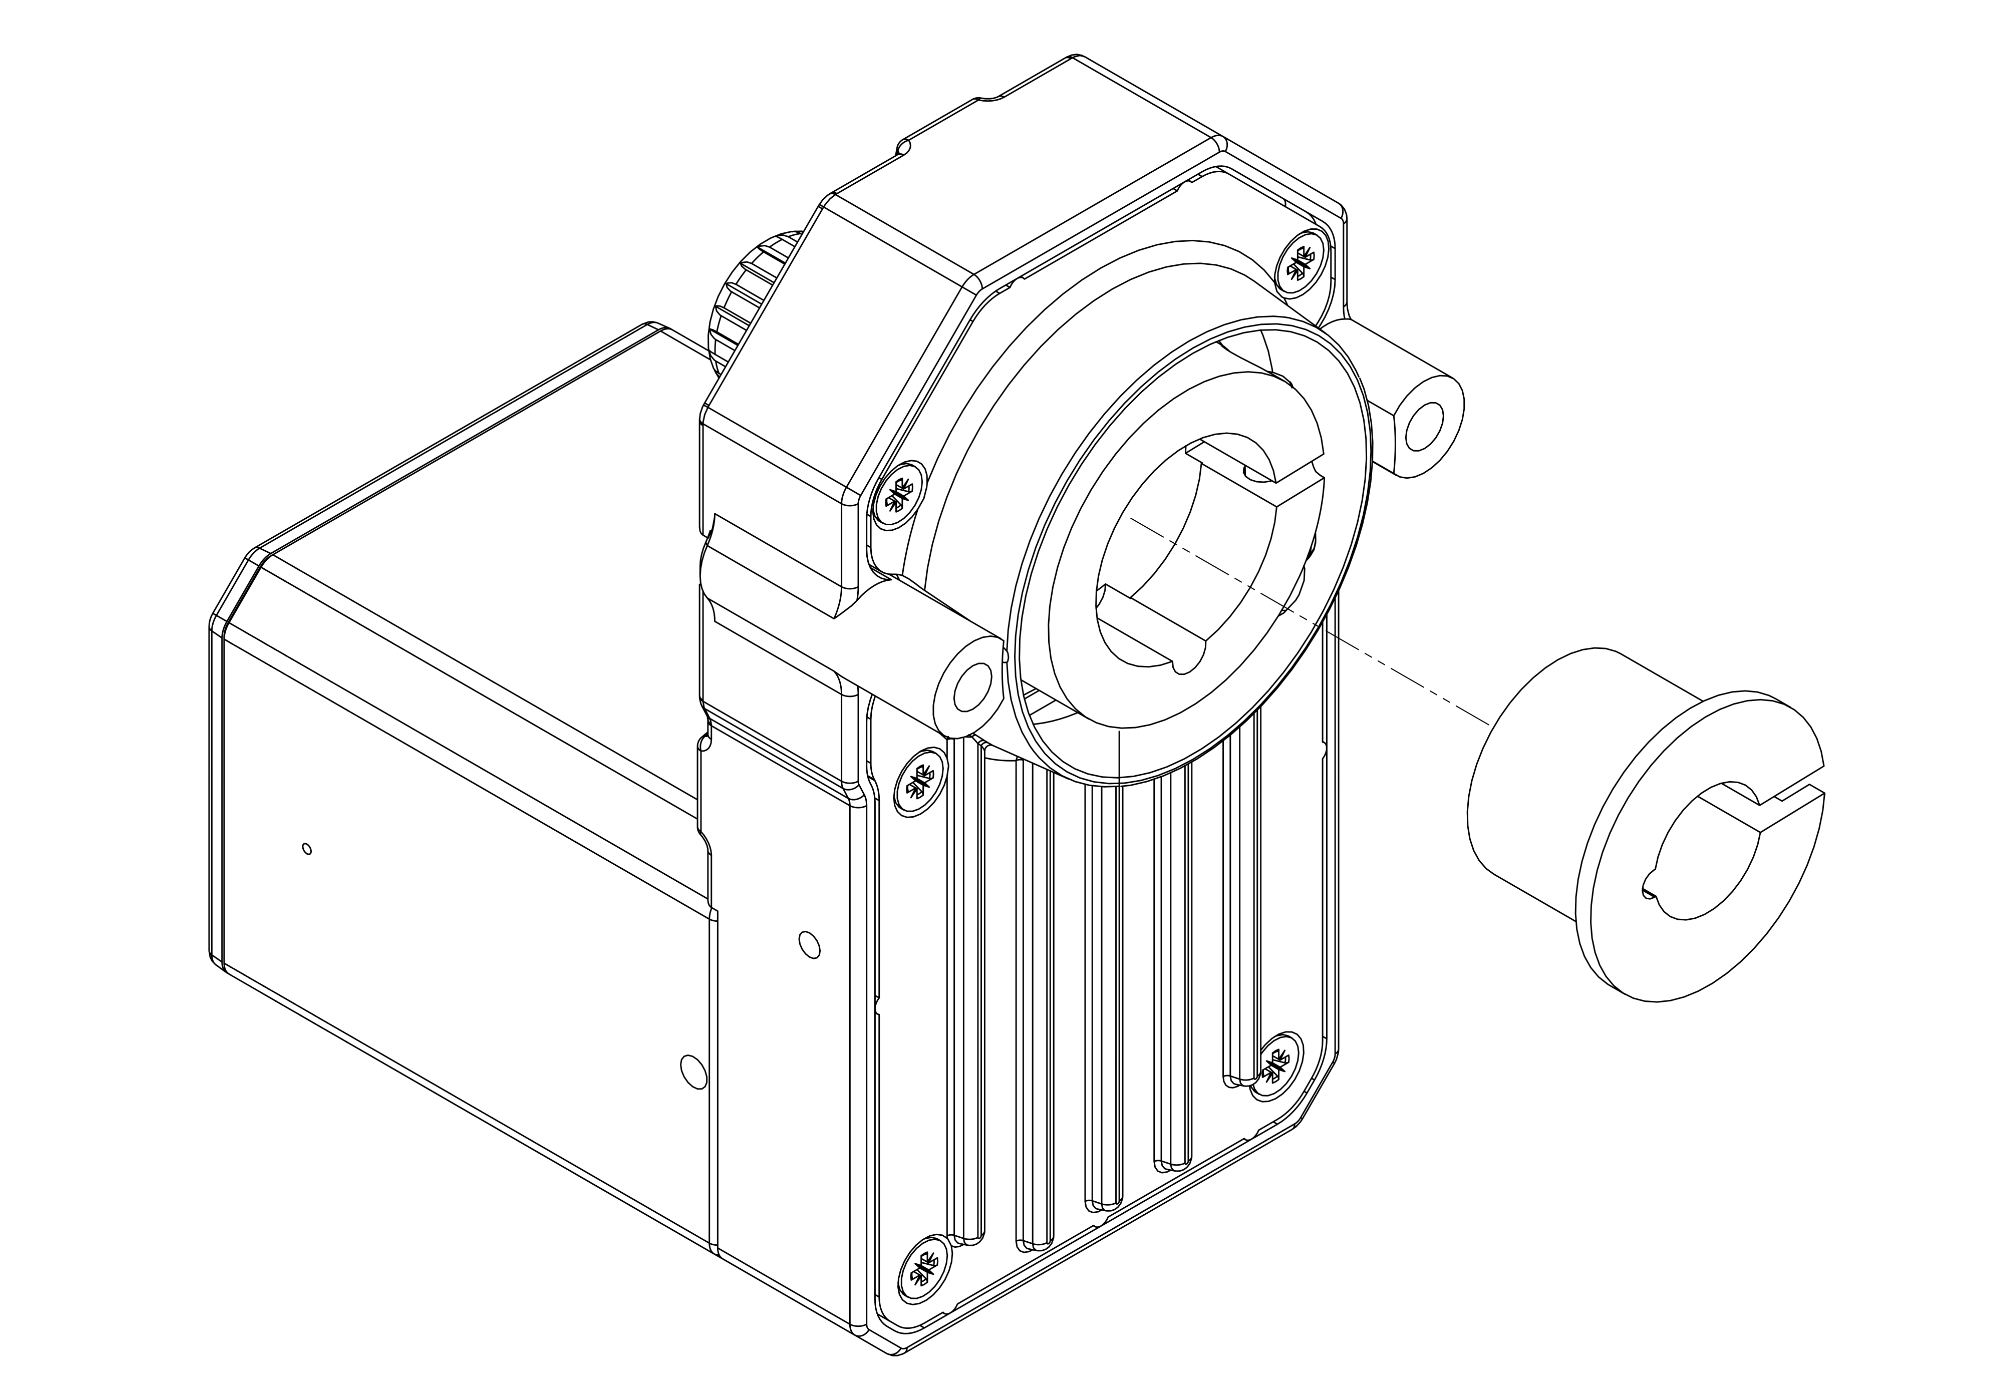
Then, gently push the SESTO SENSO 3 SC motor onto the focuser shaft (4), making sure it slides on smoothly without forcing. The motor should fit snugly over the shaft, aligning naturally with the previously installed red adapter plate. Rotate the manual focus knob on the SESTO SENSO 3 SC motor (5) to align the side hole on the motor’s bushing with the internal locking screw. Once aligned, insert the Allen key and tighten the screw (6) to firmly lock the SESTO SENSO 3 SC motor shaft to your telescope’s focuser shaft.
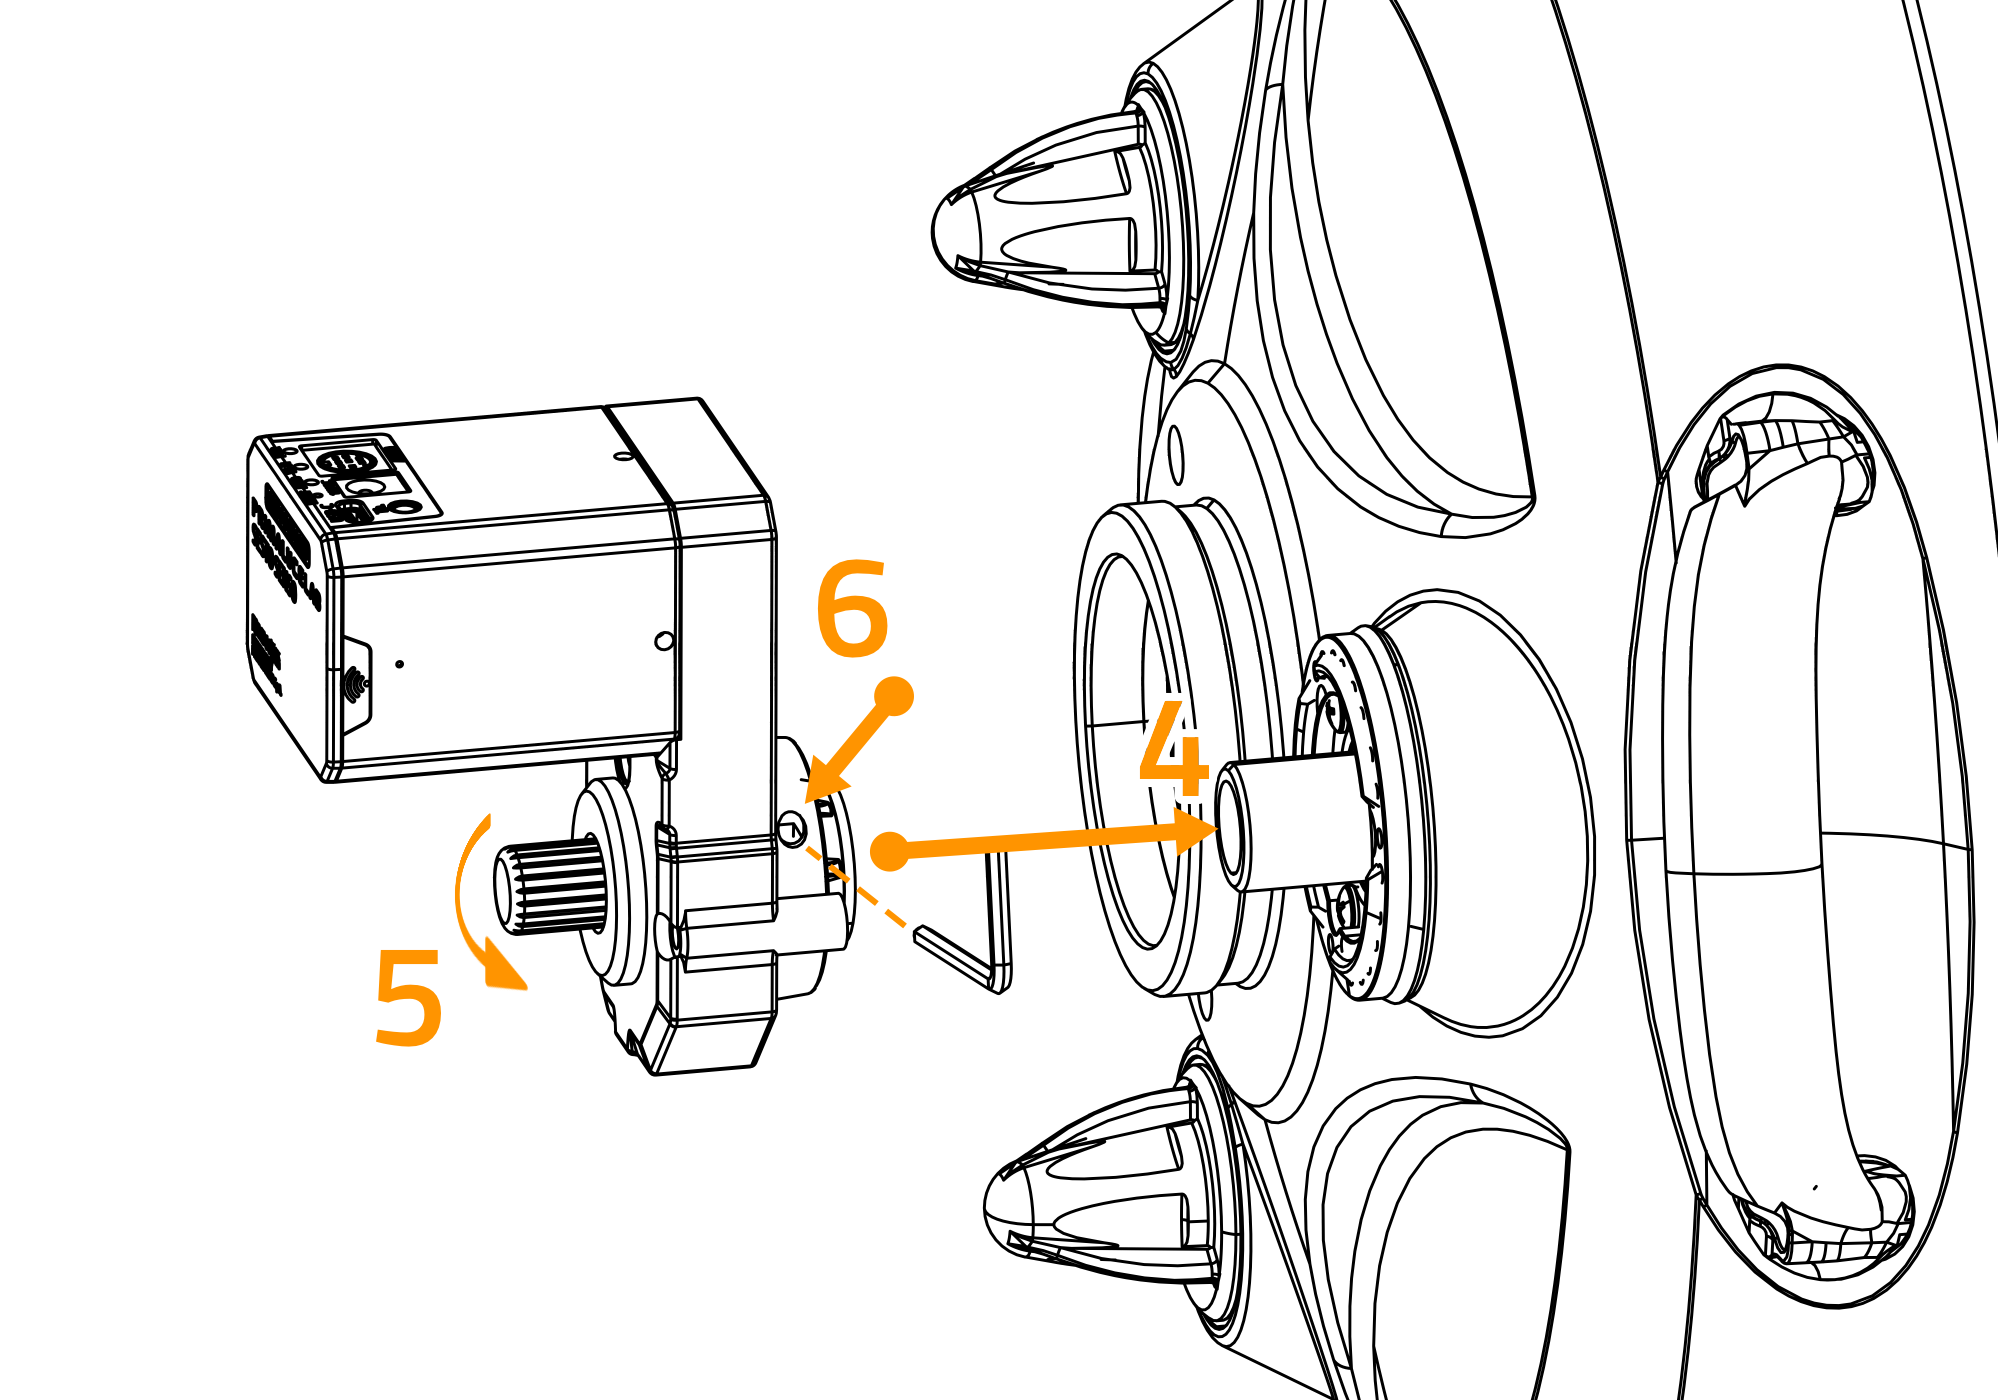
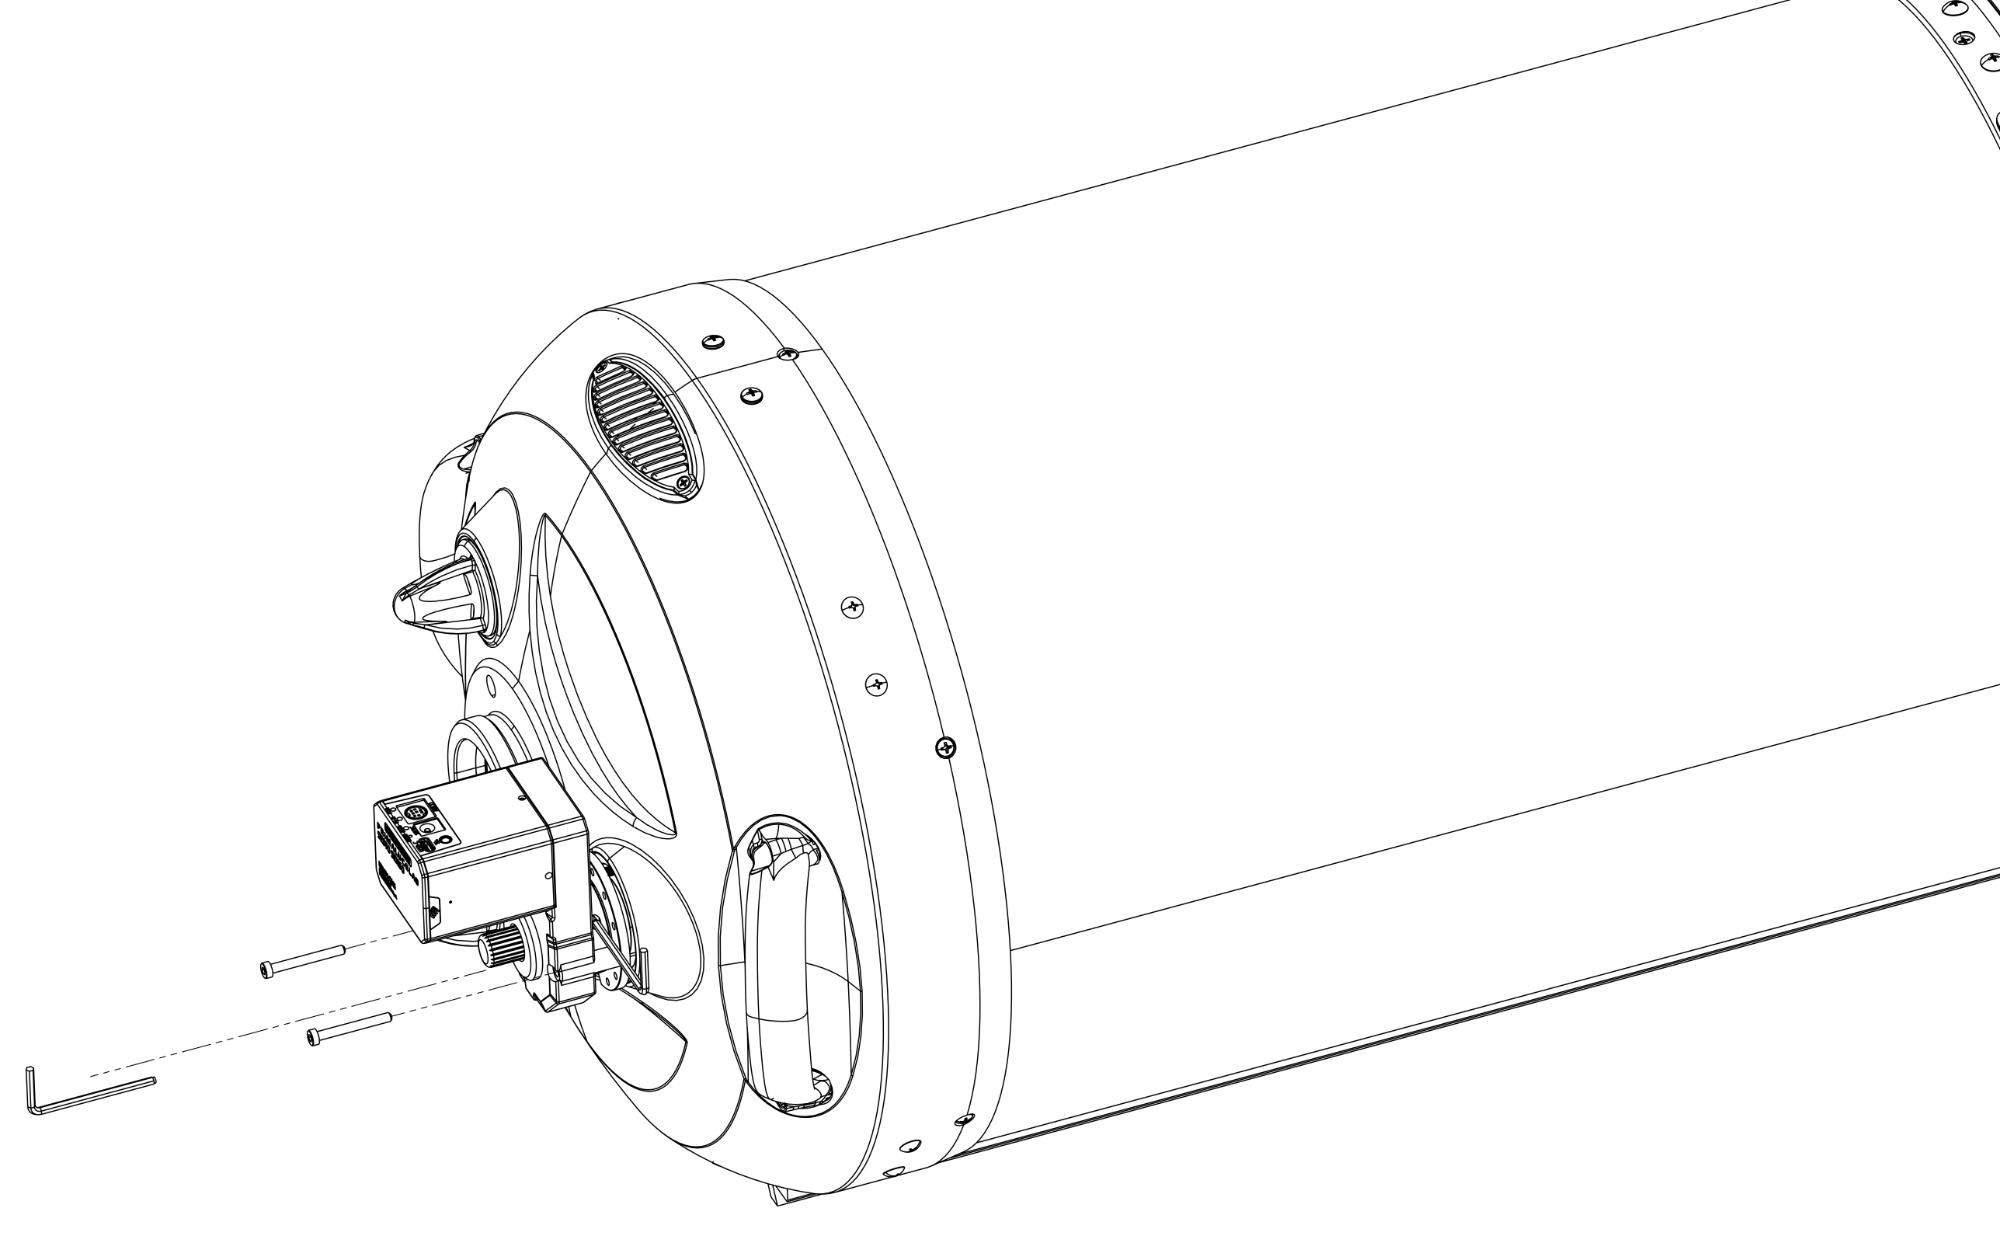
Next, rotate the entire SESTO SENSO 3 SC motor body to find the orientation that best fits your setup and cable management needs. Once you’ve found the desired position, secure the motor body by tightening the two screws that connect it to the SESTO SENSO 3 SC adapter you installed in Step 3. Before powering SESTO SENSO 3 SC on, we recommend manually turning the focuser knob to check that the movement is uniform. It is normal for the rotation to feel stiffer than before, since the motor is now engaged, but the motion should still remain consistent. If you notice irregular movements, please repeat the installation procedure and/or check the mechanical condition of your focuser. Your SESTO SENSO 3 SC installation is now complete and ready for operation.
Please keep in mind that SESTO SENSO 3 SC, like any focusing motor, works in conjunction with the mechanical characteristics of your telescope’s internal focuser. Since it directly controls the movement of the primary mirror, the precision and repeatability of focusing will not only depend on the SESTO SENSO 3 SC motor, but also on the mechanical quality and stability of your telescope’s internal focusing system.