

SESTO SENSO 3 is the third generation of our robotic focusing motor, designed to connect directly to the shaft of your telescope’s focuser without the need for external brackets, thanks to the improved Self Centering Clamp 2 (SCC2). Unlike the previous generation, the new SCC2 supports multiple shaft diameters without the need of external adapters — 25mm, 26mm, 33mm, and 37mm — allowing for faster installation and a more secure mechanical coupling with a wider range of focusers. SESTO SENSO 3 connects directly to 37mm shafts, and by using one of the included adapters, it can also connect to 25mm, 26mm, or 33mm shafts. This means you don’t need to purchase additional adapters, and moving SESTO SENSO 3 between compatible instruments becomes much easier.
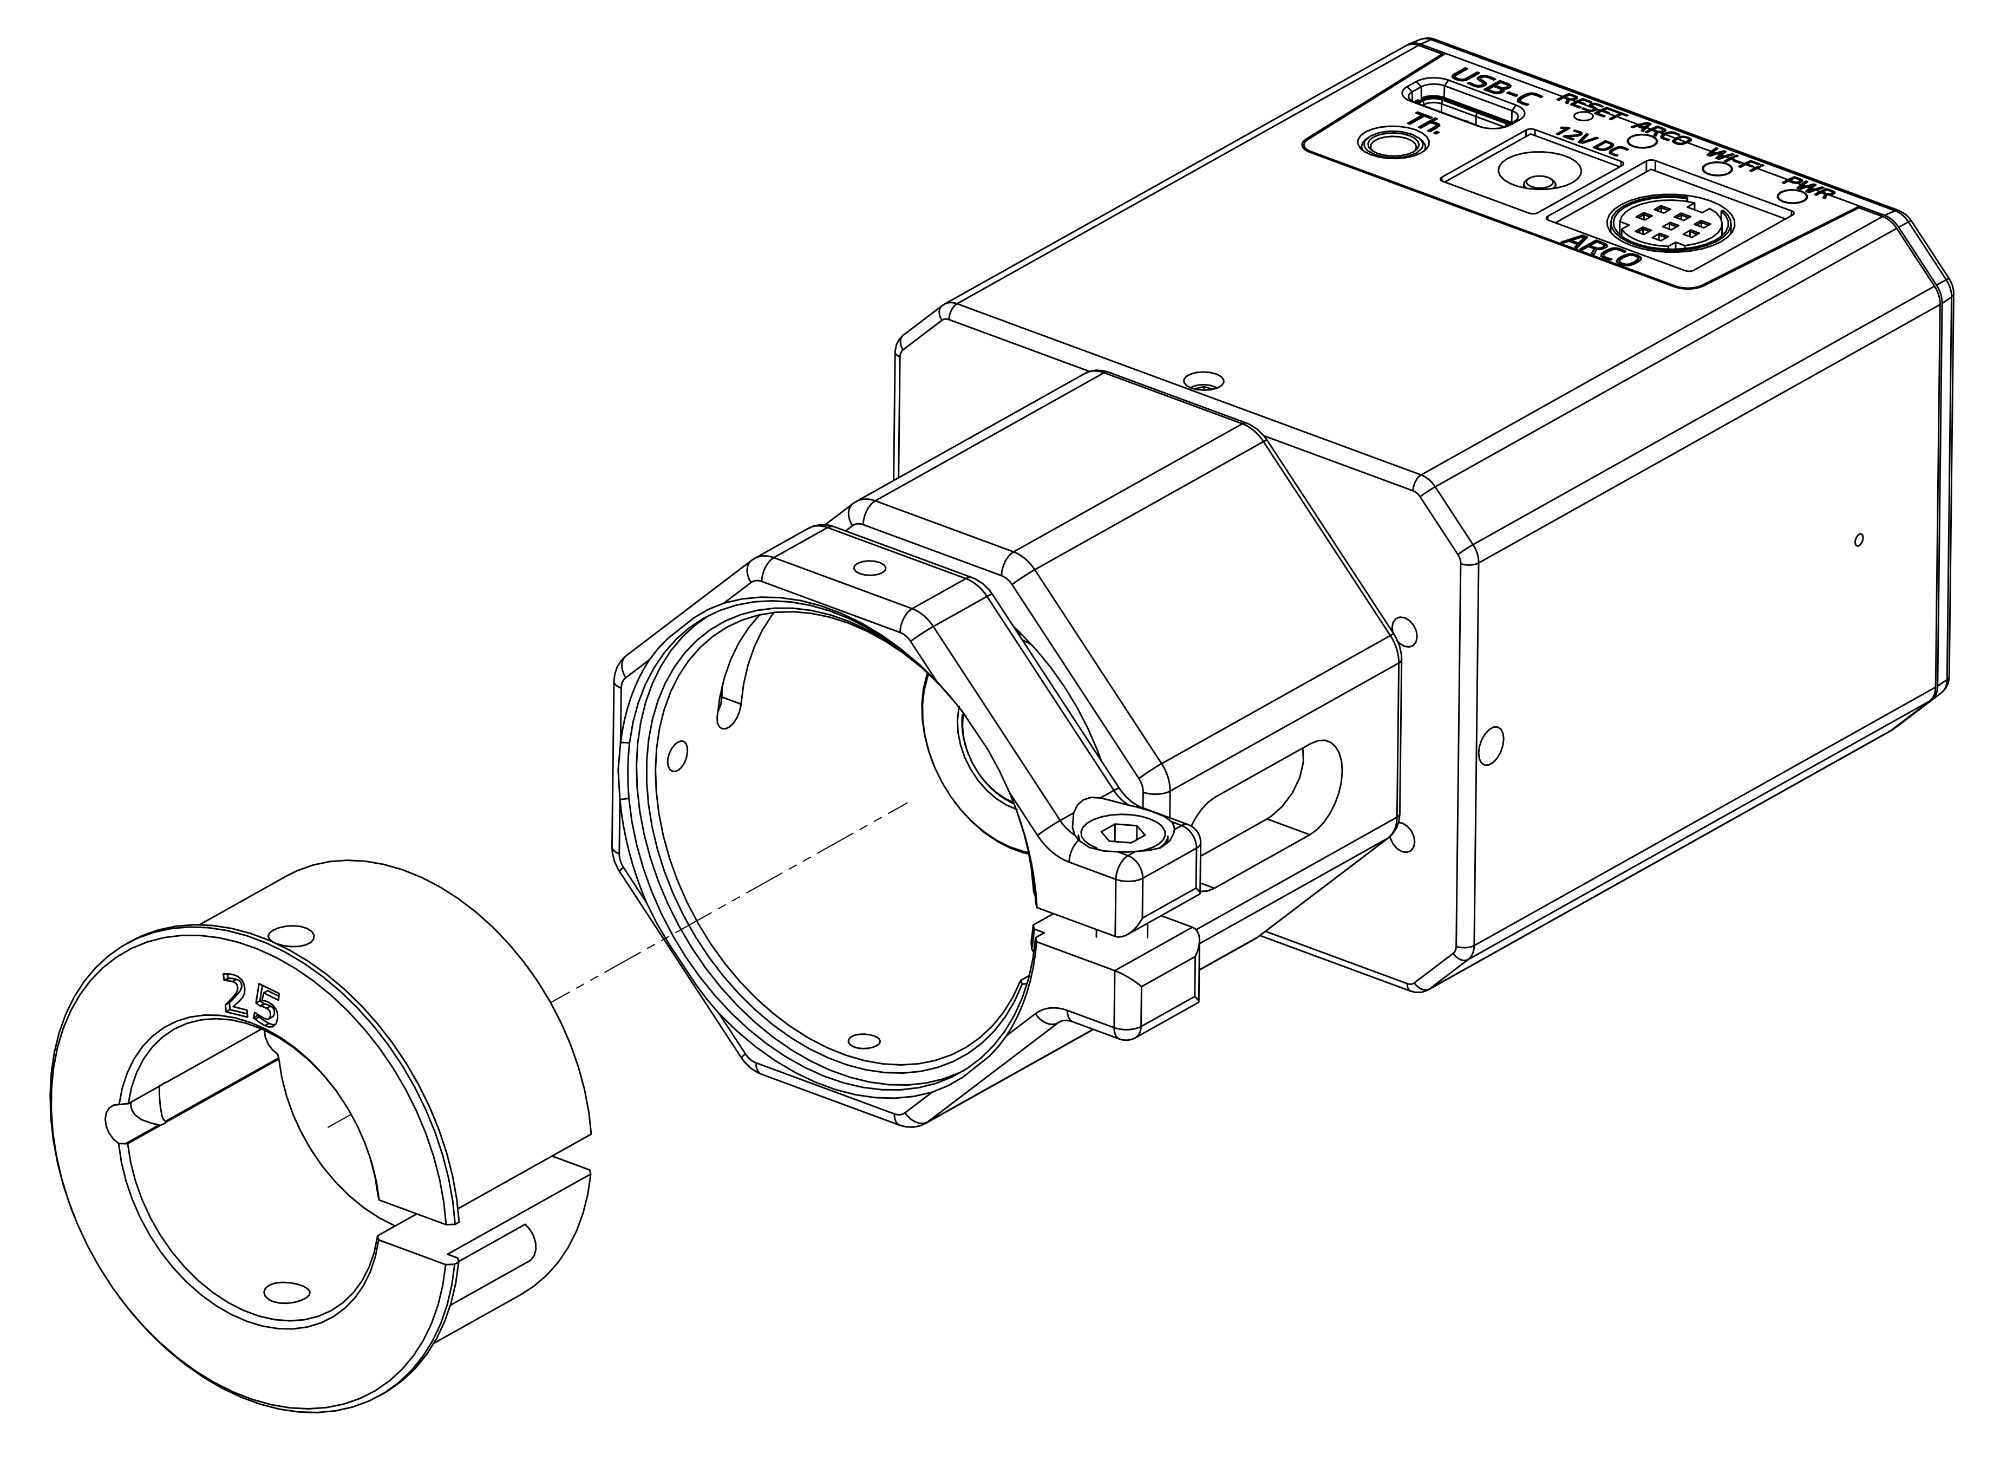
To install SESTO SENSO 3, start by removing the manual focusing knobs from your telescope’s focuser. First, remove the micrometric knob by loosening the small screw usually located on the side of the knob. Once that is done, remove the coarse knob by loosening the Allen screw that secures it. On some focusers, especially those with plastic coverings, you may need to remove the plastic housing to access the screws. Connect one of the bushings you find in the SESTO SENSO 3 box (based on the diameter that fits your focuser) to the small focuser shaft of your focuser.
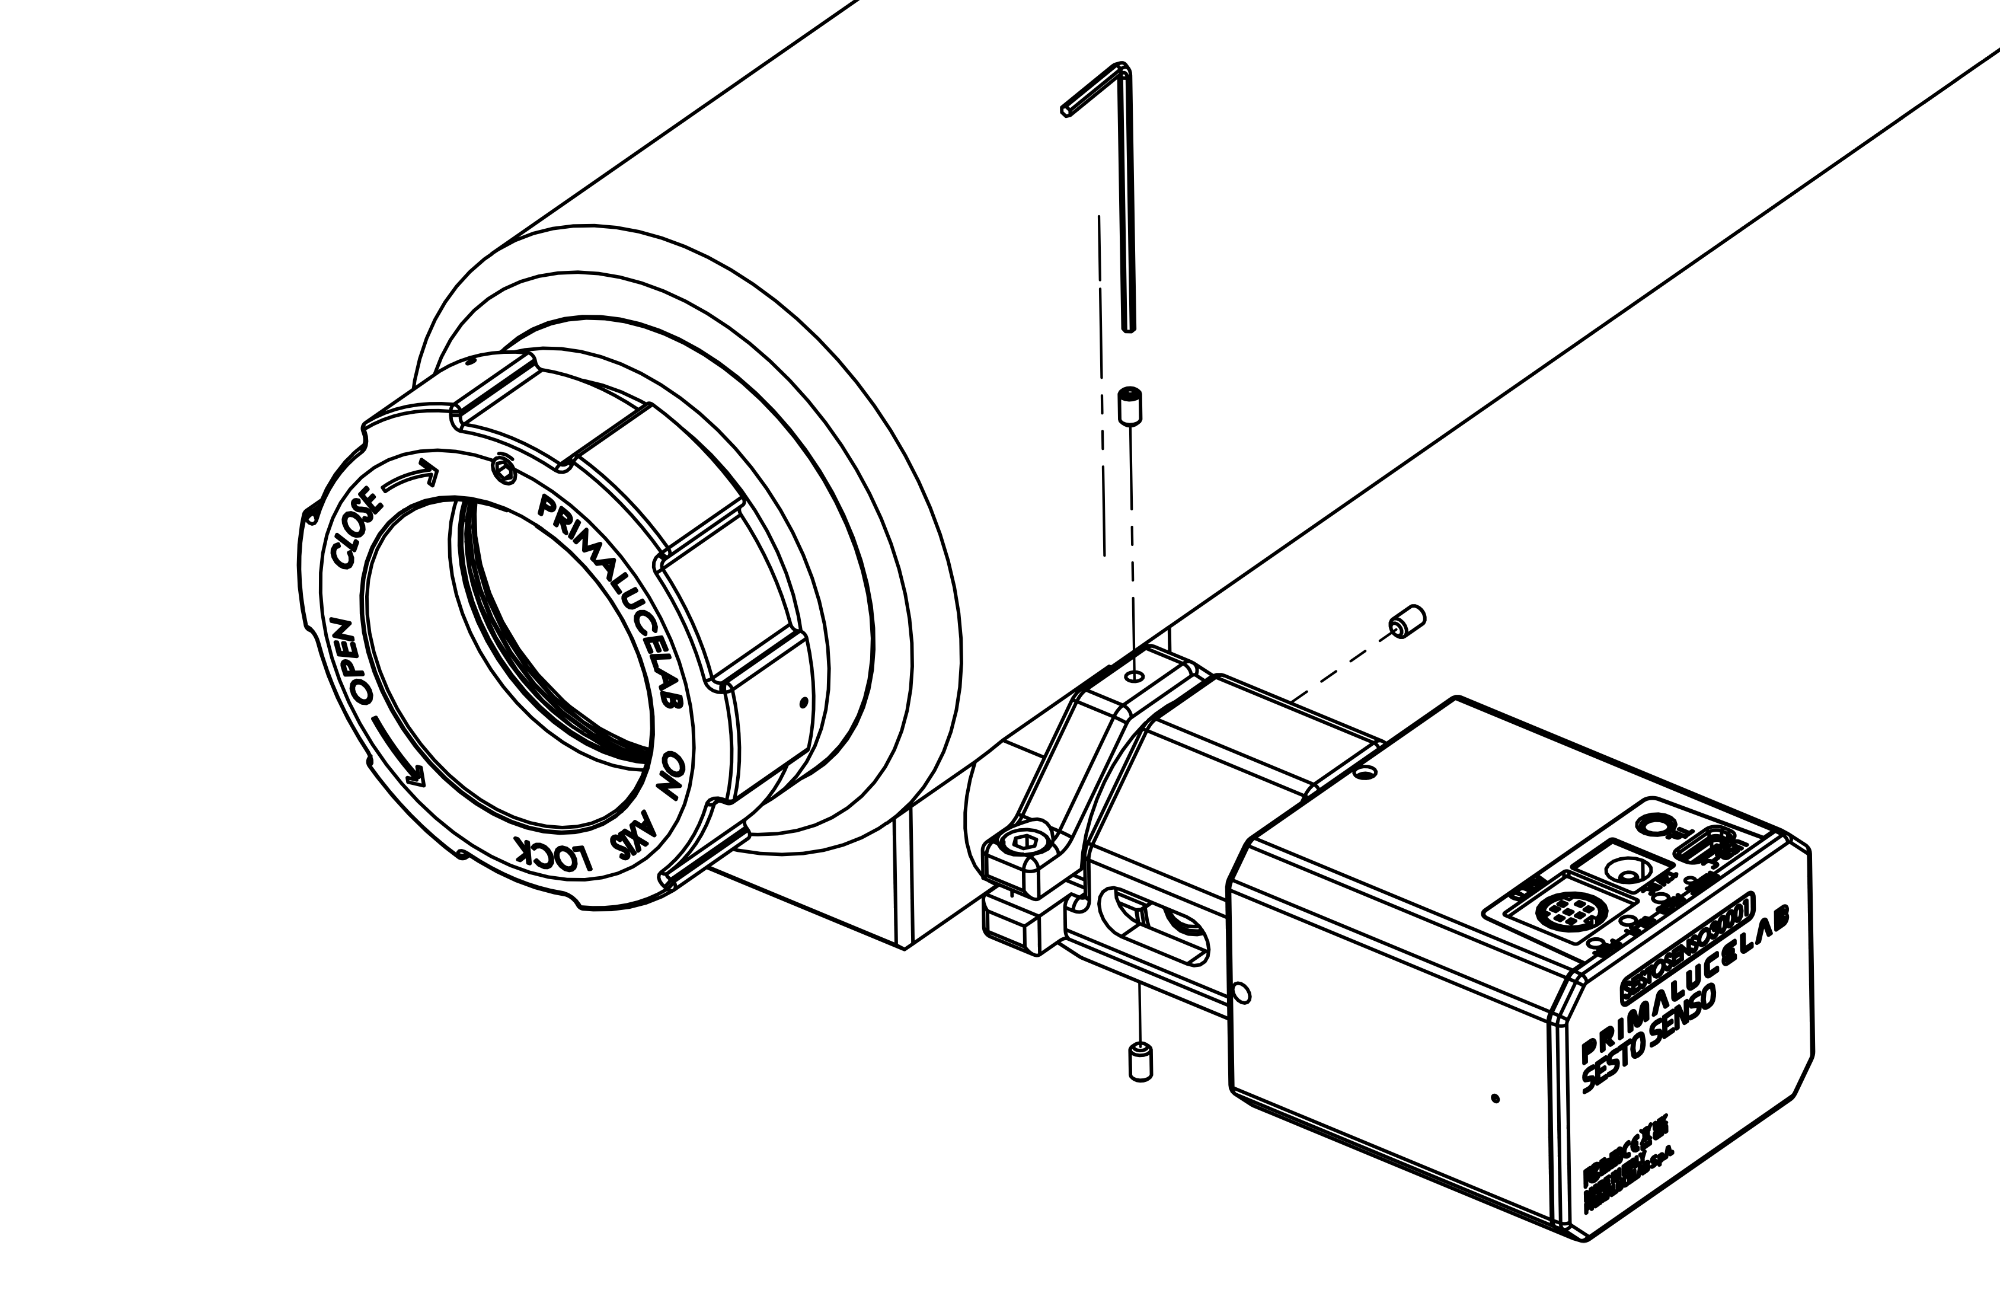
Next, select the adapter included in the SESTO SENSO 3 box that matches your focuser’s shaft diameter. If your focuser has a 37mm shaft, you won’t need any adapter — SESTO SENSO 3 will connect directly. If your focuser has a 25mm, 26mm, or 33mm shaft, insert the correct adapter onto the shaft. Focusers with different diameter shaft are not supported.
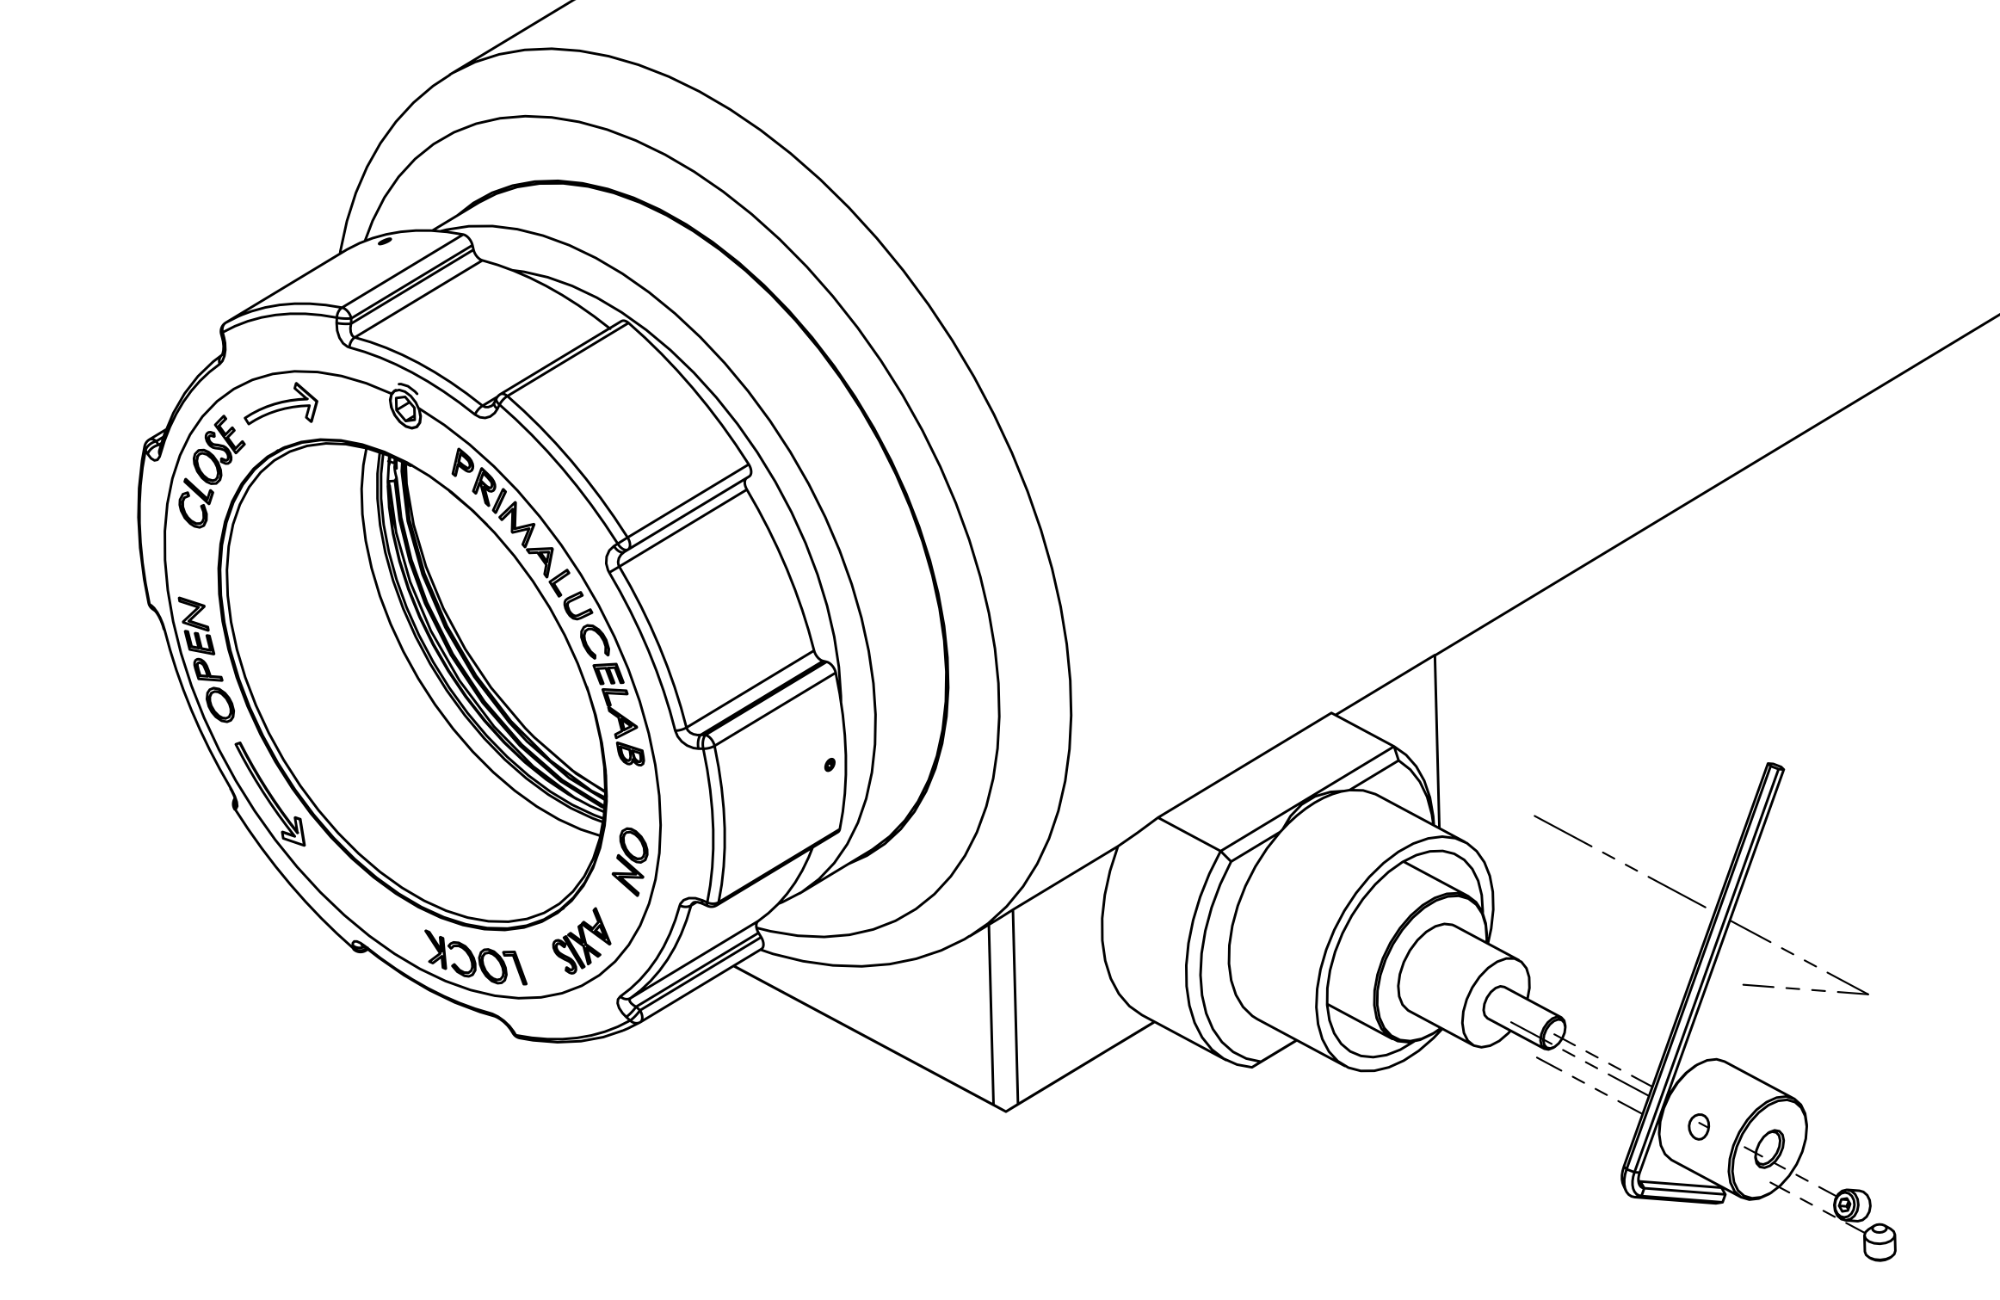
You can now connect SESTO SENSO 3 to your focuser by aligning the motor shaft with the shaft of your focuser or the installed adapter. Push SESTO SENSO 3 into position until it stops. Then, using the included Allen key, tighten the two grub screws on the front of SESTO SENSO 3 to lock its internal motor shaft to the focuser shaft.
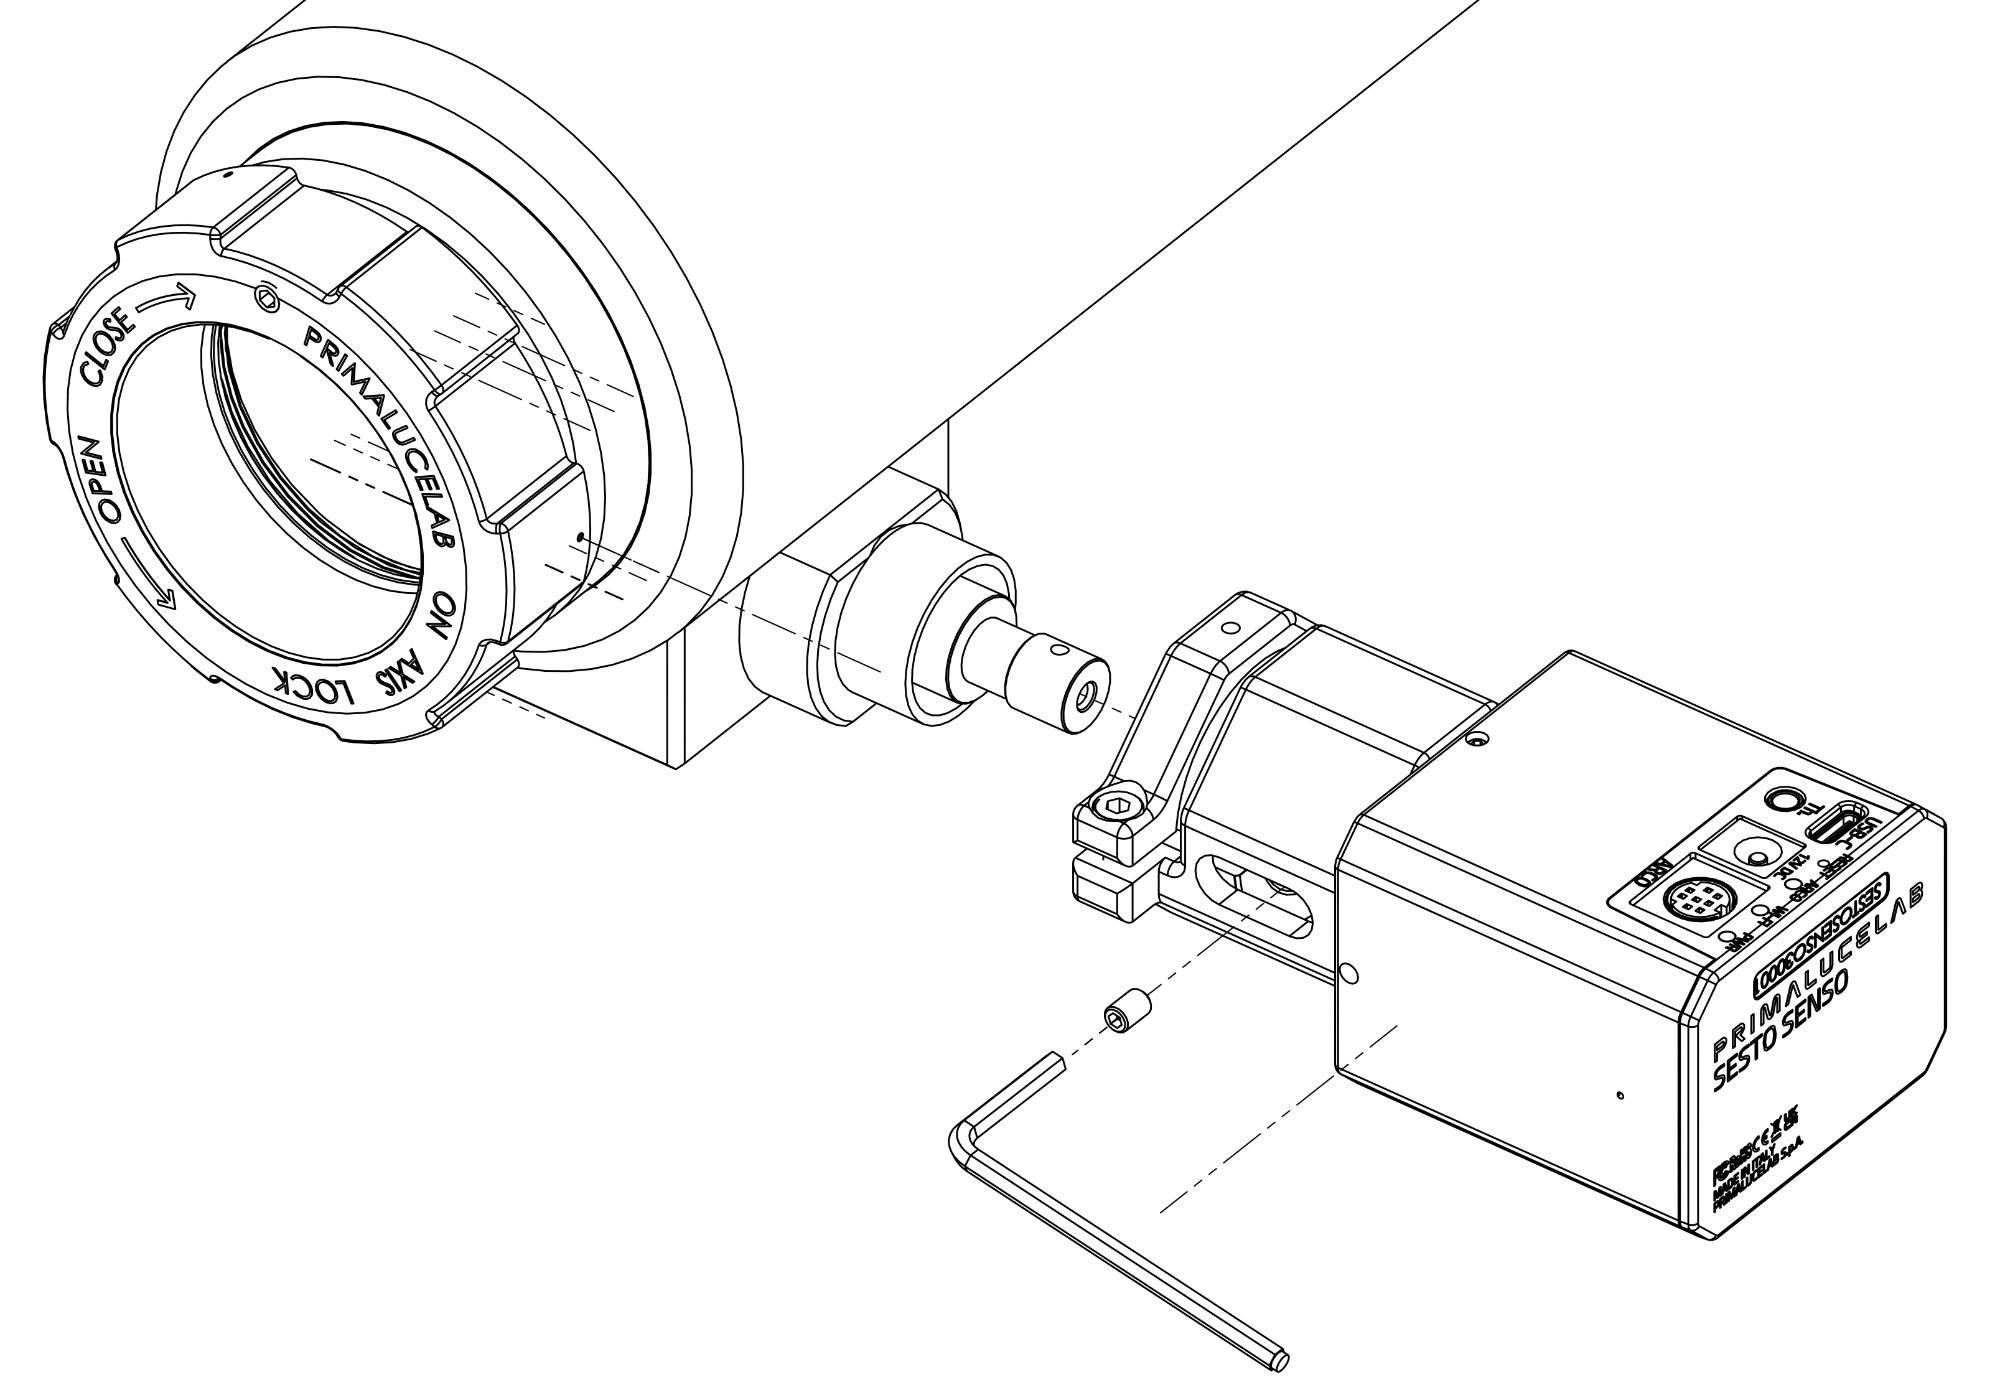
Once the motor shaft is fixed in place, secure SESTO SENSO 3 to the focuser using the main screw on the side of the Self Centering Clamp 2.
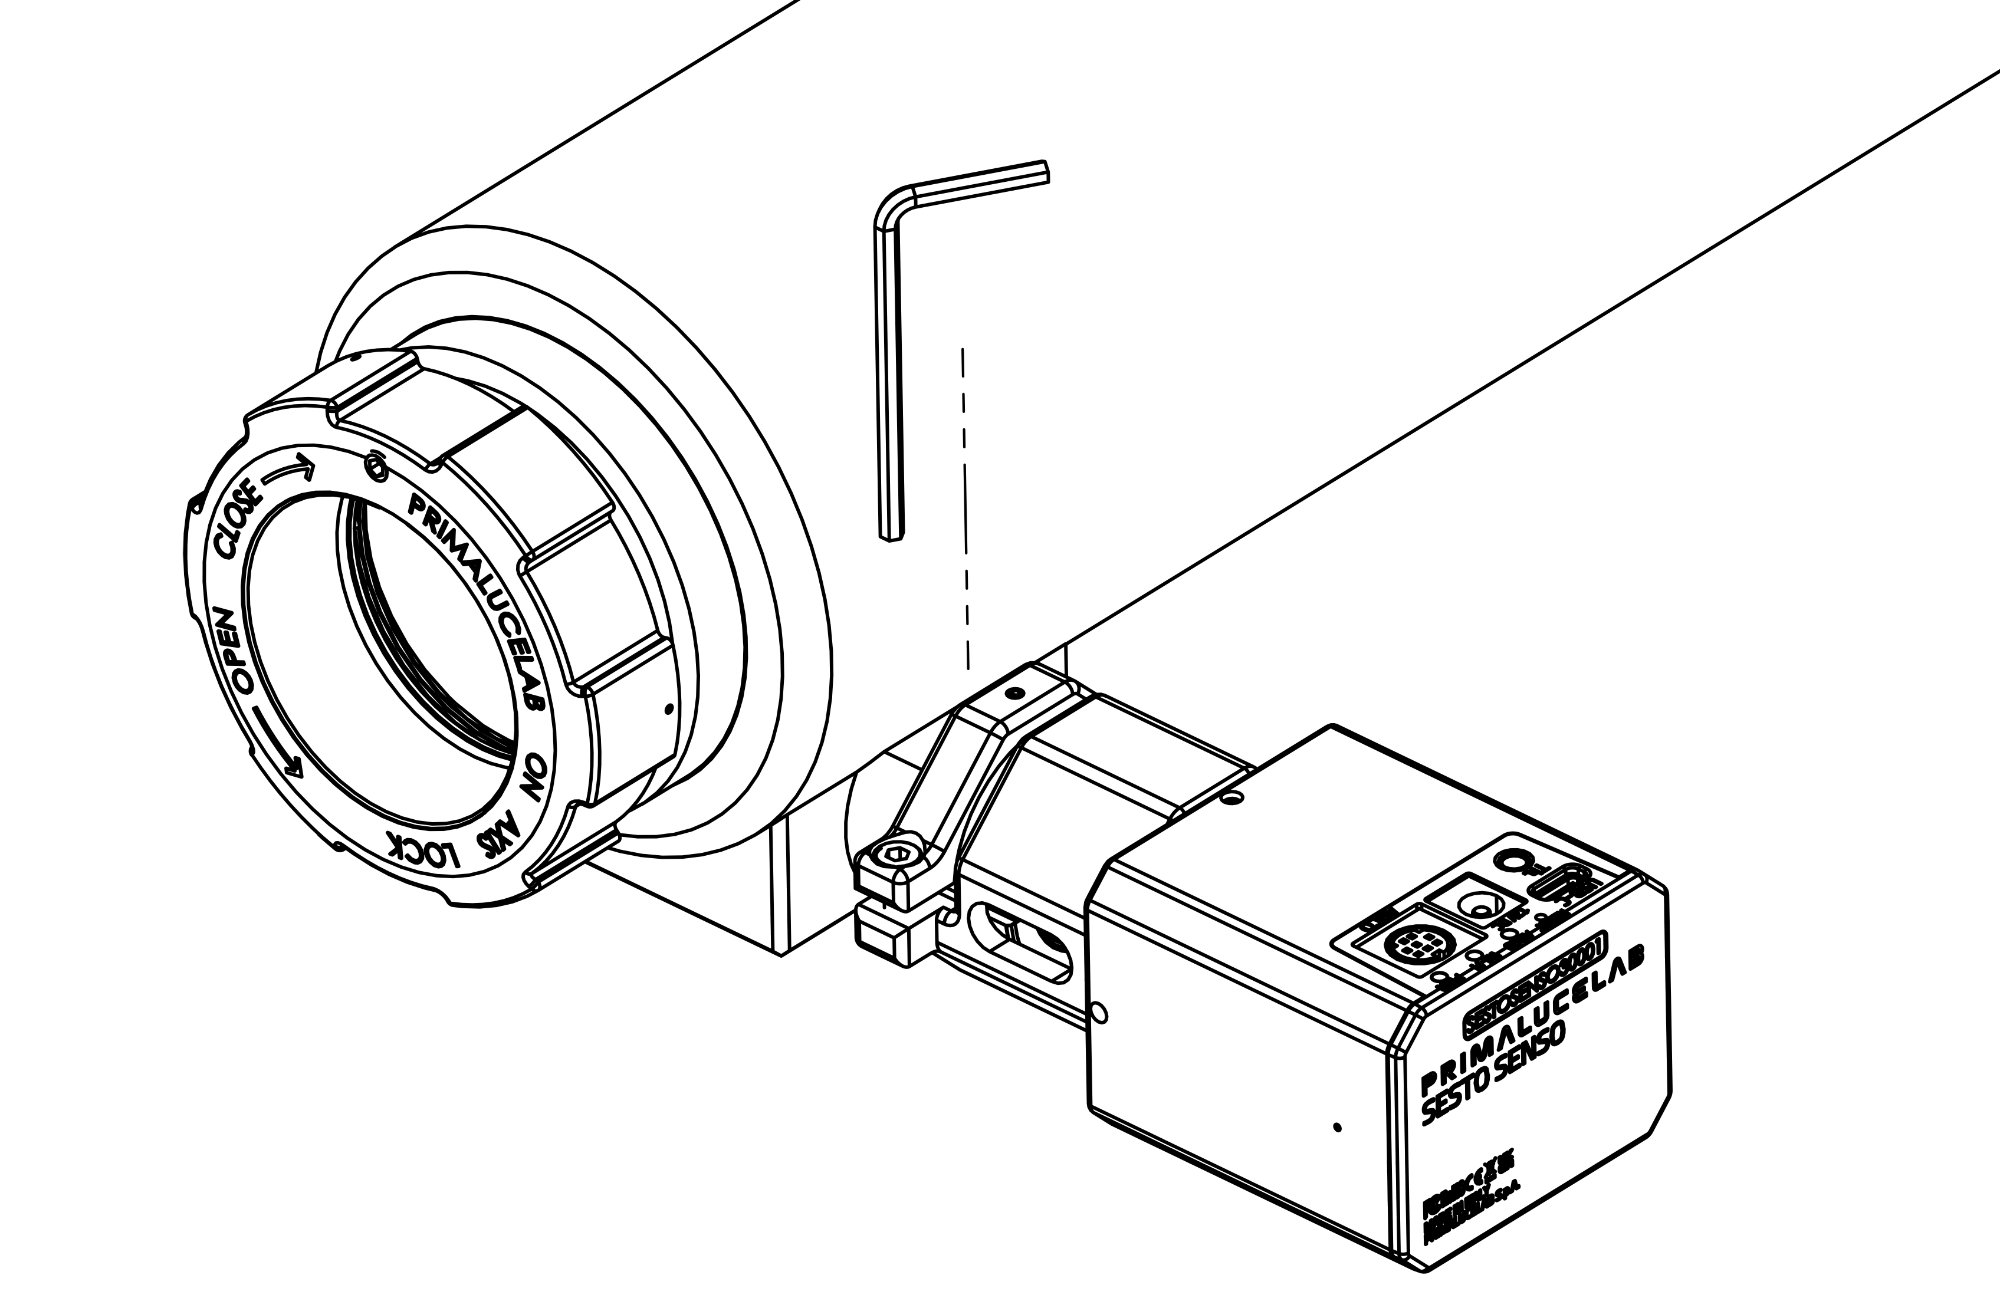
Then, tighten the three smaller set screws around the clamp to ensure everything is firmly locked in place. Before powering SESTO SENSO 3 on, we recommend manually turning the focuser knob to check that the movement is uniform. It is normal for the rotation to feel stiffer than before, since the motor is now engaged, but the motion should still remain consistent. If you notice irregular movements, please repeat the installation procedure and/or check the mechanical condition of your focuser. Your SESTO SENSO 3 installation is now complete and ready for operation.
Please keep in mind that SESTO SENSO 3, like any focusing motor, works in conjunction with the mechanical characteristics of your focuser. Accuracy and repeatability, especially when using automatic focusing, also depend on the build quality and backlash of your focuser.