

ALTO telescope cover motor includes remote control capabilities with specially designed electronics that allow you to connect it to a computer’s USB port and open/close telescope cap. In order to start using ALTO, please follow this procedure:
1) Launch the Windows Device Manager to find a new entry in the COM port list. Please take note of the COM port number your EAGLE or standard Windows computer creates when you connect ALTO (with or without GIOTTO) to USB port since this will be needed to control it from PLAY software (tip: in order to better identify ALTO, you can connect and disconnect the USB cable; you will see the device appear and disappear. The Device Manager list will update automatically).
2) Install PLAY software on your EAGLE or standard Windows computer you want to use to control ALTO. In the folder where you downloaded and unzipped PLAY installation files, please double click on the PLAY-Setup.exe file to start the installation procedure. Please note that ALTO requires at least version 1.5 of PLAY astrophotography software.
3) Launch PLAY astrophotography software and connect to ALTO by selecting “Cover motor” in the left column of the Configurator window. In the window that opens, please select the COM port related to ALTO in Device Manager (noted in the previous step) and click on the connect (chain) icon to connect ALTO.
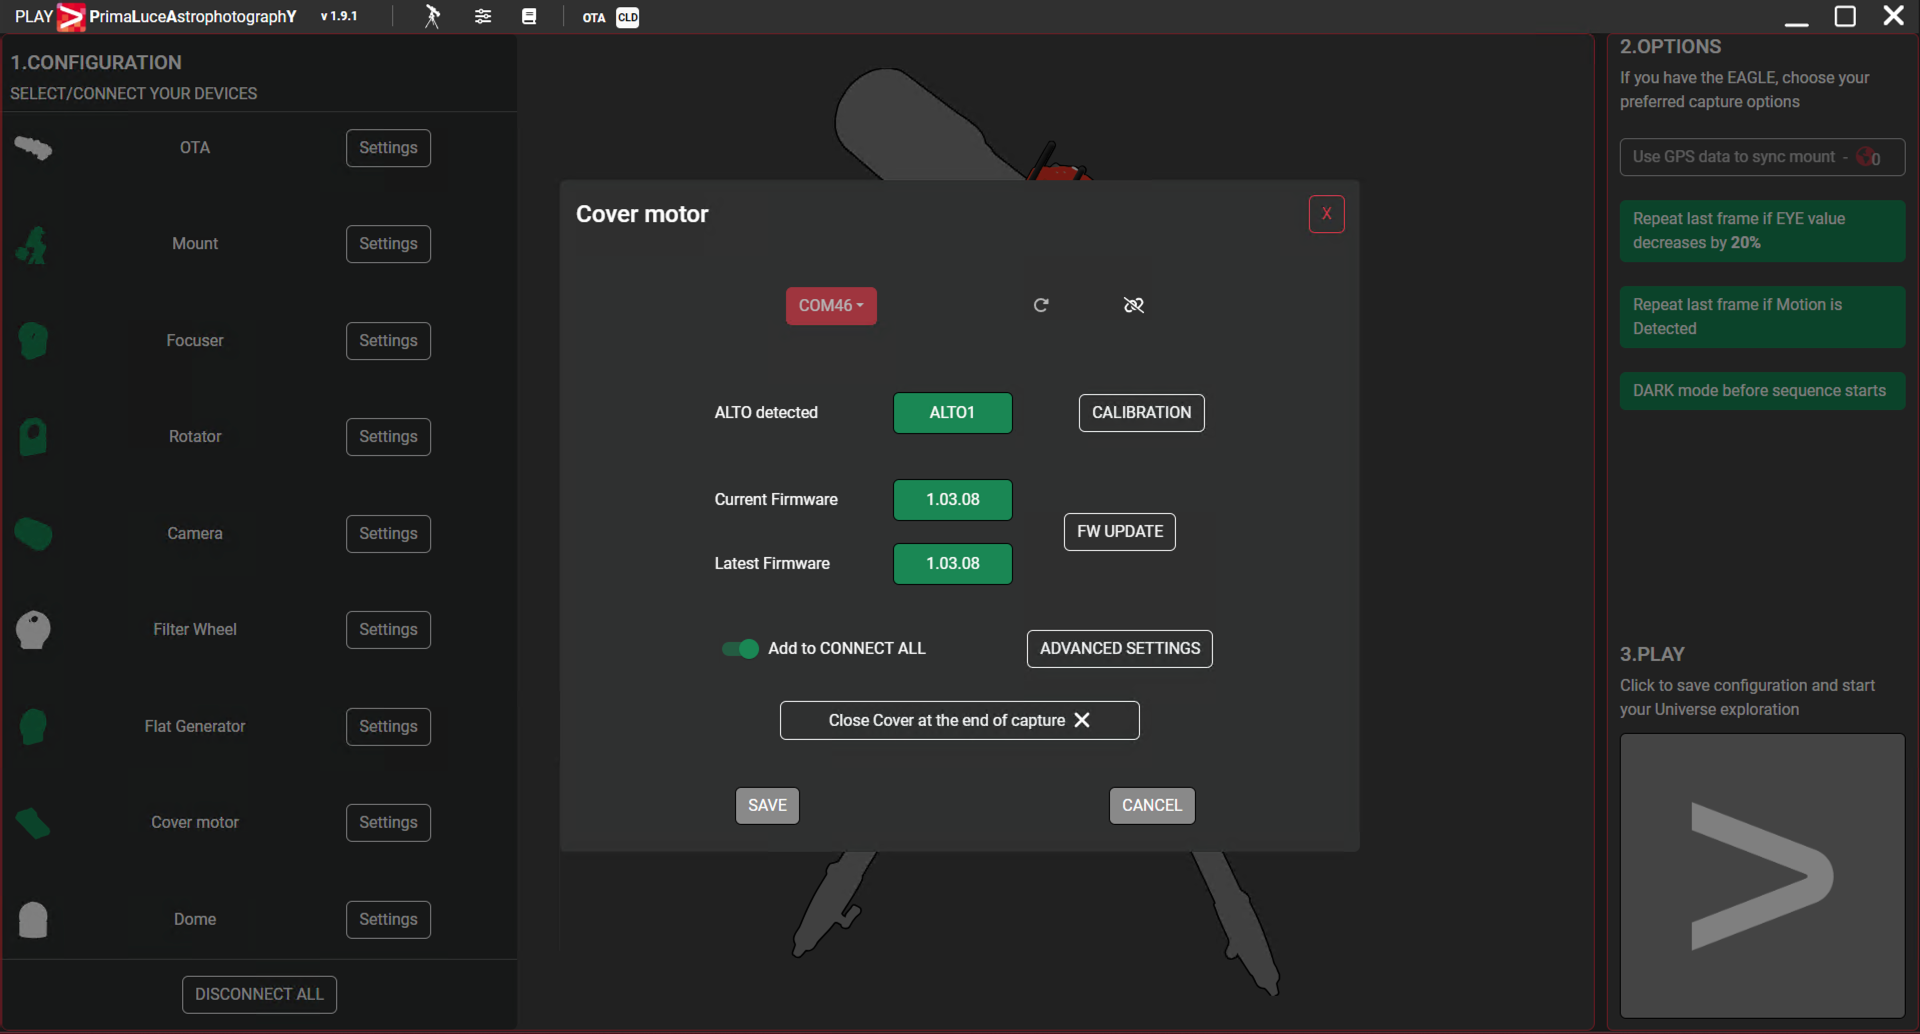
4) If you selected the correct COM port, you will see the buttons becoming green. Here you will see the current firmware version of ALTO and the latest available firmware. If you want to save the COM port setting and quickly connect to ALTO the next time you will launch PLAY, select the “add to CONNECT ALL” switch.
5) Press the CALIBRATION button to begin calibration. This is needed in order to determine the “open” and “closed” position of the ALTO telescope cover motor, depending on how you attached ALTO to your telescope. The calibration process requires you to first move ALTO/GIOTTO to the closed position – in front of your telescope, as if it were be the cap. Then move ALTO into the opposite direction to your preferred fully “open” position. Please follow the onscreen instructions in order to complete the calibration process.

6) Then press SAVE button and press the large PLAY button to the bottom-right part of the screen to access the CAPTURE section and control your ALTO telescope cover motor.
7) In order to move ALTO, select CALIBRATION tab and, in the bottom-left part of the window, you will find a slider that allows you change motor position, as well as buttons for “open” and “close”. In the same area, you can also enable “DARK mode” – allowing you turn off ALTO’s red LED status lights (please note that with DARK mode enabled, you won’t be able to visibly verify ALTO’s status without accessing it via the provided software).
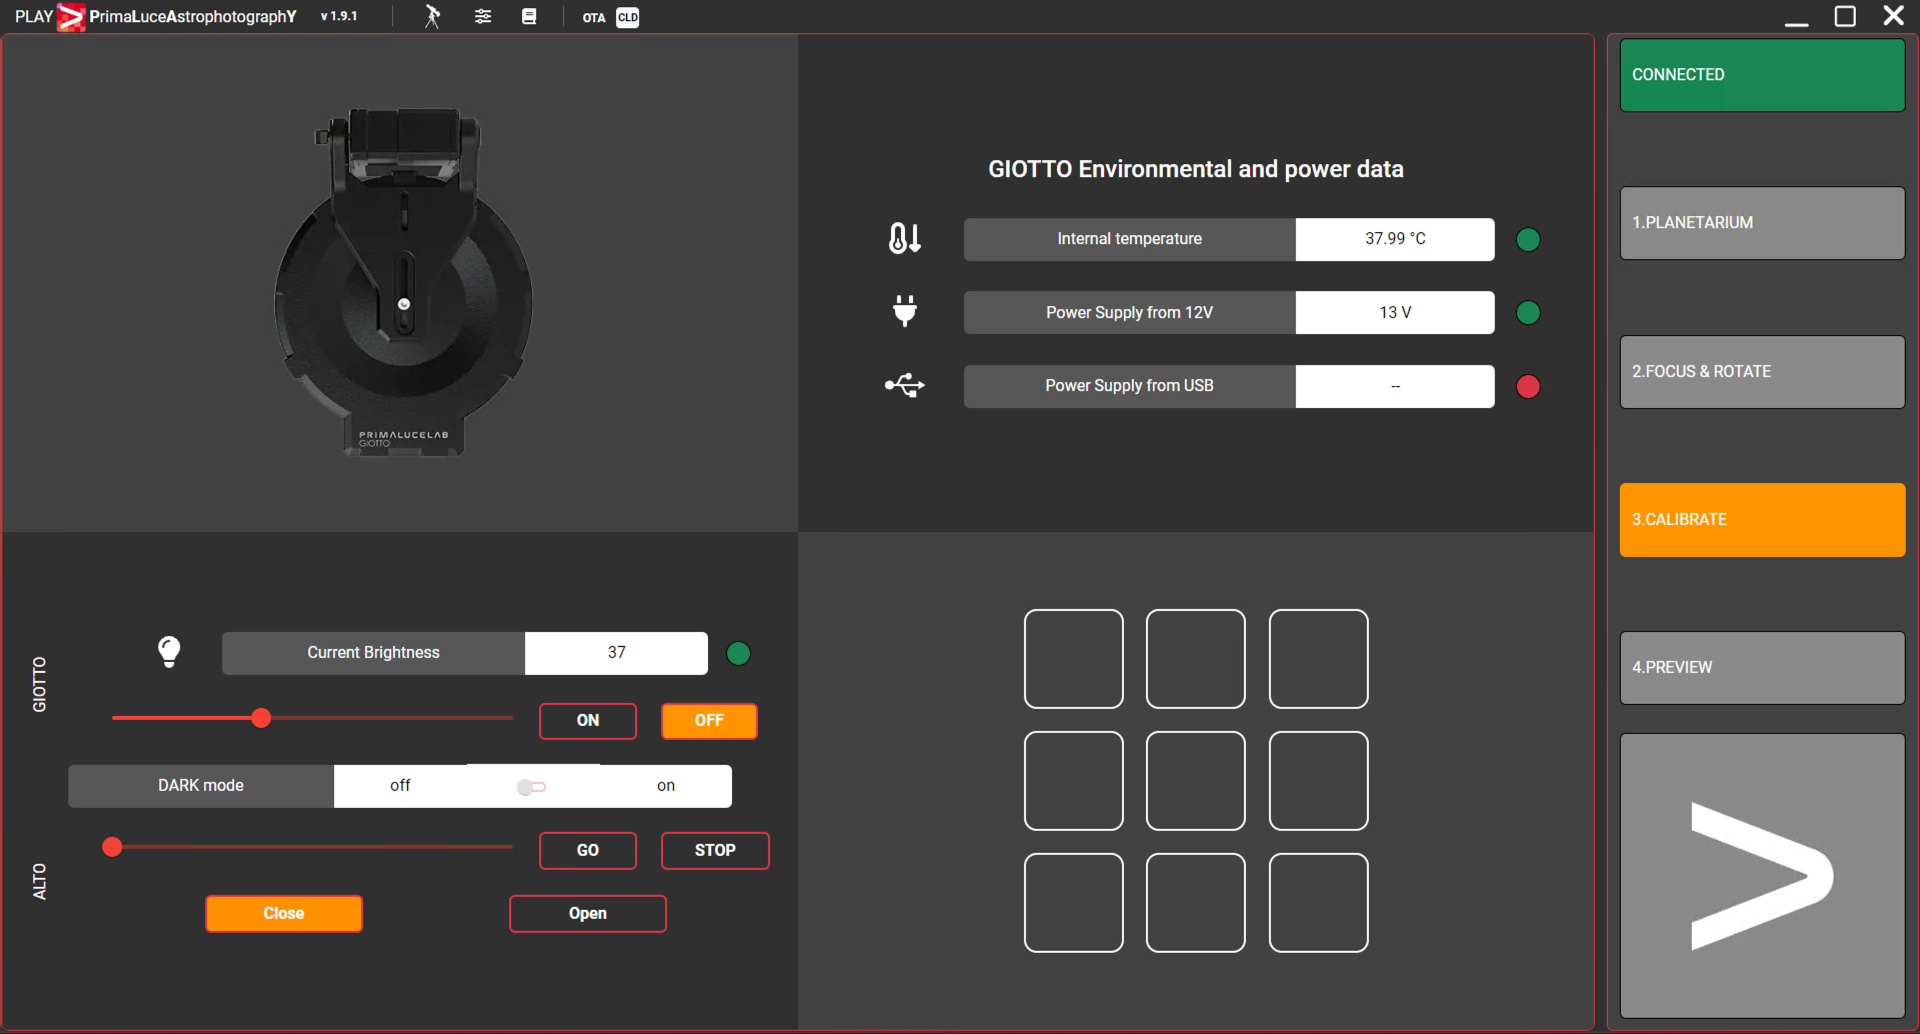
8) The Environmental Data and Virtual HandPad part of PLAY interface within CALIBRATION tab are related to GIOTTO (and not to ALTO) so you can use them only if you also connected GIOTTO to your EAGLE or standard Windows computer.
9) When you connect ALTO to PLAY, you can also open or close your motorized cap by using the “open/close” button found in the upper part of the PLAY window. This can be used to quickly open or close your telescope.