

NINA astronomy imaging suite (Nighttime Imaging ’N’ Astronomy) is an open-source astrophotography program that is both free and very capable. Thanks to its broad ASCOM support, powerful automation features, and highly customizable interface, it has become a favorite among advanced astrophotographers. While the software requires some learning to take full advantage of its possibilities, installation is straightforward, and once set up it can handle a remarkable variety of devices and configurations. All PrimaLuceLab products are supported, making N.I.N.A. one of the most frequently used solutions by expert users. In this guide, written with the collaboration of Ronald Brecher, you will find the main steps for controlling your ARCO rotator with NINA.
- Connect ARCO to ESATTO or SESTO SENSO focusing solutions with the ARCO cable. Then in N.I.N.A., go to the Equipment tab and select Rotator.
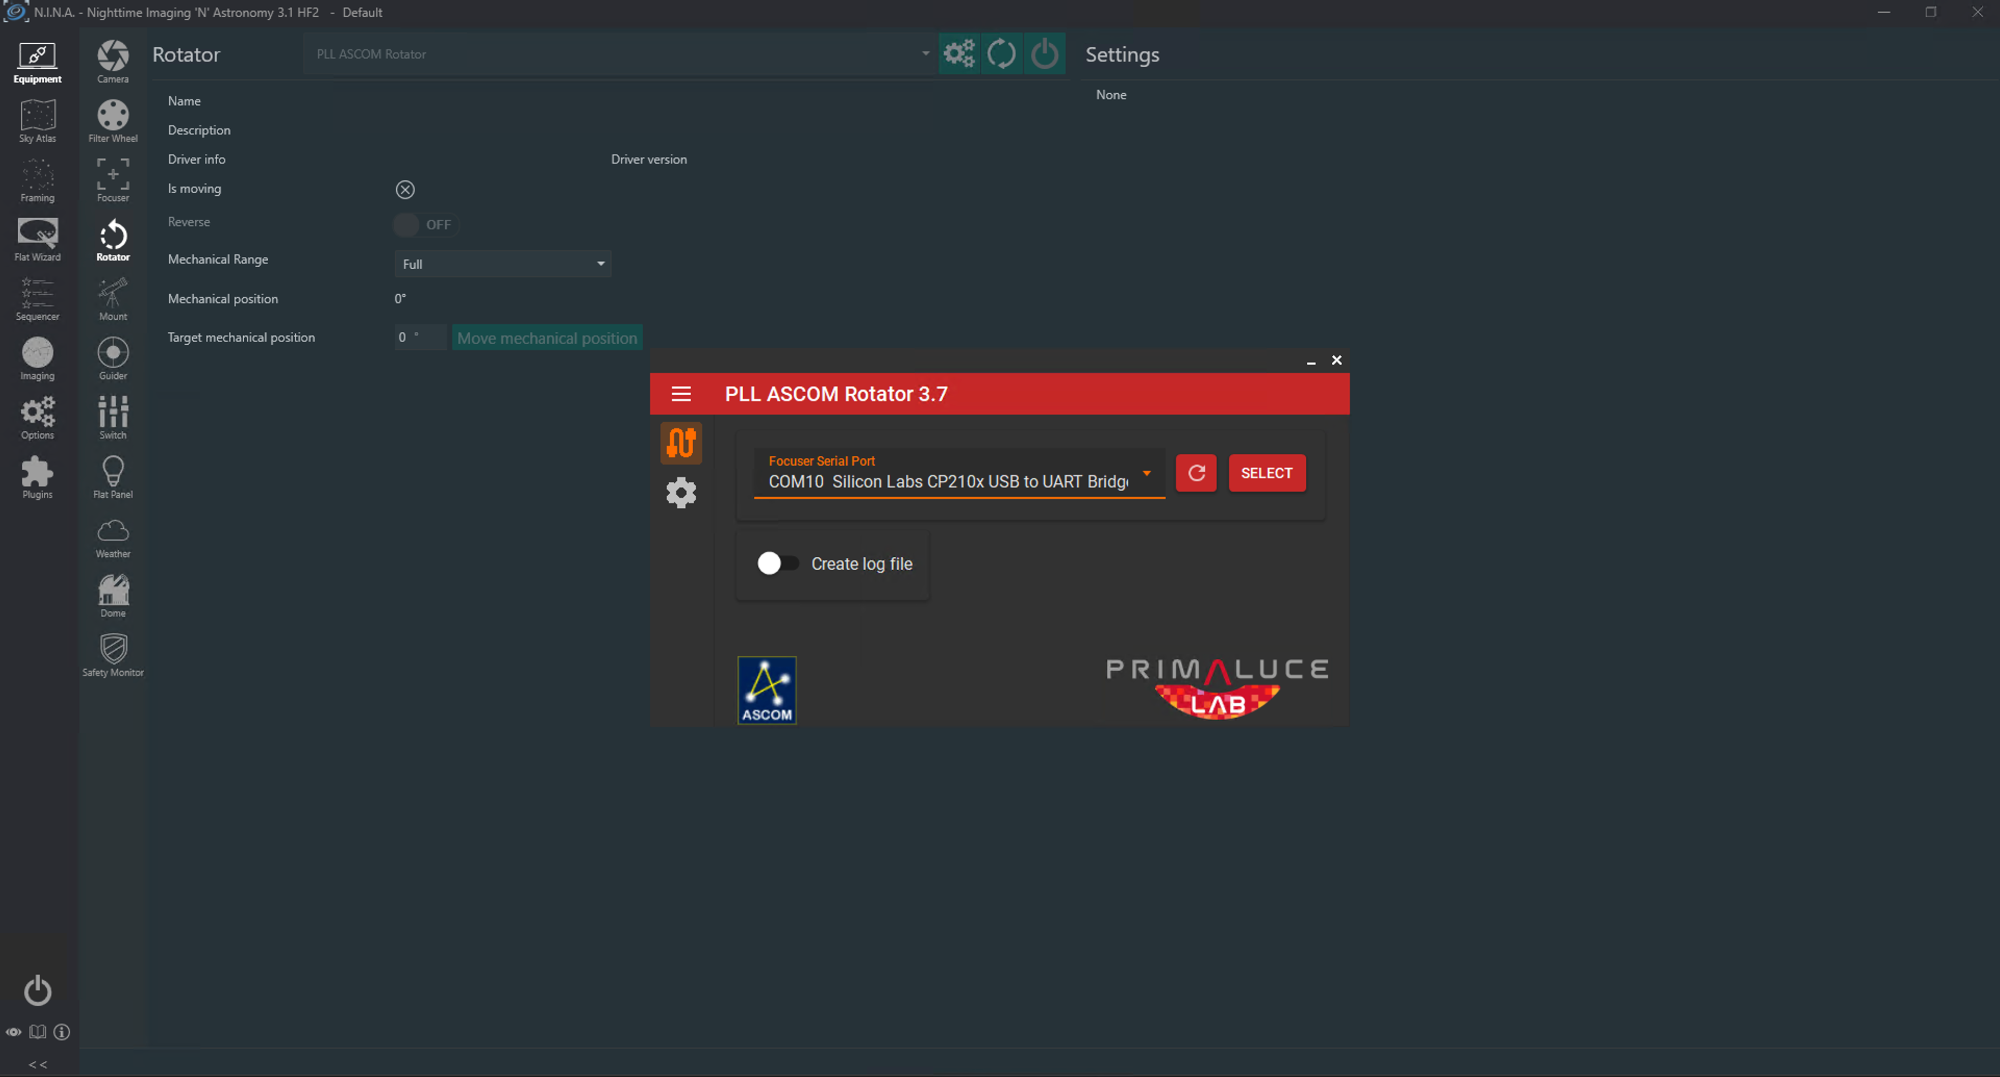
- Choose the ‘PLL ASCOM Rotator’ from the drop-down list.
- Click on the gear icon and the ASCOM settings window will open. If you already have an ESATTO or SENSO SESTO focuser connected to N.I.N.A. and to the ARCO, settings will be greyed out and you don’t need to do anything else. If no Primalucelab focuser is connected, then from the dropdown list set the COM port corresponding to ESATTO or SESTO SENSO and press SELECT. You can access other ARCO settings by clicking on the gear icon in the ASCOM driver window.
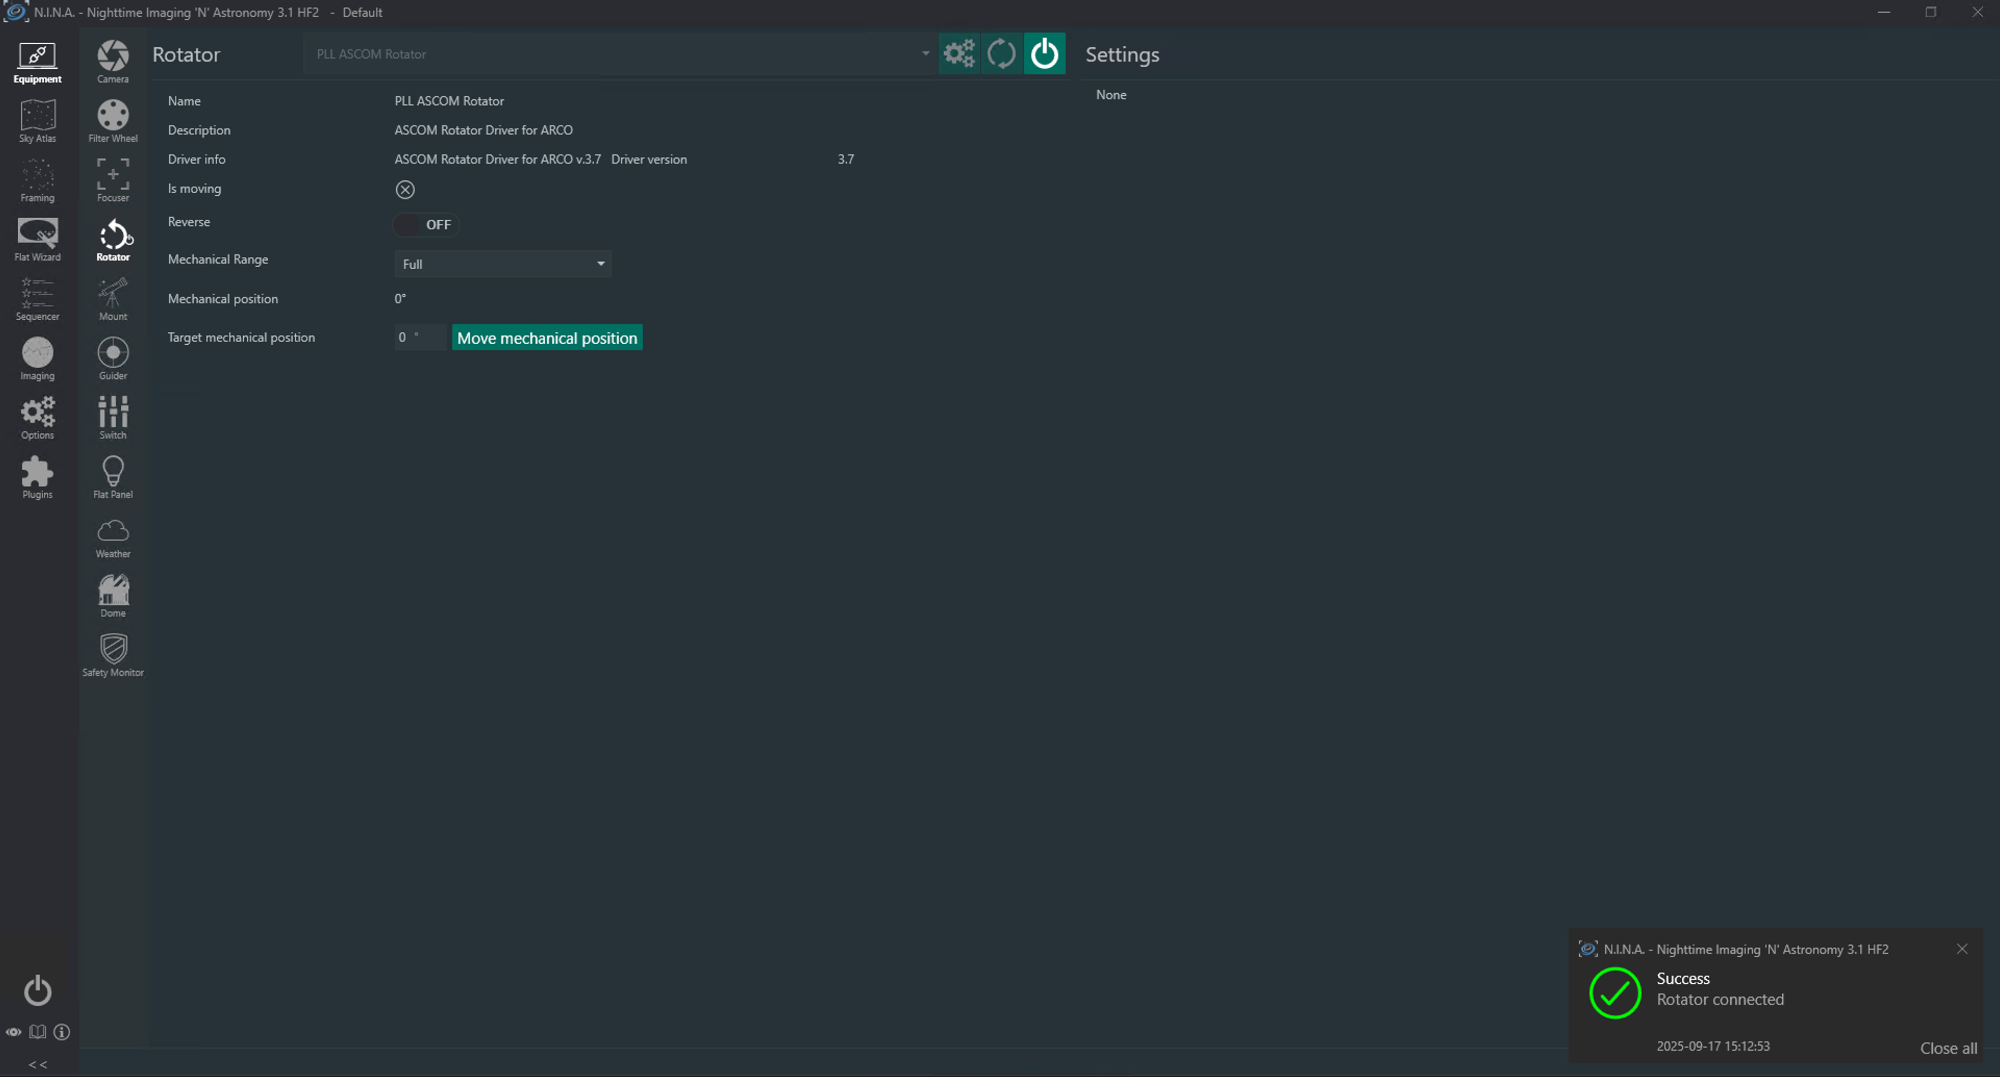
- Click the Connect button for the rotator.
Once N.I.N.A. connects successfully, information about the rotator will be displayed. Next, verify that N.I.N.A. can control the rotator. Use the controls on the Rotator tab to verify visually that the ARCO rotates as expected and prevent cables from becoming twisted.
Troubleshooting Your Connection
You’ll get an error message if ARCO fails to connect to your PC. The most common causes of failure to connect are no power, no USB connection, or wrong COM port selected during setup. Ensure that focuser is connected to power (red power light indicates power). Ensure USB is connecting. With Windows Device Manager open and the PORTS section expanded, confirm that the focuser connection appears and disappears when you plug in and unplug the USB cable. Write down the COM port number for the next step. Ensure you have selected the correct COM port In N.I.N.A. In the Equipment tab, select the Rotator tab. Highlight the PLL ASCOM Rotator driver, and click on the gear icon. Make sure that the COM port matches the COM port that appeared in Device Manager in the preceding step.
If you find the rotator always moves in the wrong direction, change the ‘Reverse’ setting on the Equipment/Rotator tab.
N.I.N.A. Instructions for ARCO
There are two rotator instructions that can be placed anywhere in a sequence.
- Rotate by Mechanical Angle
- Solve and Rotate
The Rotate by Mechanical Angle instruction will move ARCO to the specified position angle (angle of rotation). It does not verify the correct rotation via plate solving. The Solve and Rotate instruction will plate solve the image to determine the current rotation angle, and will then move the rotator to the specified angle. This instruction does not slew the telescope. Ensure that you have good focus prior to using this instruction to avoid plate solve failure.
Table 1 summarize N.I.N.A. rotator instructions. In addition, to these instructions, the rotator is also used in the Telescope instruction ‘Slew, Center, and Rotate.’ In terms of rotator function, this is similar to Solve and Rotate.
Additional Resources
See the N.I.N.A. Plugins tab for many useful plugins that can be used with various equipment. Check regularly for additions and updates.
Detailed documentation for N.I.N.A. is available at https://nighttime-imaging.eu/docs/master/site/
An introduction to N.I.N.A. is available in Sky & Telescope, September 2023, p. 28-33
Table 1: Summary of N.I.N.A. Rotator Instructions
| Rotator instruction | Use it to … | Example of Use |
| Rotate by Mechanical Angle | Move the rotator to a specified rotation angle. | Set desired framing for an image prior to acquiring images. |
Solve and Rotate | Determine current rotation angle and, if necessary, adjust to the desired rotation angle. | Set different rotation angles for multiple targets captured in a single session. |