

PHD Guiding, free software for autoguide
PHD Guiding is a free software among the most used for autoguiding since it’s very easy to use. In this tutorial we will explain how to set up this software using an Atik TITAN camera but the same steps can also be made using other autoguiding cameras.
The autoguide is a technique that involves a guider camera (usually we use cameras equipped with highly sensitive sensors to find more easily the guide stars). Connected to a secondary telescope in parallel to the main one, or to an off-axis guider, the autoguide camera generates the guide star image that is analyzed by a special software (the autoguida software) that automatically sends tracking correction signals to the mount: everything is done to obtain, even with long exposures, perfect images with pinpoint stars.
PHD Guiding can be downloaded for free from the website https://www.stark-labs.com/phdguiding.html. There is also an updated version PHD2 (OpenPHD) (downloadable from https://openphdguiding.org/) which will be discussed in a future tutorial. Download the software, install it on your computer and connect the camera you choose as guider. Now follow these steps to get started easily in autoguiding:
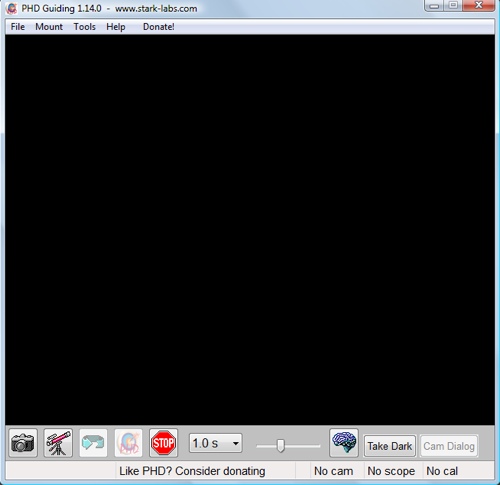
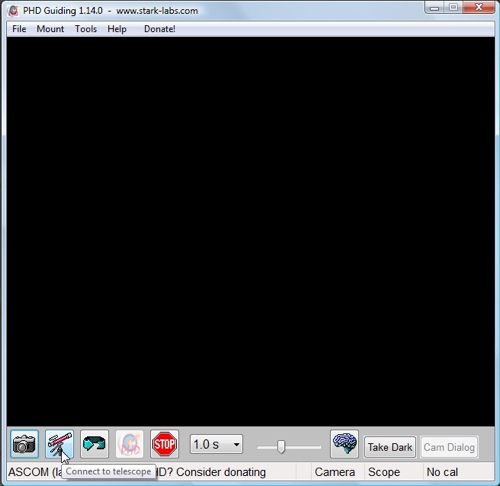
1) Start PHD Guiding, the following window will open.
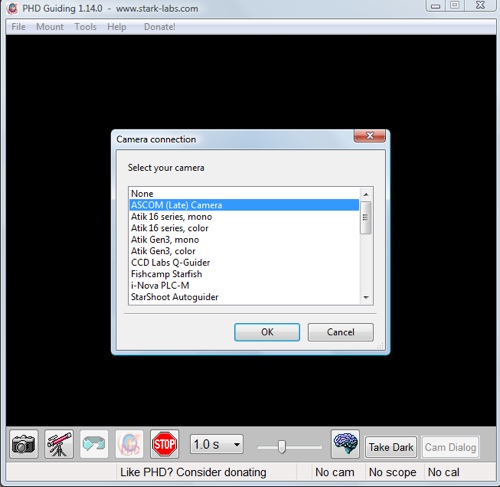
2) Click the first button on the bottom left, it will open the window “Camera connection” with a list of cameras. Select your camera. We used an Atik TITAN which is equipped with ASCOM driver so we selected “ASCOM (Late) Camera”.
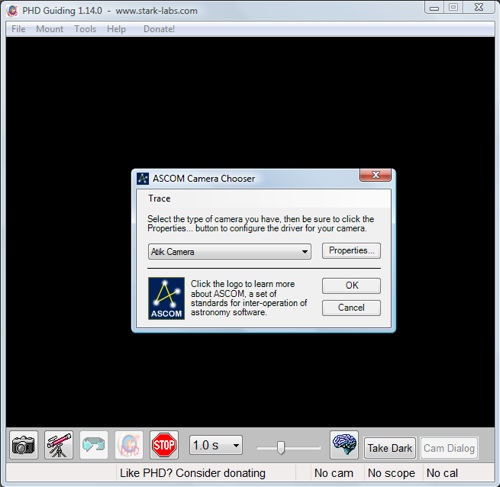
3) This step is only valid if you have selected “ASCOM (Late) Camera”: otherwise go directly to step 5. This opens the “ASCOM Camera Chooser”, select your camera (we have selected Atik Camera) and press the button “Properties”.
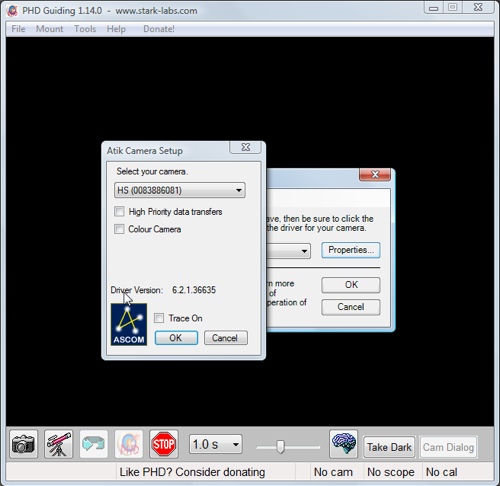
4) This opens the window where you can see some camera options (changes according to the model used). If you want, adjust the options and then click OK twice to close both windows.
5) Now select the menu “Mount” and verify that the transmission protocol of guiding data to the mount is correct. For example, if you use a guider camera with ST4 port that you connect (via the appropriate cable) to the ST4 port of the mount, make sure you selected “On camera”. Then click the second button at the bottom left “Connect to telescope”.
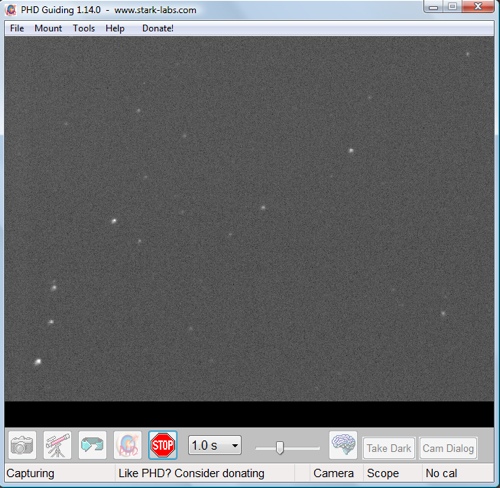
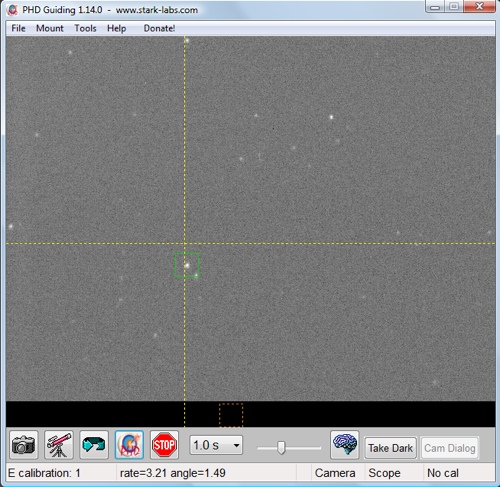
6) Check that you have correctly connected your guide camera into the guide telescope focuser (or off-axis guider). Then press the third button in the lower left (the one with the arrow): PHD Guiding will perform a loop images that will be displayed on the screen. Do not worry if, as in the image below, you notice a lot of background noise: in fact PHD Guiding automatically compresses the image histogram to help better visualize the guide stars and this makes especially the sky background very noisy (but it has no impact on guide accuracy). Probably your image will be out of focus so move the guide telescope focuser until you see the point stars on the screen. If you can not find the guide star you can adjust (increasing it) the shutter speed using the command in the bottom center. Tip: Never use shutter speeds that are too short, usually 1 to 3 seconds are fine.
7) Now, even if the software does not strictly require it, it is advisable to match the X and Y camera axes (columns and rows of the sensor) with the axes of movement of the mount: in practice it is better to see on the screen that, if for example, you slightly move the mount in RA or DEC, the reference star moves horizontally or vertically, but not diagonally. In this way, every time PHD Guiding detects a tracking error, it send a correction to the mount only in one axis and not both (thus reducing the guiding error). Rotate the guide camera until slightly moving the telescope in RA or DEC, you see that the stars are moving perfectly horizontal or vertical.
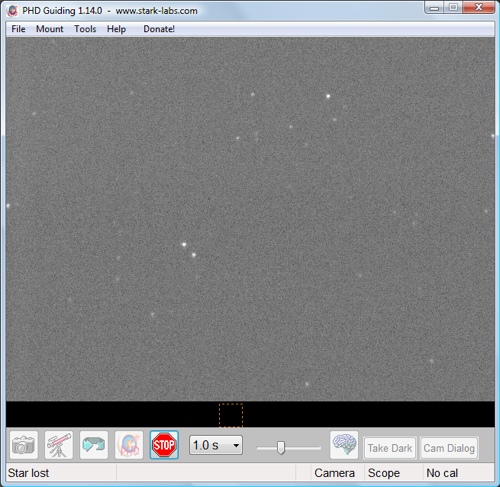
8) Now press the “Stop” button and click with the mouse on a star not too bright on the screen. The star will be highlighted by a square with green border.
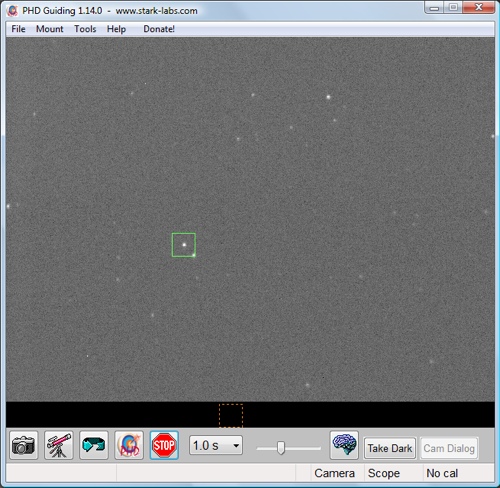
9) Then press the fourth button down on the left (the one with the PHD text): PHD Guiding will automatically start the calibration process that allows the software to “understand” which direction to move the guide star when a shift in the four mount movements (+ AR, AR, DEC +, DEC).
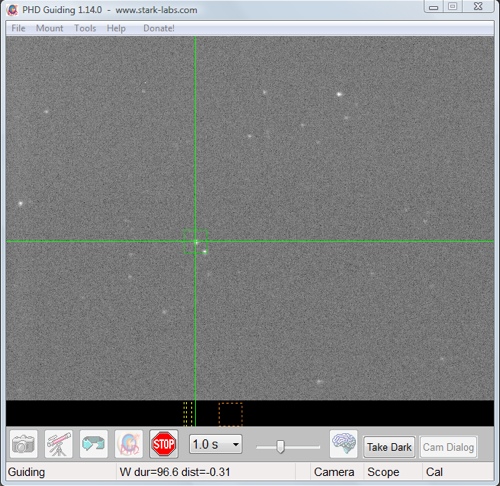
10) After the calibration, PHD Guiding will indicate the starting position of the guide star with two green lines (one horizontal and one vertical) and it will begin automatically guiding.
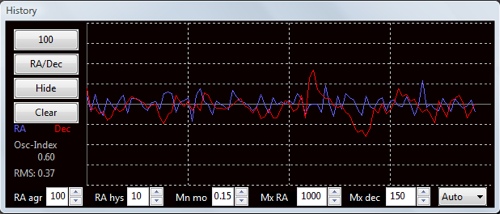
11) To check for guide quality, you can select the “Tools”menu and then “Enable Graph”. This will open a window where you can check the guide precision.
This guide allows you to easily start guiding but PHD Guiding also has many advanced options to adjust and further improve the guide. So if you need it, since you still can’t get perfectly pinpoint stars guiding your mount, I invite you to read the PHD Guiding user manual.